Employees often spend too much time searching for files, chasing approvals, or trying to figure out where the latest company updates are posted. For example, a new employee joining the marketing team may need to email multiple colleagues just to gather policies, project files, and training materials. This fragmented approach wastes time, slows down productivity, and makes onboarding and collaboration unnecessarily complicated.
A SharePoint intelligent intranet solves this by creating a single, centralized hub where you can access documents, updates, calendars, and workflows in one place. It not only streamlines day-to-day tasks but also fosters better communication, faster decision-making, and a more connected workplace. By building a SharePoint intranet, organizations can ensure employees spend less time searching and more time doing meaningful work.
In this blog, we will walk you through the step-by-step process of planning, building, and launching a SharePoint modern intranet, helping you set up an organized and efficient digital workspace for your organization.
What is an Intelligent Intranet in SharePoint?
An intelligent intranet is a modern, dynamic platform built on Microsoft SharePoint that delivers relevant content and insights to employees while connecting teams and departments efficiently. Unlike traditional intranets, it leverages Microsoft 365 integration, Copilot-powered assistance, AI-driven content recommendations, and personalized communications to keep users informed and engaged.
It enables organizations to:
- Enhance project collaboration: Provide centralized access to project files, calendars, and task lists to reduce delays.
- Improve knowledge sharing: Surface expert contacts, best practices, and key resources tailored to each employee.
- Boost employee engagement: Deliver targeted announcements, news, and updates that matter to individual roles.
Features of Modern Intranet in SharePoint
The modern SharePoint intranet is a powerful, integrated, and user-friendly hub right out of the box, no need for coding or third-party tools to unlock its full potential. There are many features and functionalities available, but here are a few key ones.
- Advanced Document Management – Built-in versioning, co-authoring, metadata tagging, and secure sharing create a streamlined and compliant document environment without extra add-ons.
- Highly Customizable Templates & Workflows – Use pre-designed templates to create SharePoint intranet and automate processes with Power Automate, no coding skills required.
- Seamless Microsoft 365 Integration – Native support for Teams, Outlook, Power Platform (Power Automate, Power BI, Power Apps), and Viva Connections enables unified collaboration and content consumption.
- Mobile-Optimized & Responsive Design – The modern SharePoint interface adapts perfectly to phones, tablets, and desktops, so that users stay connected and productive everywhere.
- Smart, User-Centric Experience – Personalized news, targeted content delivery, and intuitive navigation (via hub sites and global navigation) foster engagement and ease of use for all employees.
How to Create a SharePoint Intranet from Scratch?
Required Prerequisites: Microsoft 365 Enterprise plan like E3 or E5.
Building a SharePoint intranet from scratch gives your organization the flexibility to design a centralized hub tailored to its unique needs. SharePoint enables users to create functional, responsive intranet pages swiftly, without the necessity for coding or complex customizations. These sites are optimized for any device, providing engaging experiences for users.
By following the steps below, you can quickly create a modern SharePoint intranet in just a few minutes.
- Plan your SharePoint intranet
- Create a SharePoint site
- Design your intranet
- Add and organize content
- Set permissions to content
- Integrate with Microsoft 365 tools
- Test the built intranet
- Launch SharePoint intranet
1. Plan Your SharePoint Intranet for Maximum Impact
Before jumping into the technical setup, take some time to plan your intranet so it truly meets your team’s needs. Consider the following aspects:
- Audience: Who will be using the intranet? Is it for everyone in the company, or just specific departments?
- Content: What kind of information should be available? Consider news updates, important documents, calendars, and other resources people need every day.
- Permissions: Who should have access to what? Set clear permissions to make sure the right people see the right content.
- Branding: How should it look and feel? Make it match your company’s identity so it feels familiar and welcoming to employees.
Taking the time to plan these elements upfront makes building the intranet smoother and ensures it’s useful for everyone who uses it.
2. Create a SharePoint Site for Your Intranet
The first step in building your intranet is setting up a SharePoint site. Here’s how to get started:
- Go to your SharePoint home page in Microsoft 365.
- Click on “Create site” to start a new site.
- Select a Communication Site type for broadcasting information.
- Now, select a blank template and then click ‘Use template’.
- Enter a site name, add a brief description, and choose the privacy settings.
- Click “Finish” to create your site, it’s ready for you to start customizing and adding content.
Tip: Utilize SharePoint Look Book to jumpstart your intranet design, pick a template that fits your organization’s needs, then customize it. It’s a great way to get inspired and quickly add pre-built, visually engaging layouts to your SharePoint site.
3. Design your Intranet to Boost Team Collaboration
Designing your intranet involves customizing the site’s layout and adding web parts:
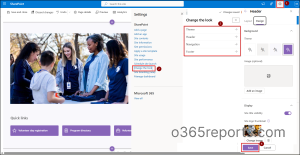
- Home Page: From your SharePoint site, to create an intranet welcoming page, click Settings > Change the look > Site theme / Header / Logo to upload a logo and adjust branding. To add content like news, quick links, or announcements, go to the Home page > Edit and use the + (Add a web part) option.
- Navigation: Set up a clear and intuitive navigation menu for easy access to resources. For a Team site, edit the left-hand navigation from Edit links in the side menu. For a communication site, manage the top navigation from Settings > Change the look > Navigation.
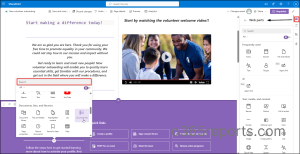
- Web Parts: Add web parts to enhance the functionality of an intranet. Open the page in Edit mode, hover and click the + (Add a web part) button, then choose from available web parts to insert them onto the page.
Tip: You can connect web parts to make your intranet interactive. For example, link a Document Library web part to a File and Media Viewer. When someone clicks a file in the library, its contents open instantly in the viewer, creating a seamless experience.
Key SharePoint Web Parts and Their Purpose
- Agent Links– Provides contextual navigation links to guide users toward relevant resources.
- Bing Maps – Displays a location map directly on your page using Bing Maps.
- Call to Action – Adds a visual button or link that encourages users to take a specific action.
- Code Snippet – Inserts formatted code blocks for sharing scripts or technical references.
- Conversations – Embeds a Microsoft 365 group or Yammer conversation feed for team discussions.
- Countdown Timer – Shows a live countdown to an event or deadline.
- Document Library – Displays files from a document library so users can view and access them.
- Embed – Embeds external content like videos, dashboards, or custom apps.
- Events – Highlights upcoming events, meetings, or milestones.
- Feed for Viva Connections – Brings personalized news and updates from Viva Connections into SharePoint.
- Hero – Showcases up to five visual tiles with links to key pages, campaigns, or resources.
- Highlighted Content – Dynamically pulls and displays content (files, pages, videos) based on filters.
- Image – Adds an image to your page with customizable size and layout.
- Kindle Instant Preview– Embeds a Kindle book preview for quick access to learning or training material.
- List – Displays structured data such as tasks, contacts, or to-do items in customizable views.
- Microsoft Forms – Embeds a form or survey so users can respond directly on the page.
- Microsoft PowerApps – Embeds a custom PowerApps for tailored business solutions.
- News – Publishes announcements and updates to keep teams informed.
- People – Displays team members or key contacts with profile details.
- Quick Links – Provides easy access to frequently used resources or pages.
- Weather – Shows the current weather for a chosen location.
- World Clock– Displays the time in one or more selected cities worldwide.
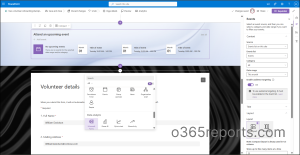
4. Add and Organize Content to Keep Employees Informed
Once your intranet design is ready, the next step is to fill it with content that keeps employees engaged and up to date.
- Upload important documents into document libraries so teams can easily find policies, guidelines, or project files.
- Use the News web part to share company announcements, leadership updates, or team highlights.
- Add event calendars to keep everyone informed about upcoming meetings, holidays, or company activities.
- Include Microsoft forms for tasks like leave requests, surveys, or feedback collection.
Note: The number of co-authoring editing sessions is limited to 100 at a time. The Discard changes command is only available when a single author has made edits in the session; it is not available if multiple users are editing simultaneously, though it can be used if users take turns editing.
5. Set Permissions to Secure Sensitive SharePoint Intranet Content
In a SharePoint intranet, permissions define who can access different areas of the intranet and what actions they can perform. The site owner, designated by the organization, has full control over these permissions and ensures the right balance between security and collaboration.
Site-Level Permissions: Control access to the intranet’s communication or hub sites. For example, the Corporate Communications team may have editing rights on the intranet homepage to post company-wide news, while most employees only have read access.
Library Permissions: Apply restrictions on document libraries that store sensitive content. For instance, the HR library containing employee policies or payroll guidelines may be limited to HR staff, while the “Company Policies” library remains accessible to everyone.
Item-Level Permissions: Narrow access to a specific page or document within the intranet. A leadership meeting agenda stored in a general library can be restricted so only executives can view it, without locking down the whole library.
In a SharePoint intranet, you can manage site permissions from the Settings (gear icon) > Site permissions, adjust library or folder permissions by going to the document library, click Library settings > More library settings > Permissions for this document library, and set item-level permissions by selecting a specific document or list item, clicking the … (More options) > Manage access.
Tip: Intranet admins should use Microsoft 365 groups or SharePoint groups instead of assigning permissions directly to individuals. This ensures smoother user onboarding/offboarding and helps avoid access gaps when employees change roles.
6. Integrate SharePoint Intranet with Microsoft 365 for Seamless Workflow
Key components of a SharePoint intranet include:
- Communication and Team Sites- Support collaboration and information sharing.
- Home and Hub Sites- Provide central navigation and a unified structure.
- SharePoint News- Deliver timely announcements and updates.
- Viva Engage Integration- Foster community engagement and conversations.
- Microsoft Forms- Collect feedback and data from employees.
- Microsoft Stream- Host live or on-demand events and training.
- Microsoft Teams- Embed chat, channels, and virtual meetings in SharePoint.
- Power Automate- Automate document approvals and other workflows.
- Power BI- Display interactive dashboards and reports directly on intranet pages.
Together, these elements create an intranet that not only stores information but actively supports decision-making, learning, operational efficiency, and productivity across the organization.
7. Test Your SharePoint Intranet and Gather Feedback
Before rolling out your intranet to the entire organization, it’s important to test it with a smaller group of users. Usability testing helps ensure the site is intuitive, easy to navigate, and aligned with employee needs.
Gathering feedback from this pilot group allows you to uncover issues early, identify areas for improvement, and refine the overall experience. Making adjustments based on user experience not only prevents confusion after launch but also build
s confidence that the intranet will be a valuable, user-friendly hub for everyone.
Tip: Use the built-in Accessibility Assistant in SharePoint to check your pages for readability, colour contrast, and screen reader compatibility. It helps ensure your intranet is inclusive and accessible for all employees, making content easier to consume and interact with.
8. Launch Your SharePoint Intranet Successfully
After testing and fine-tuning, the next step is to roll out your SharePoint intranet to the whole organization. A smooth launch makes all the difference in driving adoption. Start with quick training sessions so employees know how to navigate the site, access key resources, and share updates. Announce the launch through engaging channels like emails, team meetings, or even a kick-off event to build excitement.
Most importantly, set up ongoing support, whether that’s a help desk, intranet champions in each department, or a simple FAQ section, so users feel confident from day one. A well-planned launch transforms your intranet from just another tool into the go-to workspace where people connect, collaborate, and get work done.
Tip: Use SharePoint content services like audience targeting to deliver the right news, documents, or announcements to the right teams, ensuring employees see content that’s most relevant to their role, region, or department.
Considerations and Best Practices for SharePoint Intranet
- Strengthen content management for better governance: Establish clear guidelines for content creation, publishing, and accessibility to ensure consistency across the intranet. Apply version control, sensitivity labels, retention policies, and scheduled reviews to keep content accurate, compliant, and easy to find.
- Set secure defaults for document sharing: Do configure the default sharing link setting to “People with existing access” so site owners don’t unintentionally create editable links for sensitive intranet documents, reducing the risk of accidental data exposure.
- Design your intranet with global accessibility in mind: Enable multilingual sites or pages for diverse workforces, and apply the right regional settings for accurate formats. Also, use multi-geo capabilities to meet data residency requirements, ensuring your intranet works seamlessly across locations.
- Use hub sites to organize and elevate your SharePoint intranet: Do structure your intranet using hub sites to connect related team and communication sites. This enables unified navigation, consistent branding, and cross-site search, ensuring your intranet stays organized, scalable, and easy to discover.
- Embed your intranet within Microsoft Teams using Viva Connections: Do integrate Viva Connections so users can access your SharePoint intranet directly inside Microsoft Teams, creating a seamless experience that bridges collaboration and content.
Wrapping up
A modern SharePoint intranet is more than just a digital space; it’s the backbone of your workplace experience. Whether for onboarding or cross-team communication, an intranet makes information easy to access, keeps processes efficient, and helps employees stay connected. From everyday collaboration to company-wide updates, it creates a single hub where work feels simpler, more organized, and far less frustrating.
We hope this blog helps you understand how to plan, create, and launch a SharePoint intranet that truly empowers your organization. If you have any questions or concerns, feel free to drop them in the comments, we’re here to help!


