Have you ever been part of a group with a name so confusing that you wondered if it had a purpose at all? Names are powerful, just as your name distinguishes you in a crowded room. In the internet age, where collaboration and connectivity are vital, the way you name your groups in Microsoft 365 holds incredible significance. The naming policy you assign to your Microsoft 365 groups play a pivotal role in shaping their identity and functionality.
This issue becomes even more challenging with self-service group management in Entra ID, allowing users to create and manage security and Microsoft 365 groups. To address these concerns, Microsoft 365 offers a solution – group naming policy in Microsoft Entra ID.
In this blog post, we’ll explore what a group naming policy is and the significance of implementing it in your organization. The blog covers the following,
- What is a group naming policy in Microsoft 365?
- Group naming policy features in Microsoft 365
- How to set up group naming policy in Microsoft Entra ID
- Configure group naming policy using Azure AD PowerShell
- Group naming policy experience across Microsoft 365 apps
What is a Group Naming Policy in Microsoft 365?
The group naming policy is applied when creating or editing group names, specifically for Microsoft 365 groups in services like Outlook, Microsoft Teams, SharePoint, Planner, Viva Engage, etc. It is applied to both group names and group aliases. However, it is important to note that this policy doesn’t impact the naming of distribution groups in Exchange Online. With a group naming policy, you can
- Understand the group’s function, membership, location, or ownership based on organizational needs.
- Categorize groups in the global address list [GAL].
- Block offensive words from being used in group names and aliases.
- Block use of business terms, department names, and client/vendor/competitor names to Microsoft 365 groups.
IMPORTANT: If you have an existing Exchange group naming policy and set up a group naming policy in Microsoft Entra ID, the Microsoft Entra ID policy will be enforced in your organization. It’s crucial to note this interplay between policies.
Prerequisites for Group Naming Policy in Microsoft Entra ID
To configure the group naming policy in Microsoft 365, users, including guests, require Microsoft Entra ID P1 or Microsoft Entra Basic EDU licenses. Admins creating the naming policy must also meet this licensing requirement. Additionally, setting up the group naming policy requires having one of the following roles: Global Administrator, Group Administrator, or Directory Writer.
Group Naming Policy Features in Microsoft 365
In Microsoft Entra ID, you can implement group naming policies through two methods:
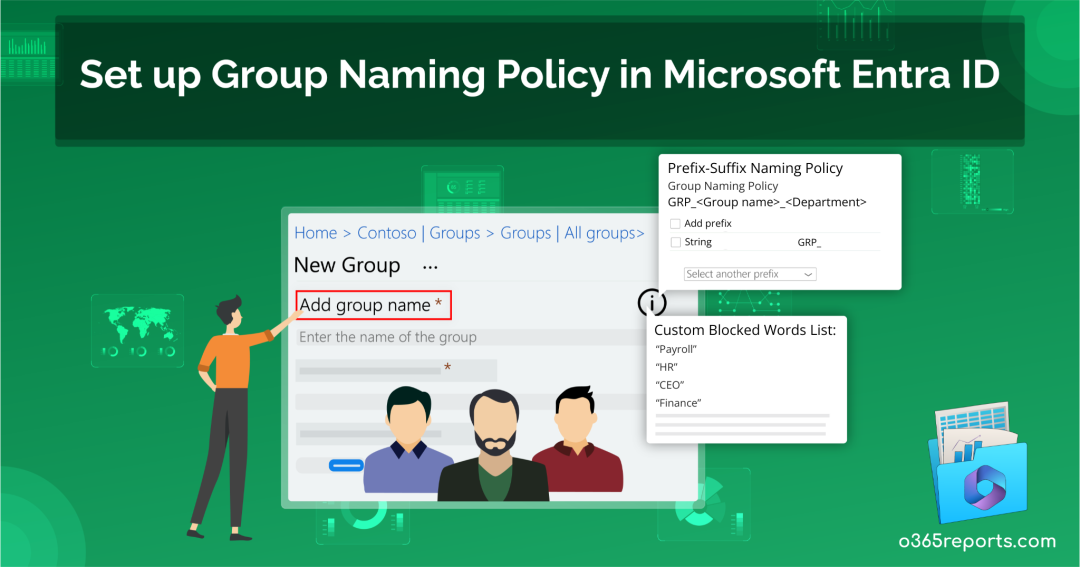
1. Prefix-Suffix Group Naming Policy
Prefixes and suffixes serve diverse purposes in group naming policies. They are automatically added to group names upon creation.
Example: Japan_Group Name_QualityCheck, where “Japan” is the prefix, and “QualityCheck” is the suffix.
NOTE: Multiple instances of prefixes and suffixes can be defined, but only one instance of [GroupName] is allowed. Moreover, the total allowable number of characters for the group name is 63, including all prefixes and suffixes.
Fixed Strings and User Attributes in Prefixes and Suffixes:
Prefixes and suffixes can be fixed strings or user attributes. Fixed strings are enforced directly in the naming convention. Use fixed strings for quick scanning and differentiation of groups in the global address list and left navigation links of group workloads. For instance, employ common prefixes like ‘Grp_Name’ or ‘#Name’.”
User attributes aid in identifying the department, office, or geographical location for which a group is created. For example, if the PrefixSuffixNamingRequirement is set as “GRP”[GroupName] [Department] and the user’s department is Content, then the enforced group name would be “GRP GroupName Content.”
Special Characters in Prefixes and Suffixes:
Prefixes and suffixes can include special characters, supported in both group name and group alias. Unsupported characters in the group alias are still applied in the group name but removed from the alias. This may result in differences between the prefixes/suffixes applied to the group name and the group alias.
2. Custom Blocked Words
When users create groups with sensitive acronyms for quick identification, it poses security risks. In such cases, Microsoft’s custom blocked words feature comes in handy. This blocked word list, a comma-separated compilation of phrases, restricts sensitive terms in group names and aliases. This prevents risky acronyms and minimizes unintentional information disclosure.
When dealing with custom blocked words in Microsoft 365 group naming policy, it’s important to note a few key considerations:
- Substring searches are not performed, allowing users to use common words (e.g., “Class”) even if a similar term (e.g., “lass”) is blocked.
- If the group name exactly matches a custom blocked word, the creation of the group with that specific name will fail.
- Blocked words are not case-sensitive.
- Users receive an error if they attempt to enter a blocked word as part of the group name.
- Blocked words do not have any character restrictions.
- The blocked words list has an upper limit of 5000 phrases.
NOTE: Certain admin roles, like Global Administrators and User Administrators, are exempted from the group naming policy across all workloads and endpoints. This allows them to create groups with their preferred names, even if they include blocked words.
How to Set Up Group Naming Policy in Microsoft Entra ID?
The group naming policy in Azure AD provides enhanced control over the types of groups created within organizations. Now, let’s see how to configure the group naming policy in Microsoft Entra ID.
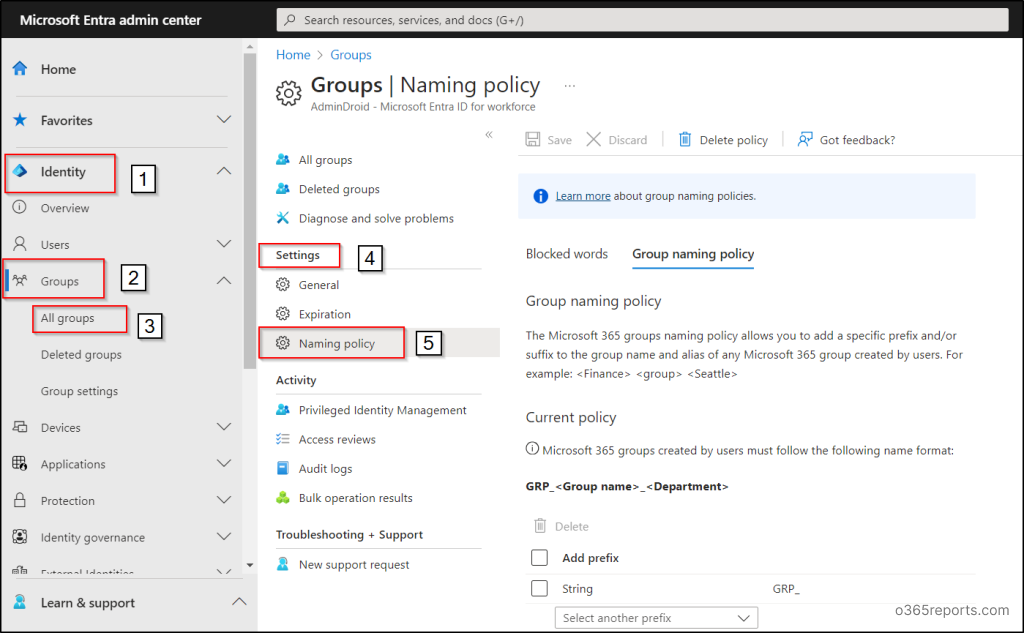
- Sign in to the Microsoft 365 Entra admin center (formerly known as Azure Active Directory) with a minimum of Groups administrator privileges.
- Navigate to the “Microsoft Entra ID” (formerly known as Identity) section.
- Locate “Groups” and choose “All Groups”. Under “Settings,” click on the “Naming policy.”
Add Prefix-Suffix Naming Policy:
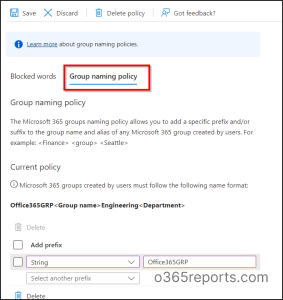
- Navigate to the Group naming policy tab in the ‘Naming policy page’.
- Add or view prefixes and suffixes for your group names using fixed strings or user attributes.
- To remove a prefix or suffix, select the item, and choose “Delete.” You can delete multiple items simultaneously.
- Save your group naming policy in Microsoft Entra ID by clicking the “Save” button.
Download Custom Blocked Words:
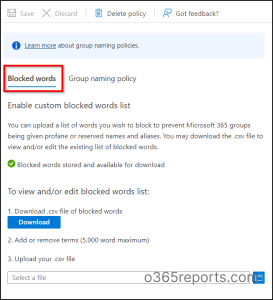
- Navigate to the Naming Policy page and go to the Blocked Words tab.
- Review the existing list of custom blocked words by selecting “Download.” You can also add new entries to the list but be mindful of the 5000-word limit. The case-insensitive nature of custom blocked words may fill up space rapidly.
- Upload the updated list of custom blocked words by selecting the file icon, and then click “Save” to apply your changes.
NOTE: To delete a created group naming policy, use the ‘Delete policy’ option in the ‘Naming policy page.’ Confirming the deletion removes the policy, along with any prefix-suffix settings and custom blocked words.”
Configure Group Naming Policy Using Azure AD PowerShell
Although the user interface (UI) method simplifies processes, PowerShell proves invaluable for repetitive tasks. Let’s explore how to configure group naming policies using PowerShell.
- Install AzureADPreview PowerShell module
- View the current settings of naming policy
- Set the group naming policy and assign the custom blocked words
- Export or import custom blocked words
- Remove the group naming policy
1. Install AzureADPreview PowerShell Module
To configure Microsoft 365 group naming policies, we use the AzureADPreview module. Please note that this module is in preview and may not be fully supported.
- Launch the Windows PowerShell application with administrator privileges.
- Before proceeding, ensure to uninstall any previous versions of AzureADPreview or Azure AD. You can use the following cmdlets for uninstallation:
123Uninstall-Module AzureADPreview(Or)Uninstall-Module AzureAD - Now, install the latest version of AzureADPreview by executing the following cmdlet. You may receive a prompt about accessing an untrusted repository. Respond with ‘Y.’ The installation process may take a few minutes.
1Install-Module AzureADPreview - Next, you’ll need to perform the following actions to import the module and establish a connection to Azure AD using the provided cmdlets:
12Import-Module AzureADPreviewConnect-AzureAD
Once you execute the cmdlets, you will encounter a “Sign-in to your account” screen. Here, you should input your credentials and proceed with the login process.

2. View the Current Settings of Group Naming Policy
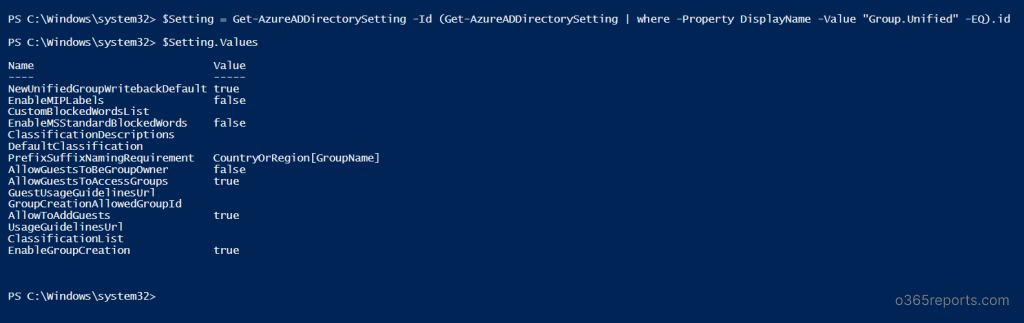
- Execute the provided cmdlet to retrieve the current group naming policy settings in your organization.
12$Setting = Get-AzureADDirectorySetting -Id (Get-AzureADDirectorySetting | where -Property DisplayName -Value "Group.Unified" -EQ).id$Setting.Values
3. Set the Group Naming Policy and Assign the Custom Blocked Words
- Now that all the necessary preparations have been made, set up a group naming policy in Microsoft 365 using the provided cmdlet. Include group name prefixes and suffixes, ensuring [GroupName] is part of the setting for proper functionality.
1$Setting["PrefixSuffixNamingRequirement"] =“GRP_[GroupName]_[Department]" - Use the provided cmdlet to configure custom blocked words for restriction. The provided example demonstrates how you can add your preferred custom words. $Setting[“CustomBlockedWordsList”]=“Payroll,CEO,HR”
1$Setting["CustomBlockedWordsList"]="Payroll,CEO,HR" - Save the updated group naming policy to take effect by executing the “Set-AzureADDirectorySetting” PowerShell cmdlet.
1Set-AzureADDirectorySetting -Id (Get-AzureADDirectorySetting | where -Property DisplayName -Value "Group.Unified" -EQ).id -DirectorySetting $Setting
4. Export or Import Custom Blocked Words in Microsoft 365 Group Naming Policy
- To export a list of blocked words, utilize the following PowerShell script:
12$Words = (Get-AzureADDirectorySetting).Values | Where-Object -Property Name -Value CustomBlockedWordsList -EQAdd-Content "c:\work\currentblockedwordslist.txt" -Value $words.value.Split(",").Replace("`"","")- In this example, we’ve exported a list of blocked words to the “customblockedwords.txt” file. Ensure to mention the file of your convenience in the script before running it.
- Utilize this PowerShell script to import a variety of blocked words.
12345678910$BlockedWords = Get-Content "C:\work\currentblockedwordslist.txt"$BlockedWords = [string]::join(",", $BlockedWords)$Settings = Get-AzureADDirectorySetting | Where-Object {$_.DisplayName -eq "Group.Unified"}if ($Settings.Count -eq 0){$Template = Get-AzureADDirectorySettingTemplate | Where-Object {$_.DisplayName -eq "Group.Unified"}$Settings = $Template.CreateDirectorySetting()New-AzureADDirectorySetting -DirectorySetting $Settings$Settings = Get-AzureADDirectorySetting | Where-Object {$_.DisplayName -eq "Group.Unified"}}$Settings["CustomBlockedWordsList"] = $BlockedWordsSet-AzureADDirectorySetting -Id $Settings.Id -DirectorySetting $Settings
5. Remove the Group Naming Policy using Azure AD PowerShell
Remove the group naming policy in Microsoft 365 through Azure AD PowerShell with the following steps.
- Clear group name prefixes and suffixes.
1$Setting["PrefixSuffixNamingRequirement"] ="" - Empty the list of custom blocked words.
1$Setting["CustomBlockedWordsList"]="" - Save the updated group naming policy settings.
1Set-AzureADDirectorySetting -Id (Get-AzureADDirectorySetting | where -Property DisplayName -Value "Group.Unified" -EQ).id -DirectorySetting $Setting
Group Naming Policy Experience Across Microsoft 365 Apps
| Microsoft 365 Apps | Compliance |
|
For these workloads, the group naming policy takes effect when users input the group name during group creation or editing.
If a user enters a custom blocked word, an error message will be displayed, indicating the blocked word and prompting the user to remove it.
|
|
The respective workloads are compliant with the group naming policy.
Users receive relevant error messages with suggested prefixes/suffixes and for custom blocked words in instances where the naming convention in group names and aliases is not followed. |
|
The corresponding platforms are compliant with the group naming policy.
|
|
The associated platforms are compliant with the group naming policy.
The workload currently doesn’t show a preview of the enforced naming policy name and does not display custom blocked word errors when users enter a group name. Despite this, the naming policy is automatically applied during group creation or editing, and users receive error messages if custom blocked words are present in the group name or alias.
|
|
While SDS is compliant with the group naming policy, it doesn’t apply automatically.
SDS admins must manually add prefixes and suffixes to class names before uploading them to SDS to ensure successful group creation or editing; otherwise, the process will fail.
|
|
The classroom app complies with the naming policy, but it doesn’t apply automatically. Users entering a classroom group name won’t see the naming policy preview.
Users need to manually enter the enforced classroom group name with prefixes and suffixes for successful group creation or editing; otherwise, errors will occur.
|
|
When a user signs in to Yammer (Viva Engage) with their MS Entra account, group creation or name editing ensures compliance with the naming policy, applicable to both Microsoft 365 connected groups and other Yammer groups.
For Microsoft 365 connected groups created before the naming policy implementation, automatic adaptation doesn’t occur. Editing prompts users to manually add the required prefix and suffix.
|
|
The StaffHub team doesn’t adhere to the group naming policy, while the underlying Microsoft 365 group does.
StaffHub team names lack prefixes, suffixes, and custom blocked word checks. However, StaffHub does apply the necessary prefixes and suffixes and removes blocked words from the underlying Microsoft 365 group.
|
Ensuring seamless Microsoft 365 group management goes beyond just establishing naming conventions. While we’ve explored methods for naming conventions, monitoring these groups using PowerShell poses a challenge due to the considerable time investment it demands. That’s where AdminDroid Microsoft 365 Reporter steps in —a time-saving solution that neatly organizes groups, provides insightful reports, and makes group management a breeze.
Streamline Your Microsoft 365 Groups Monitoring with AdminDroid’s Free Reports!
AdminDroid’s Azure AD reporting tool provides a detailed view of all group activities within your organization. Particularly, the Microsoft 365 group reports offered by the tool encompasses a wide array of data, including group members, nested groups, security groups, distribution groups, mail-enabled groups, cloud groups, synced groups, etc., for free! By providing a holistic visualization of your organizational group dynamics, AdminDroid facilitates effective monitoring of Microsoft 365 group usage and enhances overall group management.
In addition, AdminDroid’s Free Azure AD auditing tool simplifies the audit of group metrics such as group owner changes, hidden memberships, usage trends, group operations, etc., with ease. Plus, with its 120+ Free Azure AD reports, AdminDroid facilitates efficient Azure AD management.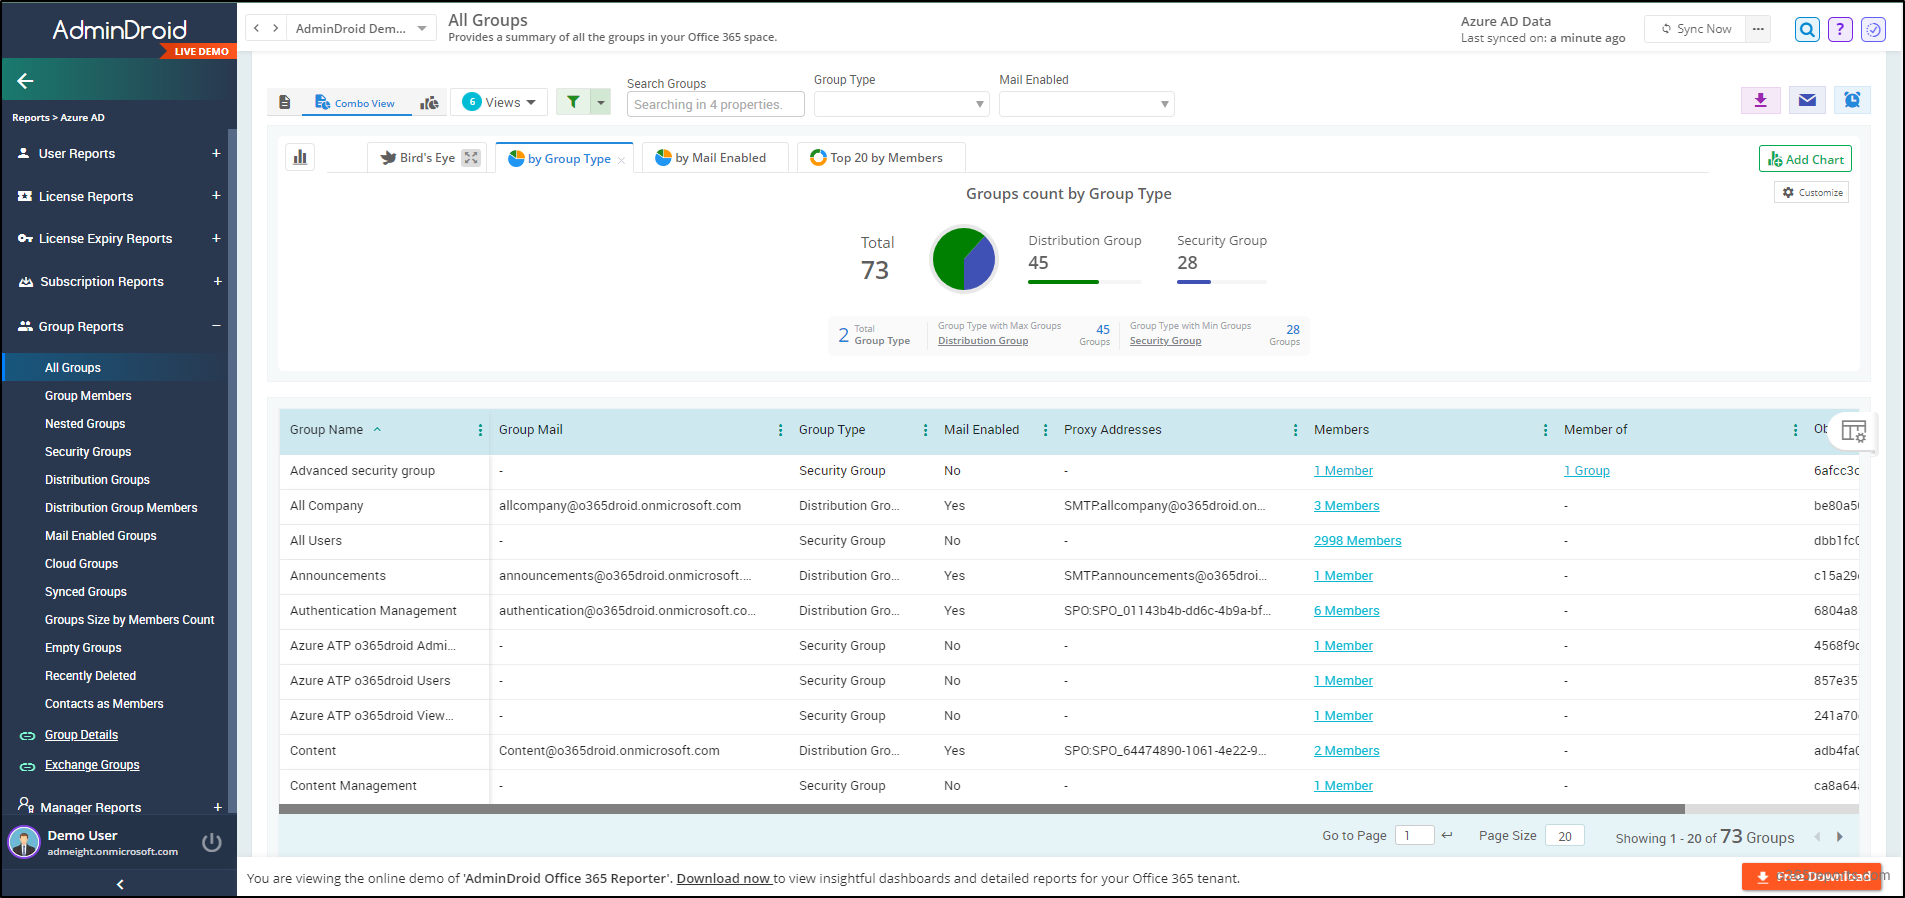
AdminDroid is an essential all-in-one solution for Microsoft 365 reporting and auditing. With 1800+ dedicated reports and 30+ smart dashboards, it covers key services like Exchange Online, SharePoint Online, OneDrive, MS Teams, Viva Engage, Power BI, and Stream. Plus, savor AdminDroid’s features: real-time alerting, advanced scheduling, granular access delegation, and fine-tuning filters for seamless Microsoft 365 administration.
Don’t miss out! Hit the download button now and seize a 15-day free trial. Witness firsthand how AdminDroid can transform and simplify your Microsoft 365 management.
In summary, establishing a group naming policy in Microsoft Entra ID is essential for efficient Microsoft 365 group management. This blog details how to set up a group naming policy in Microsoft Entra ID, aiding admins in aligning group names with organizational standards. Additionally, if you want to set the group naming policy automatically, you can use the “automate” capability of Microsoft365DSC, which saves you time and effort.
Furthermore, implementing a group naming policy and group expiration policy is crucial for maintaining order within Microsoft 365. Also, keep a vigilant eye on your groups by utilizing the prebuilt PowerShell script to export Microsoft 365 group report. Feel free to reach out in the comments section for any further questions or clarifications.