Enhancing the capability of Microsoft 365 services, add-ins stand as a cornerstone in increasing the functionality and user experience. However, in certain scenarios, it becomes necessary to disable Office add-ins in Microsoft 365 for security concerns and privacy. In this blog, we’ll explore the world of Microsoft 365 add-ins, focusing specifically on restricting users from using them in their environment.
Let’s delve into why and how you might want to block these user-owned add-ins to maintain control and security in your Microsoft 365 environment.
What Are Add-ins in Microsoft 365?
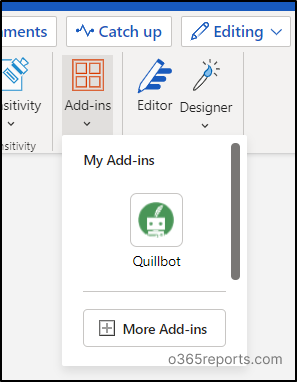
Add-ins are integrated apps and services in Microsoft 365 that can boost personal productivity, but here’s the catch: they aren’t curated or managed by Microsoft.
For example, Grammarly is a popular add-in in Microsoft 365, which provides advanced grammar error checking within your Word documents.
Reasons to Disable Office Add-ins in Microsoft 365?
The primary focus of this blog is to walk you through the process to disable Office add-ins. You might be wondering, “Why do add-ins need to be disabled even they enhance the functionality of M365?” Well, here are the key reasons why we need to block add-ins.
Data privacy concerns: Allowing add-ins from untrusted sources can pose security risks, potentially harming your devices and compromising user data.
Performance-related issues: When numerous add-ins run concurrently, it can cause Microsoft 365 applications to slow down, resulting in decreased productivity.
Improved user experience: Disabling user-owned add-ins can help maintain a cleaner and organized workspace, resulting in an enhanced user experience without additional apps.
How to Manage Add-ins in Microsoft 365?
Admins can manage and restrict access to the apps and services (add-ins) based on the below configuration methods concerning their needs.
- Restrict users from installing Office add-ins
- Disable Outlook add-ins for all users
- Remove deployed add-ins from Office 365
- Enable Office 365 add-ins for specific users/groups
- Deploy specific add-ins to all users
1. Restrict Users from Installing Office Add-ins
Microsoft 365 admins can prevent add-in downloads in their organizations by turning off the Office Store across access to all users. To restrict Office Store access, follow the steps described below:
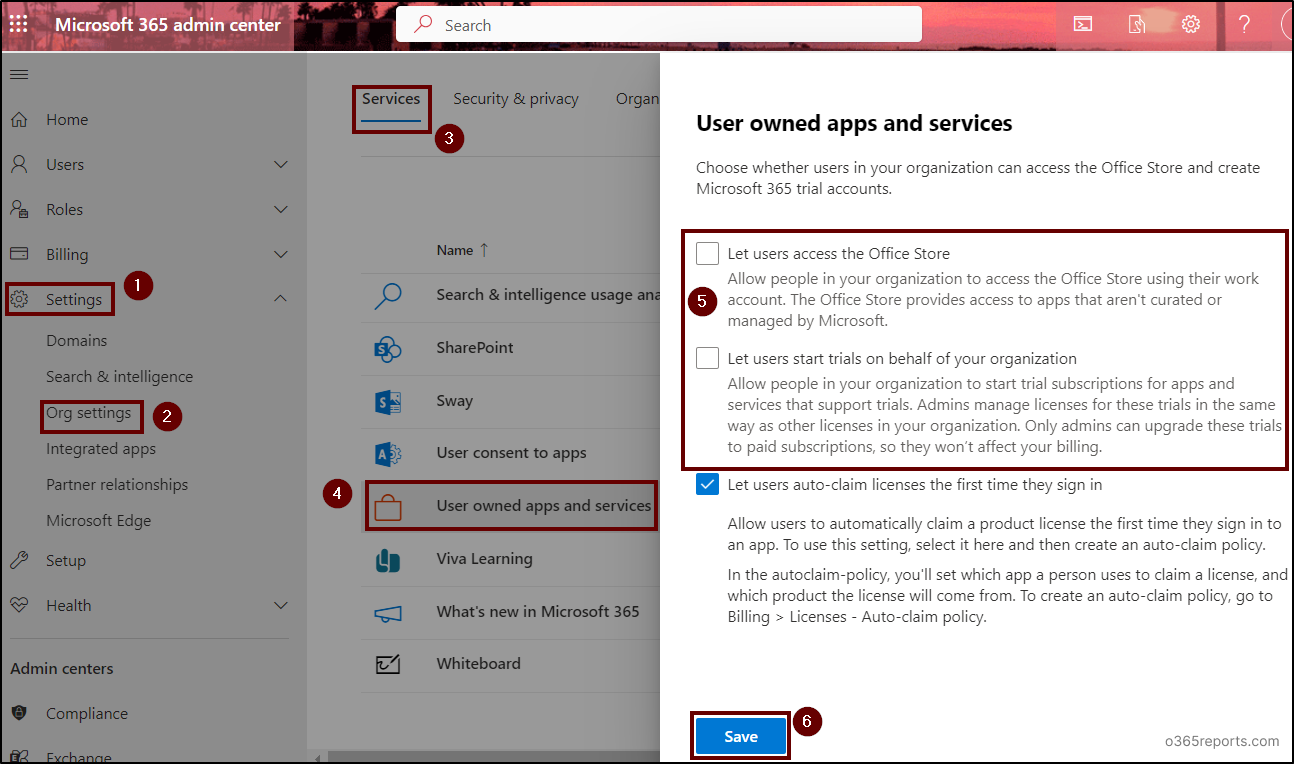
- Navigate to the ‘Settings’ tab in the Microsoft 365 admin center.
- Then select the ‘Org settings’ option.
- Select the ‘User owned apps and services’ option from the ‘Services’ tab.
- Uncheck the options ‘Let users access the Office Store’ and ‘Let users start trials on behalf of your organization’, then click on the ‘Save’ button.
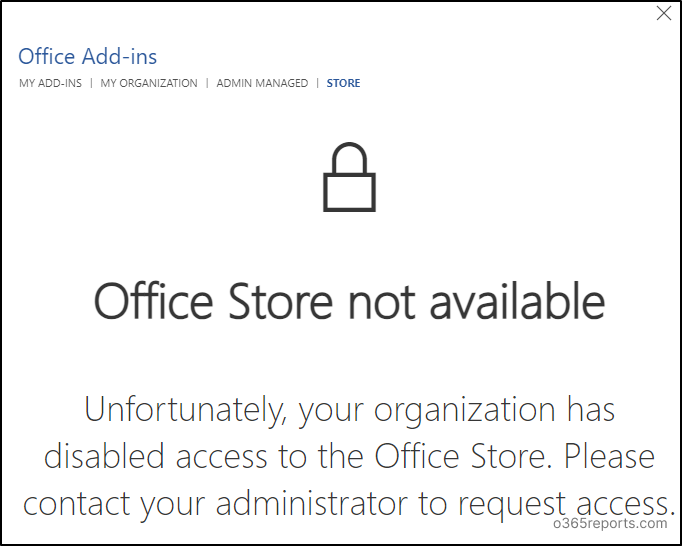
After configuring this your tenant users can’t access the Office 365 store, this blocks them from installing any add-ins in their Microsoft 365 account. Additionally, users will see the following error message if they try to install add-ins through the Office Store.
“Office Store not available – Unfortunately, your organization has disabled access to the Office Store. Please contact your administrator to request access.”
Important points to remember:
- Even though it restricts users from accessing the Office Store, users may still access and install add-ins or apps in their Outlook. Disabling add-ins in Outlook requires a different approach, we have covered it below.
- This configuration only blocks access to the Office Store, so users can access the add-ins that are already installed or deployed in their accounts. To disable Office add-ins that are previously installed in your user accounts, you can follow the instructions given in the next parts.
2. Disable Outlook Add-ins for All Users
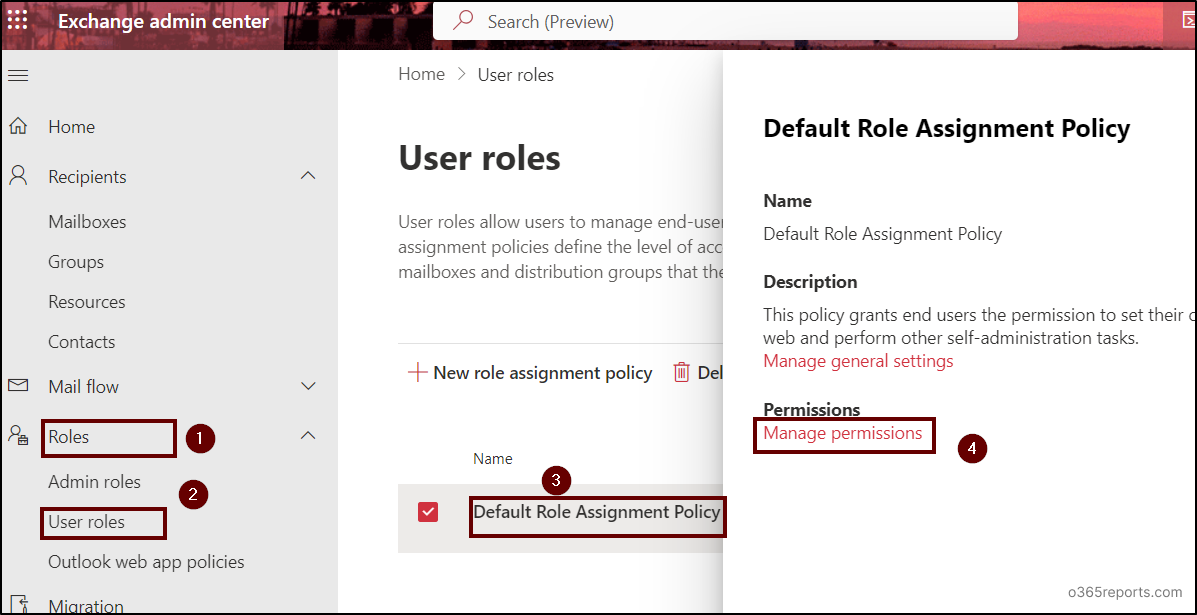
To block the usage of Outlook add-ins for all Microsoft 365 users, follow the steps below in the Exchange admin center.
- Navigate to the ‘Roles’ tab and select the ‘User roles’ page.
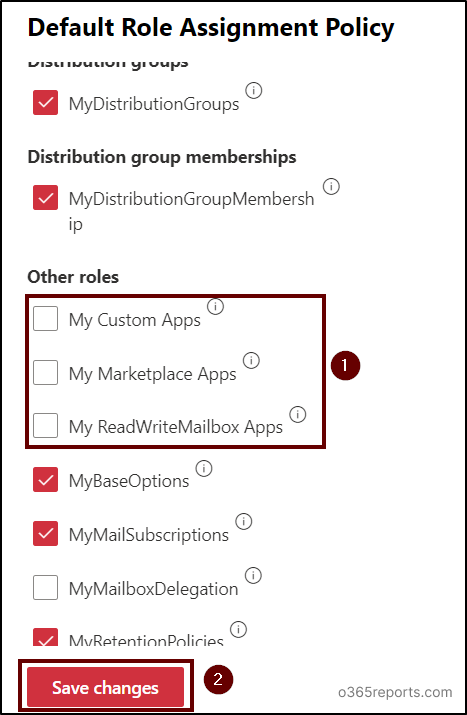
- Select the ‘Default Role Assignment Policy’ and click on the ‘Manage permissions’ option.
- Uncheck the options “My Custom Apps, My Marketplace Apps, My ReadWriteMailbox Apps” and select ‘Save changes’.
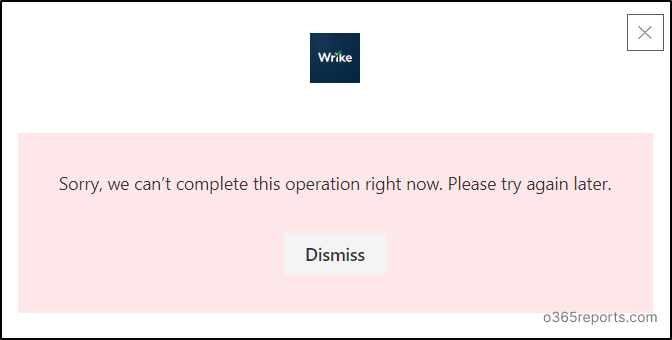
After implementing these modifications in the Exchange admin center, users will no longer be able to install new add-ins in their Outlook, and they will encounter one of the following errors.
- Sorry, we can’t complete this operation right now. Please try again later.
- Access is denied. Please contact your administrator.
3. Remove Deployed Add-ins from Office 365
As discussed above, removing access to the Office store or Outlook add-ins doesn’t remove the add-ins that are already deployed. To remove user-owned apps and services (delete add-ins) from the Microsoft 365 apps, go through the steps described below.
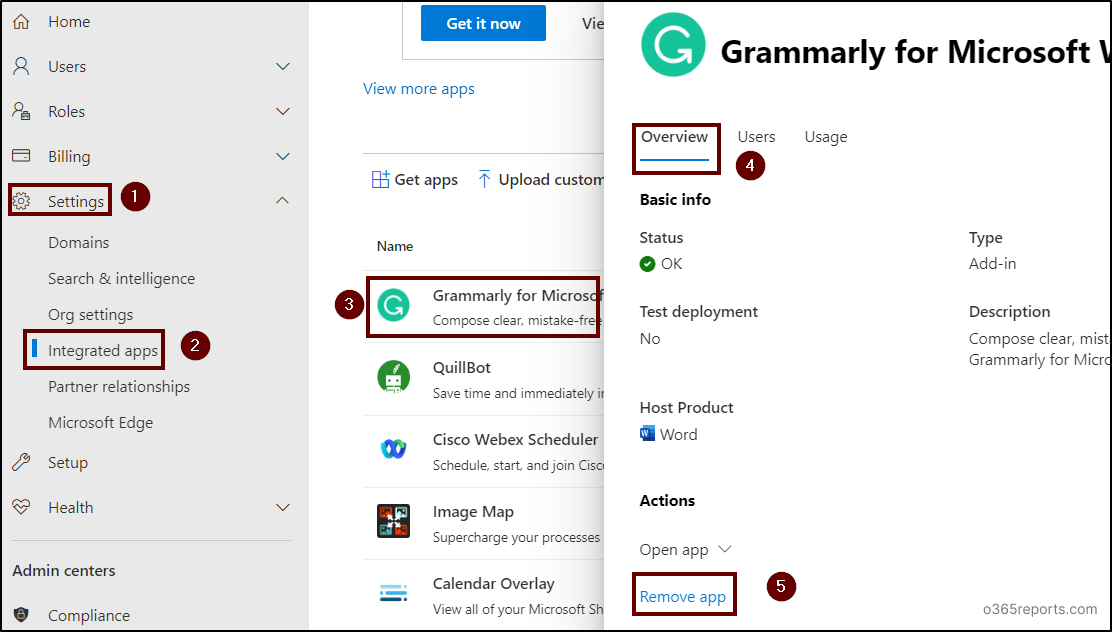
- Go to the ‘Settings’ tab in the Microsoft 365 admin center and select the ‘Integrated apps’ option.
- Select the deployed add-in or app from the list and click the ‘Remove app’ option from the ‘Overview’ tab.
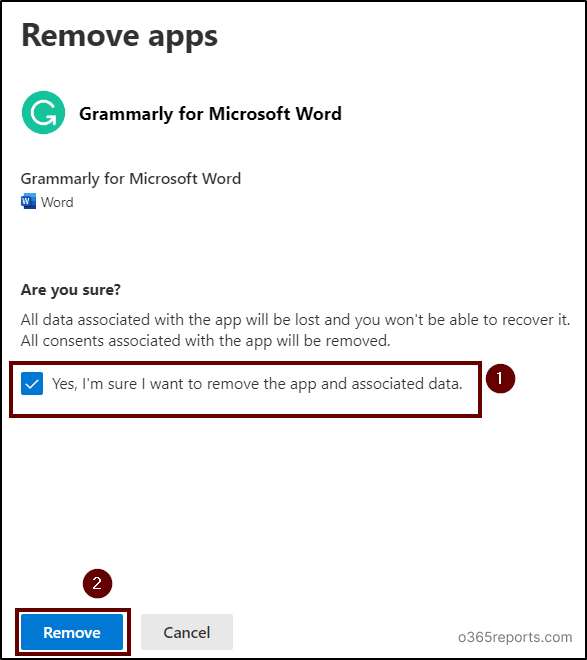
- It will take you to the ‘Remove apps’ page, click the check box stating ‘Yes, I’m sure I want to remove the app and associated data’ to confirm the removal of apps with the associated data.
- After that, click on ‘Remove’.
- Finally, select ‘Done’ after the removal of the app to close the window.
Note: This method helps to uninstall add-ins from Microsoft 365 services, such as Office, Outlook, and SharePoint Online.
4. Enable Office 365 Add-ins for Specific Users/Groups
Some trusted add-ins may crucially be needed for certain users to complete some desired tasks, in such scenarios, admins can enable add-ins only for them. To deploy add-ins in Office 365 for selected users, follow the steps below carefully.
- To install add-ins in the Microsoft 365 admin center only for certain users or groups; first, restrict access to the Office store for all users.
- Then, go to the ‘Settings’ tab in the Microsoft 365 admin center and select the ‘Integrated apps’ option.
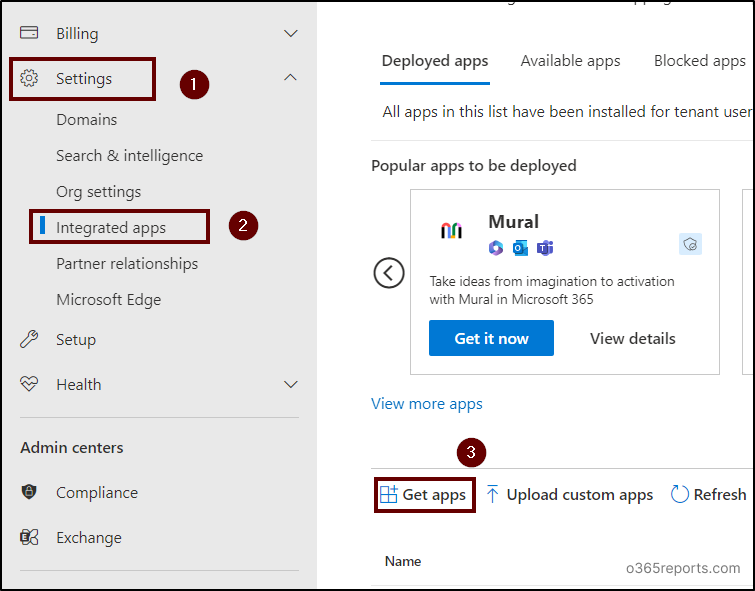
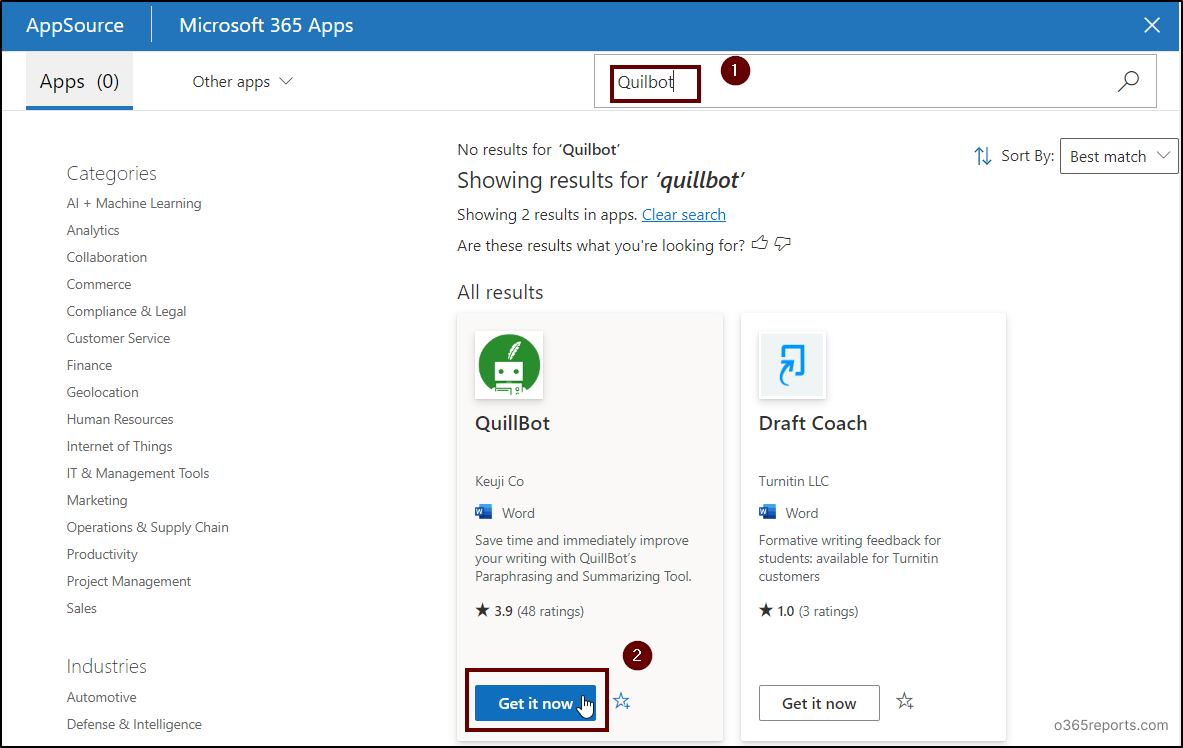
- After that, select the ‘Get apps’ option and type the name of the desired integrated app or add-in in the search bar.
- Select the ‘Get it now’ button with the appropriate app or add-in.
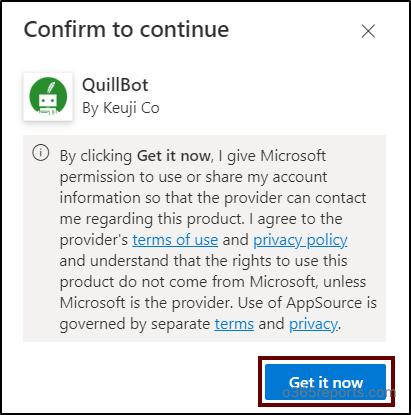
- Also, select the ‘Get it now’ option on the upcoming ‘Confirm to continue’ page.
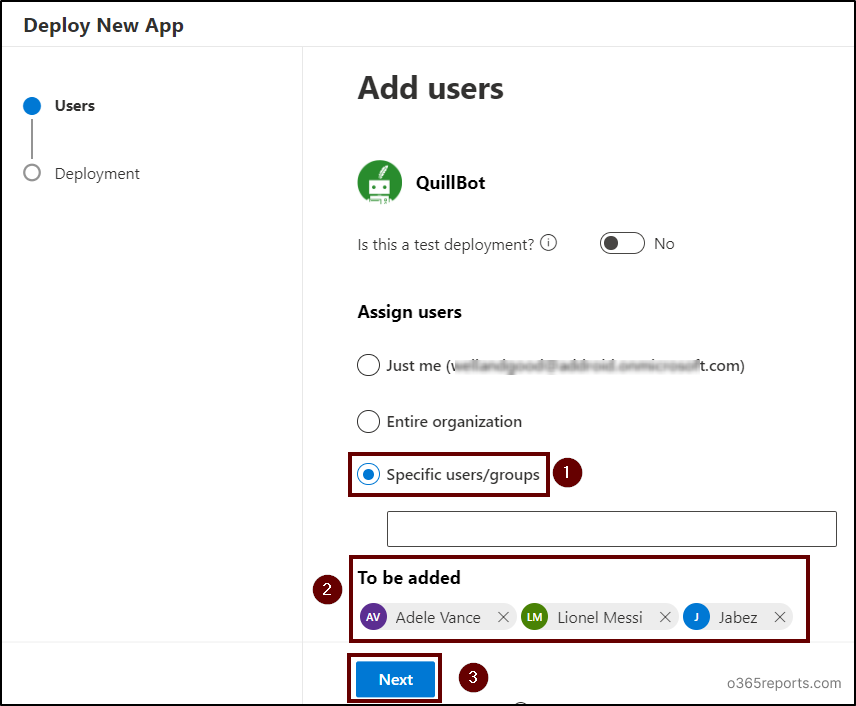
- Upon confirmation, you will be redirected to the ‘Add users’ page. Select the ‘Specific users/groups’ radio button, pick the users you want to add, and click ‘Next’.
- Read app permissions and capabilities on the ‘Accept permissions requests’ page and click on the ‘Next’ button.
- After that, check all the configurations (users and groups) in the ‘Review and finish deployment’ page and select the ‘Finish deployment’ button.
- Finally, select the ‘Done’ button to close the window after the completion of the deployment.
Once you complete, the selected add-in or integrated app will be added to the appropriate users’ or groups’ Microsoft 365 application(s).
5. Deploy Specific Add-ins to All Users
As a Microsoft 365 admin, you can enable third-party add-ins to all the organization’s users. To deploy such trusted add-ins, simply follow the instructions given below in your Microsoft 365 admin center.
- To enable only trusted third-party add-ins for all users, first disable Office add-ins access for all users by restricting access to the Office Store. This step is a crucial one as it blocks users from installing unwanted or unsafe add-ins.
- Go to the ‘Settings’ tab in the Microsoft 365 admin center and select the ‘Integrated apps’ option.
- Select the ‘Get apps’ option and type the third-party add-in or app name in the search bar.
- Click the ‘Get it now’ button associated with the required add-in.
- Also, select the ‘Get it now’ option on the ‘Confirm to continue’ window.
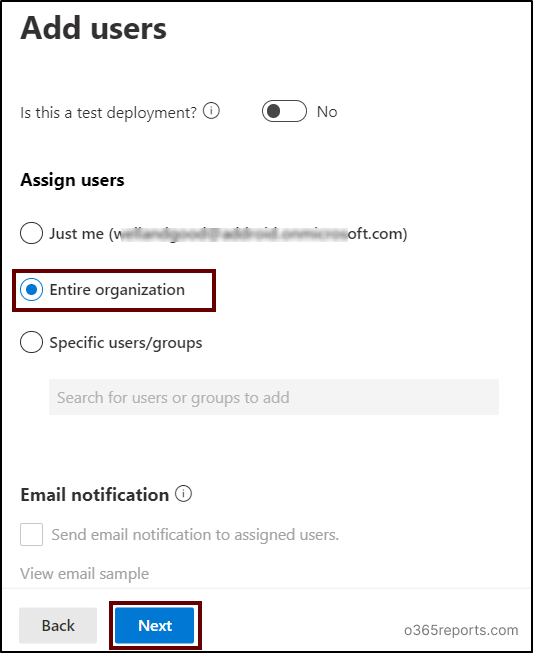
- Upon confirmation, you will be redirected to the ‘Add users’ page. Choose the ‘Entire organization’ radio button and click ‘Next’.
- Read app permissions and capabilities on the ‘Accept permissions requests’ page and click on the ‘Next’ button.
- After that, check all the configurations on the ‘Review and finish deployment’ page and select the ‘Finish deployment’ button.
- Finally, select the ‘Done’ button to close the window after the completion of the deployment.
This change enables you to allow a specific add-in for all users across the entire organization.
Final Thoughts
As data loss prevention holds sensitive information from falling into the prey’s hands, the above configurations may also block the possibility of data breaches through untrusted add-ins in Microsoft 365.
By recognizing the significance of control and adhering to the steps provided in this blog, you can effectively disable Office add-ins in Microsoft 365. This action fortifies your organization’s data security and compliance measures.
Stay tuned for more insights and tips on optimizing your Microsoft 365 experience 👋.