Office 365 admins are responsible for monitoring their users and resources, which includes managing their reports based on activities. Outlook client is a useful tool for sending those reports to specific reviewers. On the other hand, it can become challenging when reports need to be sent to multiple users. Hey admins, No more worries! You can use PowerShell scripts to send a report by email, as it has the ability to automate the process of sending Office 365 reports to multiple users at the right time.
Let’s learn more about how to send office 365 reports via email safely and reliably using Microsoft PowerShell.
Why Admins Choose PowerShell Scripts to Email Reports?
Being a hassle-free solution for Office 365 admins, PowerShell helps in sending reports via email. It ensures that reports are delivered to the recipient at the appropriate time, without any complications.
As it provides numerous advantages, admins are often apt to use PowerShell to create, send and retrieve reports from Office 365. Some of its key benefits are,
Scalability– Distributing Office 365 reports to large members can be made easier with PowerShell, as it allows simultaneously deliver reports via email to multiple recipients.
Robust error handling– Report delivery using PowerShell enables us to identify and handle errors that may occur during the process such as, attachment errors and incorrect server settings.
Improve security– It helps to safeguard our reports from unauthorized access by encrypting the email using SSL/TLS encryption methods.
Centralized reporting– PowerShell’s centralization enables administrators to generate reports across multiple Office 365 resources using a single console.
Hence, by offering the above benefits, PowerShell emerges as the ultimate Office 365 management tool to administer your organization efficiently.
Create Reports to Send via Email Using Microsoft PowerShell
Office 365 reports serves as an essential tool for admins to effectively manage and monitor their Office 365 users and activities. These reports offer valuable insights into Microsoft 365 usage patterns, security threats allowing you to make data-driven decisions.
By harnessing the power of Office 365 reports, you can proactively identify and address issues within your organization. The quick and convenient way to generate Office 365 reports is via Microsoft PowerShell.
You can generate reports to audit Office 365 such as tracking user activities, finding security events, investigating forensic events, manging file sharing, monitoring email activities, etc. efficiently using PowerShell.
Use Send-MailMessage Cmdlet to Email a Report
Sharing reports via OWA or desktop Outlook will be challenging when you deal with a greater number of reports or multiple recipients. However, with PowerShell scripts, admins can set up faster and safe report delivery to desired inboxes in their organization.
Therefore, Send-MailMessage in Microsoft Exchange Server module enables you to send the Office 365 reports via email through PowerShell.
The below is the syntax for the cmdlet that needs to be followed while sending reports via PowerShell.
|
1 |
Send-MailMessage -From <SenderMailId> -To <RecipientMailId> -Subject <SubjectForYourMail> -SmtpServer <SmtpServerName> -Port <SMTPportNumber> -UseSsl -Credential (Get-Credential) |
Provide SMTP server in the cmdlet, as email communication over the internet relies on the SMTP protocol.
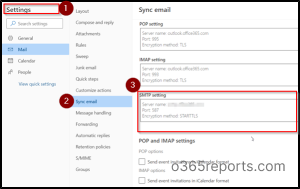
You can get your SMTP (Simple Mail Transfer Protocol) server name and port number from the Settings option in your outlook account. Then, spot the server’s name and port number like we shown in the screenshot below.
Note: Send-MailMessage is now deprecated in newer PowerShell versions.
While it may still work, it poses security risks, particularly concerning SMTP connections. For a safer, updated method, consider using Send-MgUserMail cmdlet from the MS Graph PowerShell SDK, which support OAuth 2.0 for secure, modern email handling in Microsoft 365.
Send-MailMessage cmdlet can be used with various parameters to manage office 365 activities. Thus, we have covered the most important ways below to manage sending reports via email.
- Send emails to multiple recipients using a PowerShell script
- Email a report to specific group members
- Email a HTML report users using Microsoft PowerShell
- Send reports via email using delivery notification parameter
- Email bulk attachments to multiple recipients using PowerShell
- PowerShell script to send multiple attachments in a single email
Before diving into this further, make sure to connect Exchange Online PowerShell.
Send Emails to Multiple Recipients Using a PowerShell Script
It is difficult to send reports to multiple recipients in Outlook, as it requires us to manually add each member in the ‘To’ parameter, making the process quite complex. However, you can simplify it using a CSV file to send reports to bulk Office 365 users.
You can create a CSV file. The CSV file should have a header row with recipient name and recipient email address columns. Then save your CSV file and note down the path.
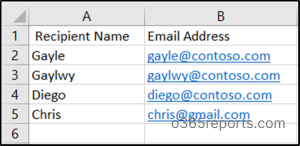
Now, you can run the below script to send report to multiple users via email using PowerShell.
|
1 2 3 4 5 6 7 |
$EmailList = Import-Csv -Path <PathForYourFile> $Message = <TypeYourMessageHere> ForEach ($Recipient in $EmailList) { $To = $Recipient.EmailAddress $Subject = <SubjectForYourMessage> Send-MailMessage -To $To -Subject $Subject -Body <MessageForYourEmail> -SmtpServer <YourSMTPServerName> -From <SenderMailId> -port 587 -UseSsl -Credential (Get-Credential) -attachment <PathOfYourReport> } |
Thus, as a result, PowerShell script will send the attached report to users mentioned in the CSV file.
Email a Report to Specific Group Members by PowerShell
You can save time and effort by sharing the report with all members at once using group mail address, instead of wasting your time in sending reports individually.
|
1 |
Send-MailMessage -From <SenderMailAddress> -To <GroupMailAddress> -Subject <SubjectForYourMail> -SmtpServer <SmtpsServerName> -Port <SMTPportNumber> -UseSsl -Credential (Get-Credential) - attachments <PathOfTheReport> |
This report will be sent to the members of the specified group like below.

Once the above cmdlet is executed, the attachment will be sent to all the group members via group mail address through PowerShell.
Email a HTML Report to Users Using Microsoft PowerShell
To send an HTML report to a recipient via email, execute the following cmdlet with the required parameters.
|
1 |
Send-MailMessage -From <SenderMailAddress> -To <RecipientMailAddress> -Subject <SubjectForYourMail> -SmtpServer <YourSMTPseverName> -Port 587 -UseSsl -Credential (Get-Credential) -attachments <PathForyourHTMLfile> |
Note: You can also send reports of any format like CSV, XML, txt, using the above cmdlet.
Send Reports via Email Using Delivery Notification Parameter
Delivery notifications will help you to know about the delivery status of the report. You can get an instant delivery status of an attachment and check whether it was successfully delivered, if there was a delay in delivery, or if it failed to reach the intended recipients.
You can get delivery notifications of the sent report by executing the below PowerShell script.
|
1 2 3 |
$deliveryNotificationOption = [System.Net.Mail.DeliveryNotificationOptions]:: Specifies the delivery notification options # Send the email and generate a delivery notification Send-MailMessage -From <senderMailId> -To <ReceiverMailId> -Subject <SubjectForYourMail> -Body <MessageForYourMail> -SmtpServer <SMTPserverName> -DeliveryNotificationOption $deliveryNotificationOption –attachments <PathForYourReport> -Priority High -UseSsl -Credential (Get-Credential) |
Note: You can also set a priority parameter like we added above, and mark the respective email with ‘High importance’ than other reports.
You will be given five delivery notification options. They are,
- None: No notification will appear regarding the report delivery.
- OnSuccess: If the delivery is successful, you will be sent a notification.
- OnFailure: You will be notified with a text, if the delivery is unsuccessful.
- Delay: If there is any delay in delivery, you will get the notification.
- Never: You won’t receive a notification regarding the delivery of the report.
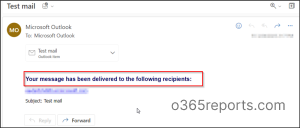
If you run this PowerShell script with “OnSuccess” delivery notification parameter, you will get a message like above screenshot.
Email Bulk Attachments to Multiple Recipients Using PowerShell
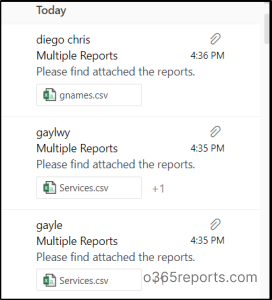
It seems difficult to send custom reports to specific users at a time via Outlook client. However, you can use PowerShell script to deliver multiple reports to desired recipients at a time.
First, create a CSV file with suitable name. The CSV file should have a header row with an “Email” column containing the email addresses of the recipients, and a “Reports” column containing the file paths of the reports separated by commas.

Then, execute the PowerShell script below to send bulk reports to bulk recipients in short time.
|
1 2 3 4 5 6 7 8 9 10 11 12 13 14 15 16 17 18 19 20 21 22 23 24 25 26 27 28 |
$list = Import-Csv -Path <pathForYourCSVfile> foreach ($item in $list) { # Create new email message $email = New-Object System.Net.Mail.MailMessage # Add recipient to email message $email.To.Add($item.Email) # Add subject and body to email message $email.Subject = <SubjectForYourMail> $email.Body = <MessageForYourMail> # Add each report as an attachment to email message $reports = $item.Reports.Split(",") foreach ($report in $reports) { $attachment = New-Object System.Net.Mail.Attachment($report) $email.Attachments.Add($attachment) } # Define email sender and SMTP server information $email.From = <SenderEmailId> $smtpServer = <SMTPserverName> $smtpPort = 587 $smtpSSL = $true $smtpUsername = <SMTPusername> $smtpPassword = <SMTPpassword> # Send email using SMTP server with SSL encryption and explicit credentials $smtp = New-Object System.Net.Mail.SmtpClient($smtpServer, $smtpPort) $smtp.EnableSsl = $smtpSSL $smtp.Credentials = New-Object System.Net.NetworkCredential($smtpUsername, $smtpPassword) $smtp.Send($email) } |
This PowerShell script will deliver multiple attachments to the recipients mentioned in the CSV file. While PowerShell can send reports via email to multiple recipients, Microsoft emphasizes that Exchange Online is not for mass mailing. However, Microsoft introduces High Volume Email in Exchange Online, designed for sending bulk messages internally in Microsoft 365. Consider using it when you need to send emails to a large number of recipients, exceeding regular limits.
PowerShell Script to Send Multiple Attachments in a Single Email
Attaching multiple reports to a recipient one by one can be a long and time-consuming process. However, this process can be automated using PowerShell, allowing for the efficient distribution of bulk reports to a recipient via email.
Simply, create a CSV file with the file paths listed in the first column, just like in the screenshot below.
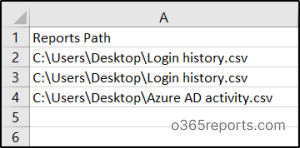
Then, you send bulk reports to a recipient by executing the PowerShell script below.
|
1 2 3 4 5 6 7 8 9 10 11 12 13 14 15 16 17 18 19 20 21 22 23 24 25 26 |
# Define email parameters $From = <SenderEmailId> $To = <RecipientEmailId> $Subject = <SubjectForYourMail> $Body = <MessageToBeSent> # Define CSV file path $CSVFile = <PathForYourCSVFileHavingReportsDetails> # Read file paths from CSV file $Attachments = Import-Csv $CSVFile | Select-Object -ExpandProperty Path # Create email message with attachments $Email = New-Object System.Net.Mail.MailMessage($From, $To, $Subject, $Body) foreach ($Attachment in $Attachments) { $AttachmentStream = New-Object System.Net.Mail.Attachment($Attachment) $Email.Attachments.Add($AttachmentStream) } # Send email $SMTPServer = <YourSMTPserverName> $SMTPPort = <YourSMTPportNumber> $SMTPUsername = <YourUsername> $SMTPPassword = <YourPassword> $SMTPSecure = "tls" $SMTPCredentials = New-Object System.Net.NetworkCredential($SMTPUsername, $SMTPPassword) $SMTPClient = New-Object System.Net.Mail.SmtpClient($SMTPServer, $SMTPPort) $SMTPClient.EnableSsl = $true $SMTPClient.Credentials = $SMTPCredentials $SMTPClient.Send($Email) |
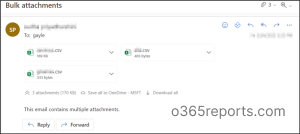
The above PowerShell script will deliver multiple reports to a recipient at a time.
Tip:
You can create a mail flow rule to encrypt emails and protect sensitive reports from unauthorized access.
AdminDroid- Facilitate Timely Delivery of Microsoft 365 Reports
Sending reports via email using PowerShell scripts will be difficult if you are a newbie to PowerShell. Also, scheduling reports with a Task scheduler using PowerShell involves a wide range of settings and options, which eats up your time. How will you react if we say that you can schedule and send reports without a task scheduler and PowerShell scripts? you may find it hard to believe, right?
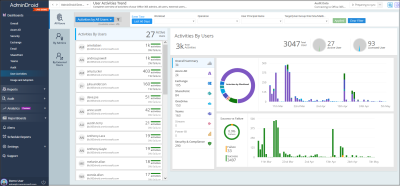
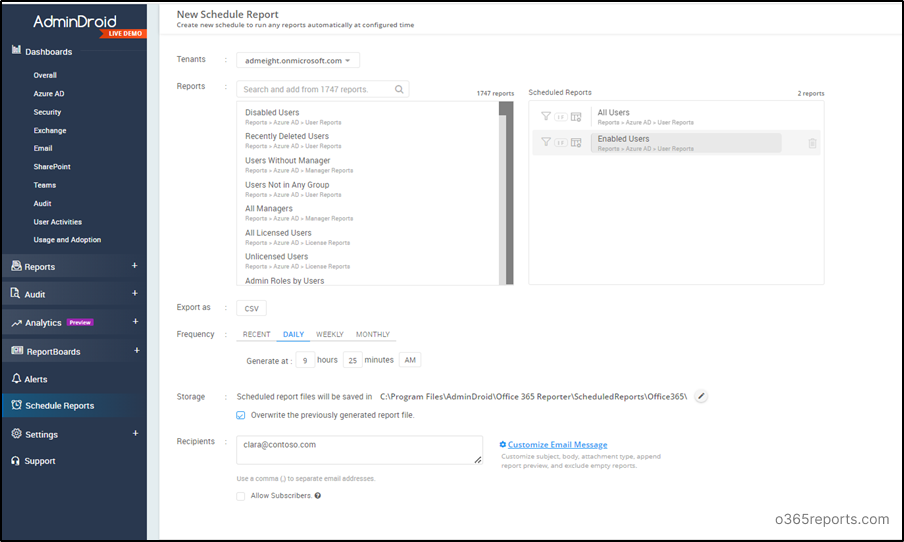
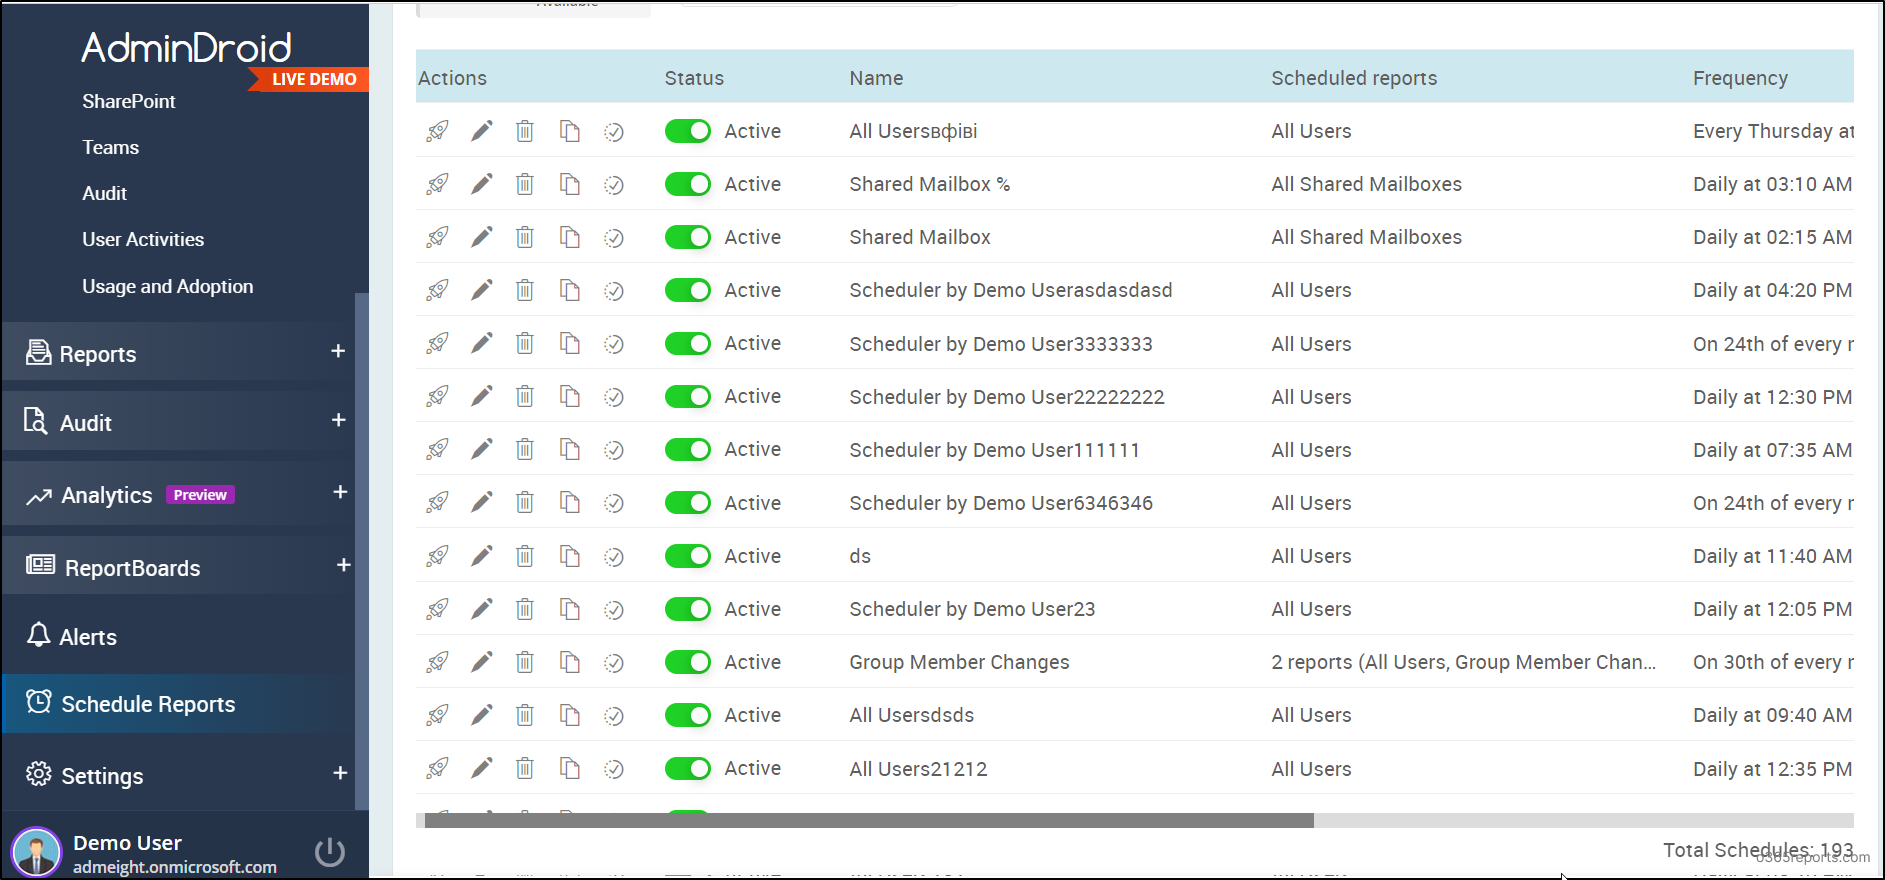
Yes! AdminDroid, a Microsoft 365 reporter, has a Advanced Scheduling capability that allows you to customize the desired report and send them to your Exchange Online mailbox. With this robust scheduling feature, you can send one or more reports to the recipients at a desired time without any delay. Thus, it saves time and effort by automating Office 365 reports distribution.
You will gain the following advantages while sending reports via email through AdminDroid.
- The scheduled reports can be saved as PDF, HTML, CSV, XLS, XLSX and RAW formats.
- Customization of body and subject of the email can be done.
- Reports can be sent either as email attachments, a single zip file, or as links.
- Scheduled reports can be sent to the respective recipients automatically.
- Scheduled reports can be stored either on the local disk or remote share.
- Reports can be sent on a daily, weekly or monthly basis. Also, you can use the recently scheduled time for sending your reports.
- You can grant other Microsoft 365 admins to subscribe to your schedules, ensuring that they will also receive your scheduled reports directly in their mailboxes.
Apart from its scheduling feature, AdminDroid enables quick emailing of reports to users, facilitating the process for instant report delivery.
Added to the above, you can schedule Exchange Online mail protection reports for periodical monitoring of the potential security threats attempted from your organization’s mail addresses, incoming/outgoing spam and malware emails, etc.
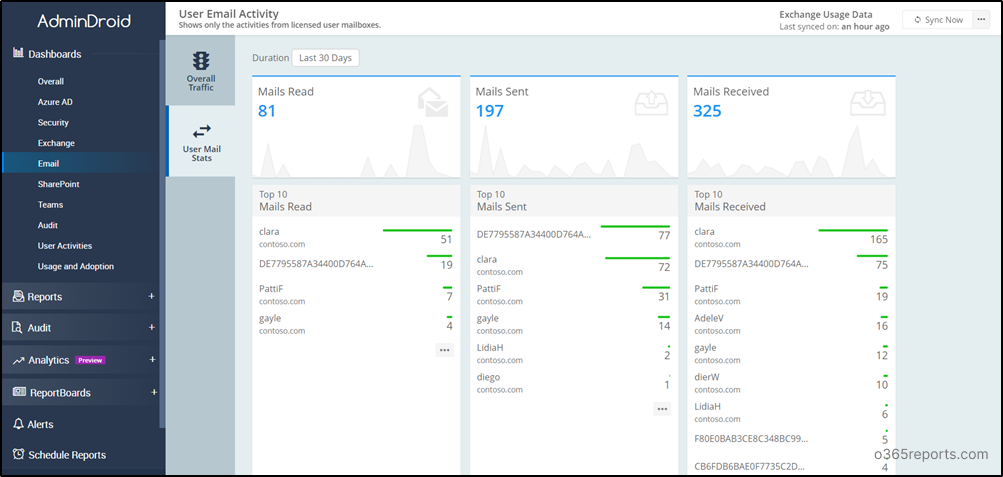
Furthermore, you can monitor inbound and outbound Microsoft 365 mail traffic to handcuff the spoofed senders constantly by scheduling Exchange Online mail traffic reports in AdminDroid. Also, this report helps you to analyze statistics such as top mail senders/receivers, top spam/malware receivers, which helps you take timely decisions in critical situations.
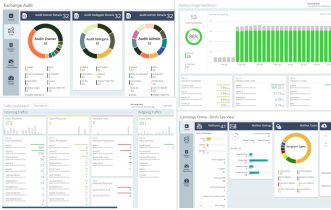
Additionally, AdminDroid’s email analytics dashboard gives you insights of every anomalous email behavior, strengthening your Microsoft 365 Exchange Online security.
One more main thing, as a one-stop solution, AdminDroid provides extensive analytics on all the Microsoft 365 resources such as Azure AD, Exchange Online, OneDrive, SharePoint Online, etc.
Also, AdminDroid offers you 190+ Azure AD reports at no cost, and paves the way for effective monitoring of user login, password changes, etc.
Don’t let the time go away! Start to use AdminDroid now for automatic report distribution in Microsoft 365.
No More Delay in Report Delivery!
In short, by using these PowerShell scripts, you will reduce the risk of sending emails to unknown users via Outlook client. in addition, you can efficiently send the activity reports to desired users in an appropriate time. Also, these scripts can be customized to meet specific needs, based on your Office 365 organization requirements.
We hope we have given you information on how PowerShell helps you to send reports via email. Furthermore, drop your suggestions and scripts ideas on sending reports using PowerShell in the comments section.
