Microsoft has now come up with the one most-awaited and most needed feature that has been missing all these days ever since the introduction of an alias. Yes, you could now add an additional email address to user mailboxes. Having an alias address (proxy address) besides a primary mail address has always been a boon to every office admin/user. It keeps assisting us in the way it receives mail for different aliases and holds it at the same box, where messages to the primary mail address reside too.
Why Alias?
Consider a situation where an organization had multiple domains and departments or an administration unit handling two or more merged companies. What if all the emails targeted to these areas needed to be collected in a single mailbox and it was a great challenge? With an alias introduction, it had been made possible.
What’s New With Alias?
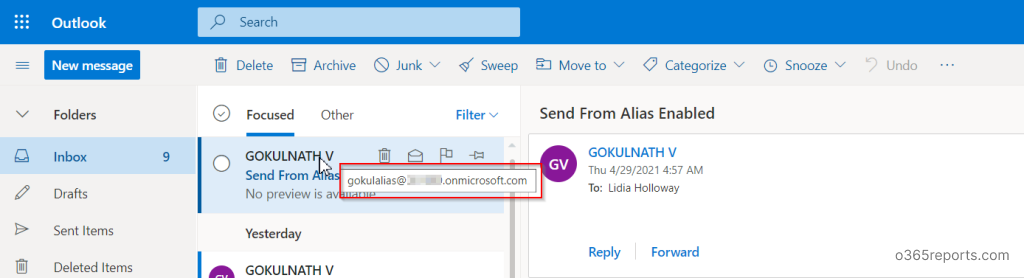
With an earlier alias feature, one could only receive emails to their alias address. But now one could send emails from alias addresses using Outlook. The recipient could see the sender’s proxy address in the “From” bar. When a recipient replies to a message from an alias, an alias address will show up in their “To” bar. And the message will reach the targeted recipient’s primary mailbox.
Send From Proxy Address Is No More Quixotic!
Microsoft recently announced that this feature will be in usage w.e.f Jun’21. Suddenly, without any prior intimation, this feature has come into effect since last week. But we must take a deep look at this as it is not been enabled by default.
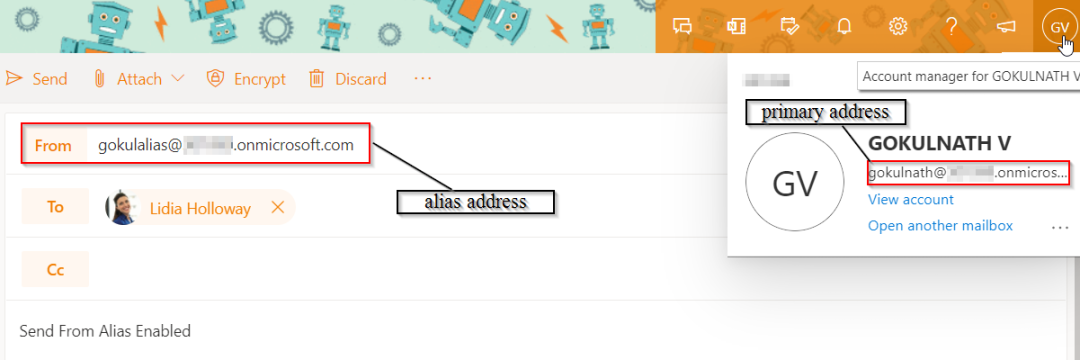
After enabling this feature, you can send emails from the proxy address as shown in the below image.
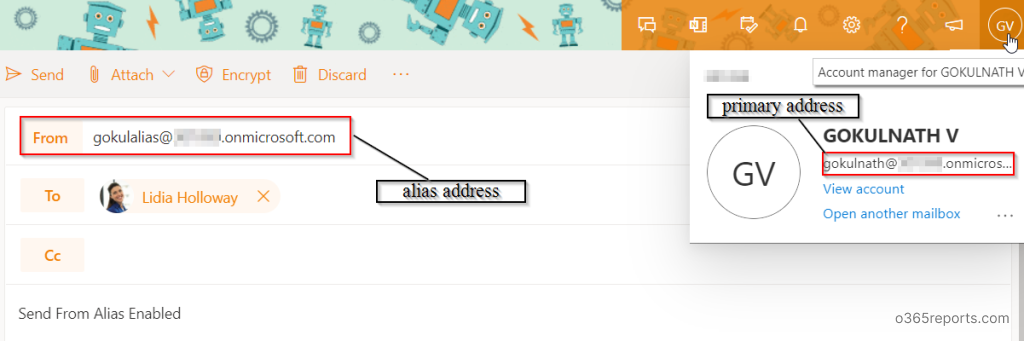
The following image shows how the recipient could see the sender’s proxy address in the “From” address.
Enabling Send as Alias Using PowerShell:
Follow the below given steps to enable email sending from proxy address.
Step 1: Connect to Exchange online PowerShell by running the following cmdlet.
|
1 |
Connect-ExchangeOnline |
Step 2: To enable the settings, use the following cmdlet.
|
1 |
Set-OrganizationConfig -SendFromAliasEnabled $True |
Now, the SendFromAlias feature is set ready to use and your user can send email from alternate email address.
To verify, if the send as alias feature is enabled, get the status of SendFromAlias by using the following cmdlet.
|
1 |
Get-OrganizationConfig| ft SendFromAliasEnabled |
The status will be displaying as “True”.
Instead, if the result ends up with any errors like ‘The term is not recognized as the name of a cmdlet, function, script file, or operable program’, while using any of the above cmdlets, then there might be a problem with exchange online module installation. You can Install and Connect Exchange Online PowerShell using PowerShell script or try the below given method to install manually.
Install Exchange Online PowerShell Module
To install the Exchange Online PowerShell module, run the below cmdlet.
|
1 |
Install-Module -Name ExchangeOnlineManagement -Scope AllUsers |
After running the above command, enter “Y” to accept the download. The module will be downloaded and installed in a minute.
How To Send Email From Alias In Office 365?
If the feature is enabled as mentioned above, then all left on the bucket list is just exploring it. Let us now see the way to start sending emails.
- Go to Outlook Web Application.
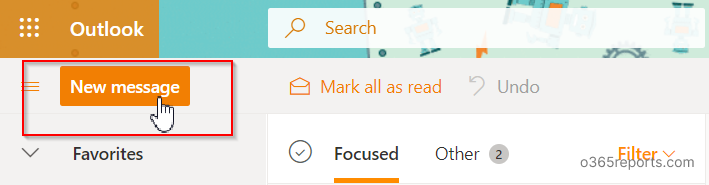
- Click the “New Message” button to compose an email.
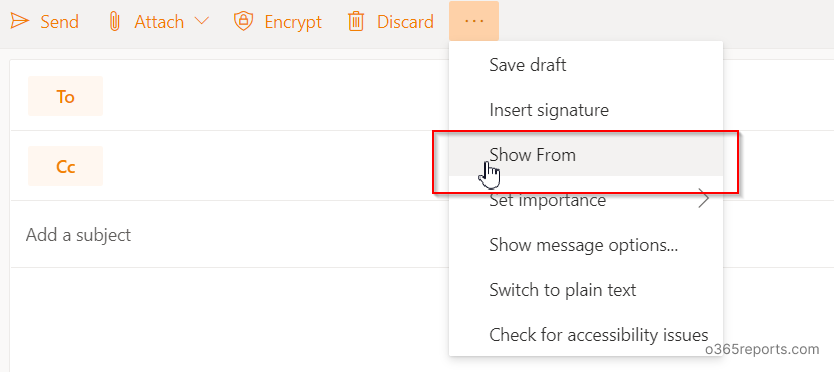
- Click on the meatballs menu (3 dots) located at the right corner of the top pane.
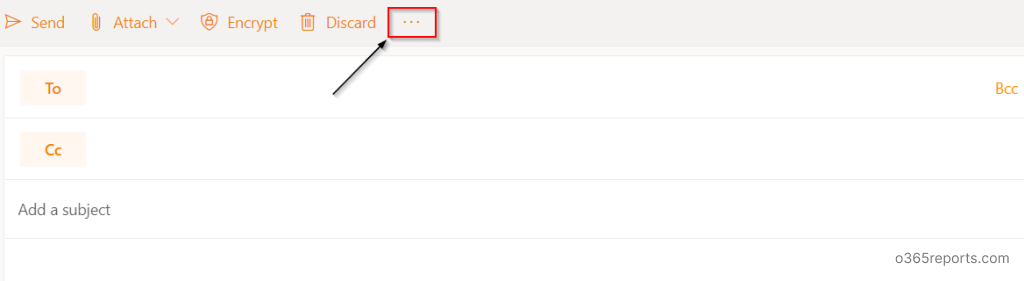
- Select the “Show from” option.
- Click on the from button and select “Other email addresses” option.
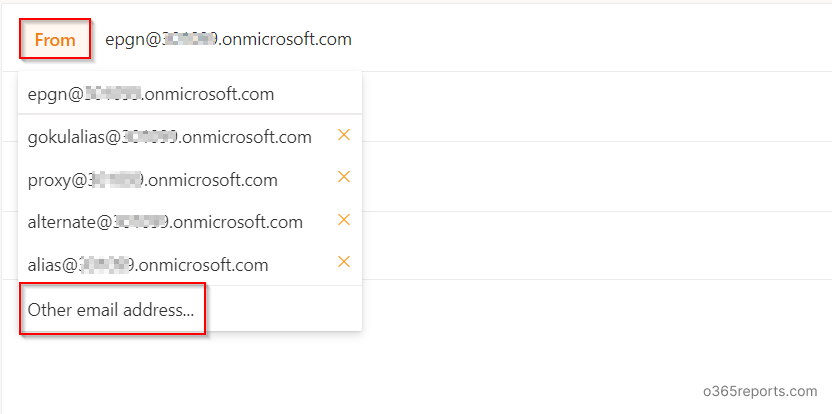

- Enter your alias address/smtp proxy address/plus address manually and add the recipient’s address, subject, message and send it.
The respective alias address will start showing automatically upon clicking the “From” button, after the first mail you sent through an alias address. If you are unable to send email from alias address means you need to enable the ‘SendFromAliasEnabled’ setting in PowerShell as discussed above.
We hope that, with this feature enabled, you could administrate your organization’s mails in a more effective and efficient means of way. Never hesitate to ask us for any clarification. You can always reach out to us. Track for further updates on this feature in the Microsoft roadmap.


