Microsoft has recently shaken things up by announcing the retirement of Office 365 connectors within Teams, following the earlier retirements of SharePoint Online and Microsoft 365 Groups connectors. These changes have left many organizations scrambling to adapt. In this blog, we’ll dive into what these retirements mean, why they’re happening, and most importantly, how you can smoothly transition to alternative solutions to keep your workflows running seamlessly.
What are Office Connectors in Microsoft Teams?
Office connectors allow users to receive content and updates from third-party services directly within a Teams channel. By connecting services like RSS, Planner, Azure DevOps, Approvals, Slack, Trello, Wunderlist, GitHub, and others, these connectors bring updates straight into the chat stream, keeping everyone on the team informed and aligned without leaving the conversation. This functionality simplifies staying up-to-date and ensures seamless collaboration.
When Will Office 365 Connectors in Teams Retire?
Retirement of Microsoft 365 Connectors in Teams is planned by Microsoft in phases. Here are the key dates to keep in mind:
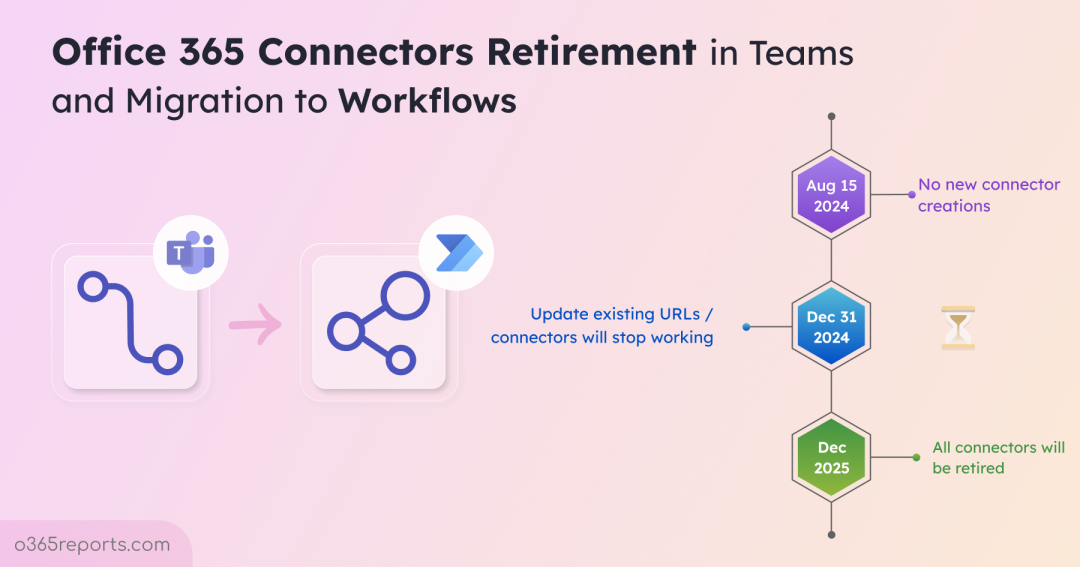
📅 August 15, 2024 – Creation of new connectors will be blocked across all clouds.
📅 December 31, 2024 – Connector owners must update their URLs by this date.
📅 December 2025 – All existing connectors across all clouds will stop working.
🔔 Update (October 2025):
Microsoft has further extended the webhook migration deadline to March 31, 2026, giving organizations additional time to transition to the Workflows app.
Why Did Microsoft Announce this Retirement?
Microsoft is retiring Office 365 connectors from Teams to align with its Secure Future Initiative (SFI), a strategic commitment to enhancing cybersecurity across its platforms. The decision is driven by the need to ensure that integrations and data exchanges within Teams are as secure and robust as possible.
What’s Going to Replace Office 365 Connectors in Teams?
The new solution is Power Automate workflow connectors. Users relying on Microsoft 365 connectors should transition to Power Automate (Workflows app in Teams) to ensure continued smooth operation of their services. As admins, you might consider disabling Office 365 connectors for Microsoft Teams to ensure a smoother transition to the more robust and future-proof Power Automate workflow connectors. In that case, you can use PowerShell to manage Microsoft 365 connectors for Teams.
Use the below cmdlet for disabling Microsoft 365 connectors for Microsoft Teams alone at the organization level.
|
1 |
Set-OrganizationConfig -ConnectorsEnabledForTeams:$false |
You can also disable Microsoft 365 connectors for your entire organization. Use the below cmdlet for disabling connectors at the tenant level.
|
1 |
Set-OrganizationConfig -ConnectorsEnabled:$false |
Workflows App in Teams
Workflows let you automate repetitive tasks or processes that connect multiple apps to Teams. In essence, they can save you both time and effort. This app is installed by default in Teams and helps manage approval processes, project updates, and routine operations. It offers features like notifications on task changes, quick actions from chats, enhanced meeting management, and easy customization of workflows.
Why Choose Workflow Connectors?
- Extensive Catalog: Provides a much broader range of office connectors.
- Scalable Architecture: Integrations are designed to grow with your business needs.
- Enhanced Security: Ensures maximum protection for your information.
You can explore a list of supported connectors by visiting the Connectors page within your Power Automate app.
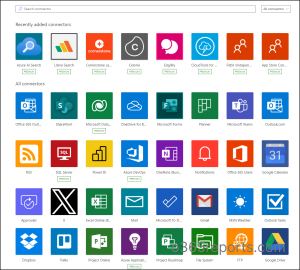
Note:
Teams also includes apps such as the Approvals app, Planner, and more that complement Office 365 connectors used in workflows and automation. These apps can be used alongside Workflows to support tasks involving request reviews or confirmations, helping you manage everything within Teams more efficiently.
Migration from Office 365 Connectors to Workflows
To transition from Office 365 connectors to workflows in Teams,
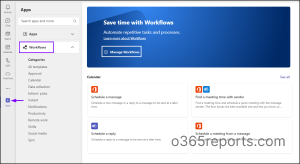
- Go to ‘Apps’ in the left navigation -> scroll down to ‘Workflows’ -> Manage Workflows.
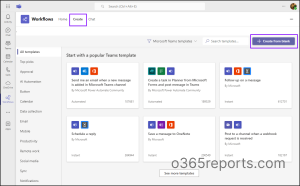
In the Workflows app, under the ‘Create’ tab, you’ll find a list of templates designed to match your connector’s functionality. Alternatively, you can start from scratch by selecting ‘Create from blank’ to build a custom workflow tailored to your needs.
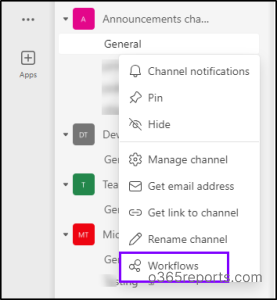
Tip: You can also open the workflows app within the chat or channel conversation in Teams by clicking on More options -> Workflows.
Use Cases for Creating Workflows in Teams
Let’s explore how you can transition from Office 365 connectors to Workflow connectors for some popular tasks.
- Microsoft Teams Webhook Connector
- Follow Up a Chat Message in Teams
- Receive SharePoint News Notifications in Teams Using Workflow Connector
1. Microsoft Teams Webhook Connector
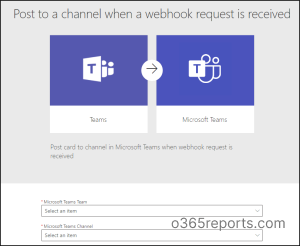
Previously, Office 365 Connectors were used to handle webhook requests—HTTP requests sent from a server to a specific URL when an event occurred, allowing real-time data transfer. Now, you can achieve this functionality using the Workflow connector. It posts data to a Microsoft Teams channel whenever a webhook request is received, streamlining and enhancing the integration process.
The Webhook connector listens for incoming data from external sources, while the Incoming Webhook connector provides a unique URL to receive and post this data directly into a Teams channel.
To set this up, use the ‘When a Teams webhook request is received’ template in Power Automate. This template creates a flow that triggers automatically when a POST request is made to the endpoint provided by the connector. It supports adaptive cards, allowing you to send a collection of these cards in the POST request body. This setup can automate notifications from external systems or applications directly into a Teams channel—such as alerts for new user sign-ups, system updates, or task completions.
Similarly, other templates can be adapted to post messages to a chat when a webhook request is received, when a new RSS feed is published, etc.
2. Follow Up a Chat Message in Teams
Let’s now create a flow to follow-up a chat message. For that,
- Access the desired chat in Microsoft Teams.
- Click on the message you want to follow up on.
- Select the three dots (more options) next to the message.
- Choose ‘More actions’ and then ‘Create a new action’.
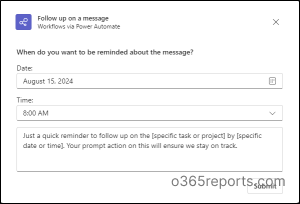
- Select the ‘Follow up on a message’ template.
Name your flow and authorize the connection. Click ‘Add workflow’ to save it. The workflow will be saved in your organization’s default environment, and you’ll receive a message from the Flow bot confirming the successful creation of the flow.
To use the flow, go back to the message, select the three dots next to it, and choose ‘Follow up on a message’. Enter the details and click ‘Submit’. Your flow is now active and will send reminders to follow up on the message.
3. Receive SharePoint News Notifications in Teams Using Workflow Connector
Another common use case for Office 365 connectors is receiving SharePoint site news notifications in a Microsoft Teams channel. Here’s how to achieve this using the Workflow connector:
- Open the Workflow app in Teams and go to Manage Workflows.
- For creating a new flow, choose to start from the Power Automate environment. Alternatively, you can create it from scratch by selecting Create from blank.
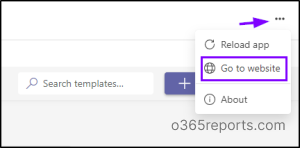
- To start, click on the three dots above Create from blank and select Go to website. This will direct you to the Power Automate page where you can build your flow.
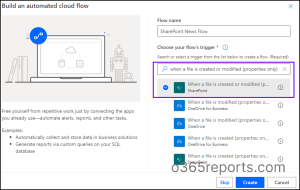
- In Power Automate, select +Create from the left navigation menu, then choose Automated cloud flow.
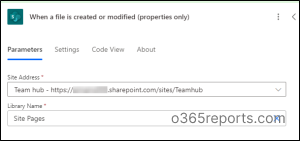
- Name your flow and search for the trigger ‘When a file is created or modified (properties only)’. Select this trigger and click Create to set up your flow.
This will open the flow page where you can edit your flow. Click on the trigger action to open the pane on the left side.
- From the dropdown menu, select the site address. For example, I have selected the site named Teams hub.
- In the Library Name field, choose Enter custom value from the dropdown and manually type ‘Site Pages’.
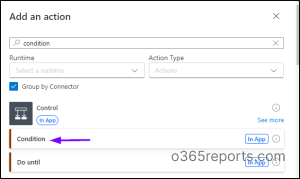
- Add another action by clicking on the + button -> select ‘Add an action’.
- In the search bar, search and select ‘Condition’.
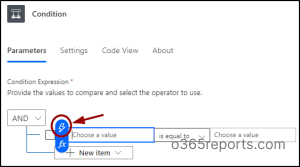
- Open the Condition action and set it up as follows:
-
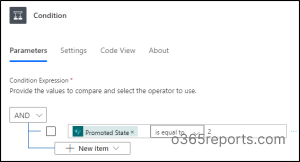
- In the Choose a value field, click the dynamic content icon and search for Promoted State. Select it. Promoted State is a metadata field in SharePoint that indicates the status of a page or news post.
- In the next field, choose is equal to.
- In the final field, enter ‘2’, which represents the metadata for a news post.
So, when you set the condition to check if Promoted State equals 2, you’re filtering to ensure that only published news posts trigger the flow.
The condition should look like this:
- As the next step, within the True condition, add an action:
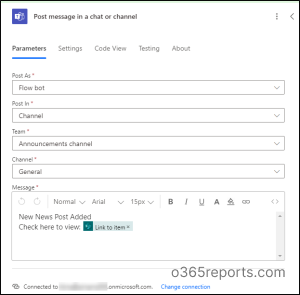
- Search for Microsoft Teams – Post a message in a chat or channel and select it.
- Fill in the fields as follows:
-
- Post as: Choose how the message should appear in the channel.
- Post in: Select Channel.
- Team: Choose the desired team.
- Channel: Select the appropriate channel from the dropdown.
- Message: Enter the following text: New News Post Added
Check here to view: - Click the dynamic content button, search for ‘Link to item’, and add it. This allows users to directly access the post from the channel.
Note: If needed, click Change connection to update the account used for posting the message.
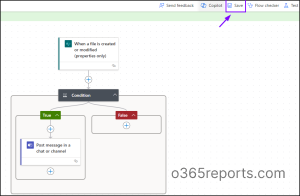
Your flow should now look like this. Save the flow, and you’re all set!
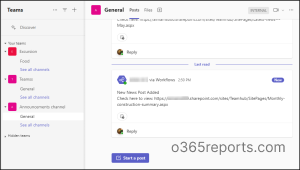
Experience:
Now, whenever a user adds a news post to the configured site, a notification will be sent to the selected Teams channel, appearing as shown below.
Similarly, you can use various available workflow connectors to automate a range of tasks in Microsoft 365.
Wrap Up:
We hope this blog has provided valuable insights on managing the retirement of Office 365 connectors in Microsoft Teams. Power Automate workflows are powerful tools that can handle more complex tasks, such as automating password expiration notifications, M365 user onboarding & offboarding, etc. Thank you for reading! If you have any questions or need further assistance, please leave a comment below. We’re happy to help!
