Every growing organization hires new employees frequently and the onboarding process starts right after hiring. The onboarding of new employees involves collaboration with various persons in the organization. Therefore, a system that could help through automation provides high benefits. Microsoft Power Automate has the capability to automate user onboarding tasks such as Office 365 account creation for new users, sending notifications, facilitating seamless approvals, and so on.
There exist multiple ways to execute this, and here we are using Microsoft Forms. When a form is filled out with the user’s details, it triggers the automation of Office 365 account creation with the manager’s approval followed by manager assignment.
For better understanding of the process to automate user onboarding, we have included the link for the demonstration video of flow construction and implementation.
A Comprehensive Overview of the Onboarding Flow:
Firstly, the pertinent organization members shall be allowed to access the created form for adding new user accounts. So, we shall share this form via Microsoft Teams, Outlook or any other Microsoft’s service.
- When anyone fills and submits the form, an approval request will be sent to the assigned manager through various channels such as their Outlook mailbox, the Approval tab within Power Automate or the Activity section in Teams.
- They shall approve the request after reviewing the new user details sent along with the approval request.
- This will then create a Microsoft 365 account under the organization’s tenant and will assign the manager.
- However, on rejection, the user will not get added and the form responder will get notified about the same.
Prerequisites for Workflow Setup:
- A valid Microsoft 365 subscription having a Power Automate license.
- Either User Admin or Global Admin role must be assigned.
These roles are required to perform administrative actions such as Azure AD account creation and manager assignment, which are essential for carrying out the onboarding process. This is needed only for the user who creates the flow as they will be required to establish connection with the Azure AD connector, to make use of its actions and triggers.
What are ‘Connectors’ in Power Automate?
Power Automate comprises a range of collaborative services that are referred to as ‘Connectors’. They are needed to establish connections with various external services and databases. By utilizing them, we can easily integrate with different applications and functionalities within Power Automate. Additionally, as Microsoft phases out Office 365 connectors in Teams and other services, you can use workflow connectors as alternatives for popular tasks, such as the Webhook connector for integrating with external systems, receiving SharePoint news in Teams channels, etc.
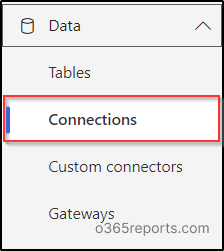
Connections with the required connectors could be made while using every new action/trigger during the flow construction itself. You shall check the connections that you’ve made by clicking on the ‘Connections’ section within the ‘Data’ tab on Power Automate’s home page.
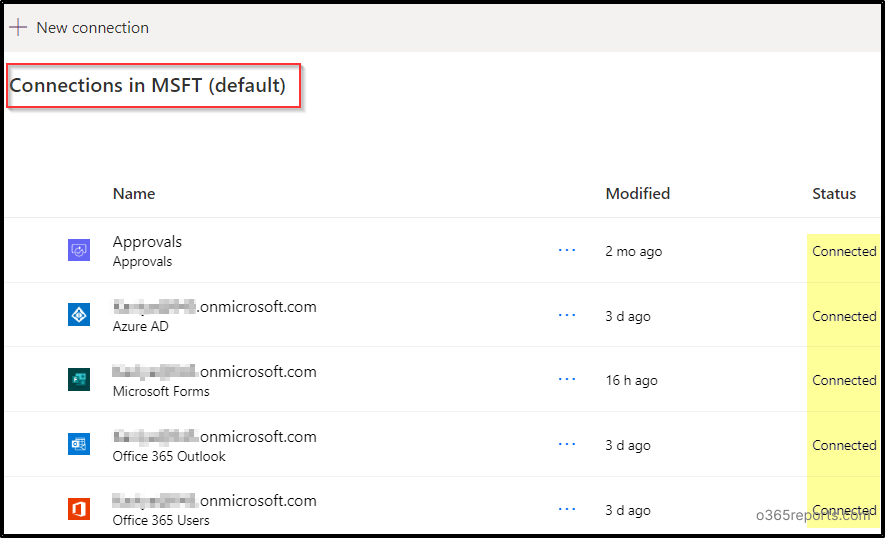
For our flow, connections with Microsoft Forms, Office 365 Outlook, Office 365 users, Azure AD and Approvals are essential. For instance, to use the ‘Send an email’ action in Power Automate, we need to establish connection with the ‘Outlook’ connector.
Using MS Forms with Flow to Automate Onboarding
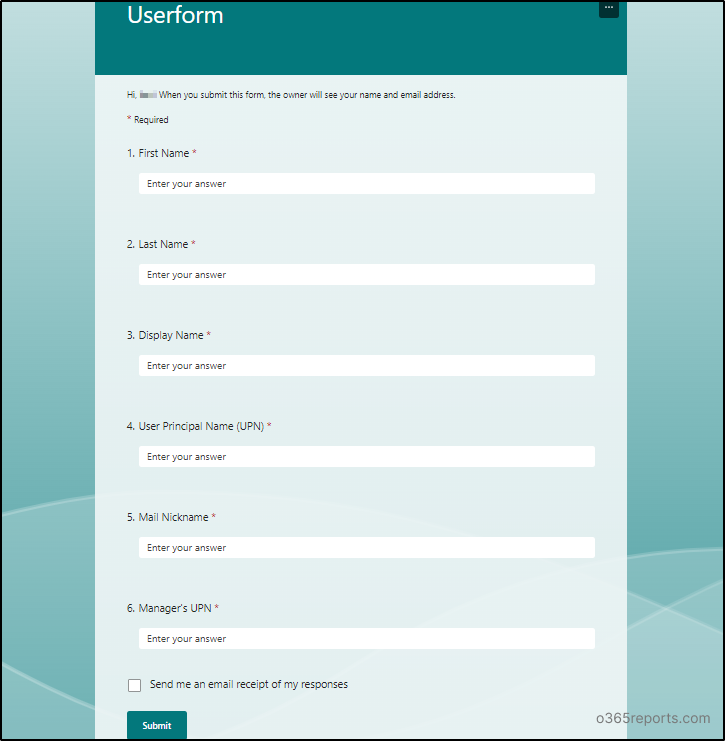
We need to create a Microsoft form having the mandatory fields for creating a new Microsoft 365 account for a user as in the following image. Specifically, it must contain the field ‘Manager’s UPN (User Principal Name)‘, under whose approval the new user will get added.
The steps to create the Microsoft 365 user onboarding flow is as follows.
- Creating the flow with MS forms
- Get manager’s profile for user onboarding approval
- Approval request in automated onboarding process
- Manager approved Azure AD account creation
- On rejection of user onboarding approval
Step 1: Creating the Flow with MS Forms
After creating the required form, we shall now proceed towards creating the flow with Power Automate.
- Login to your Power Automate portal. Then, click on the ‘Create’ tab and select Automated cloud flow.
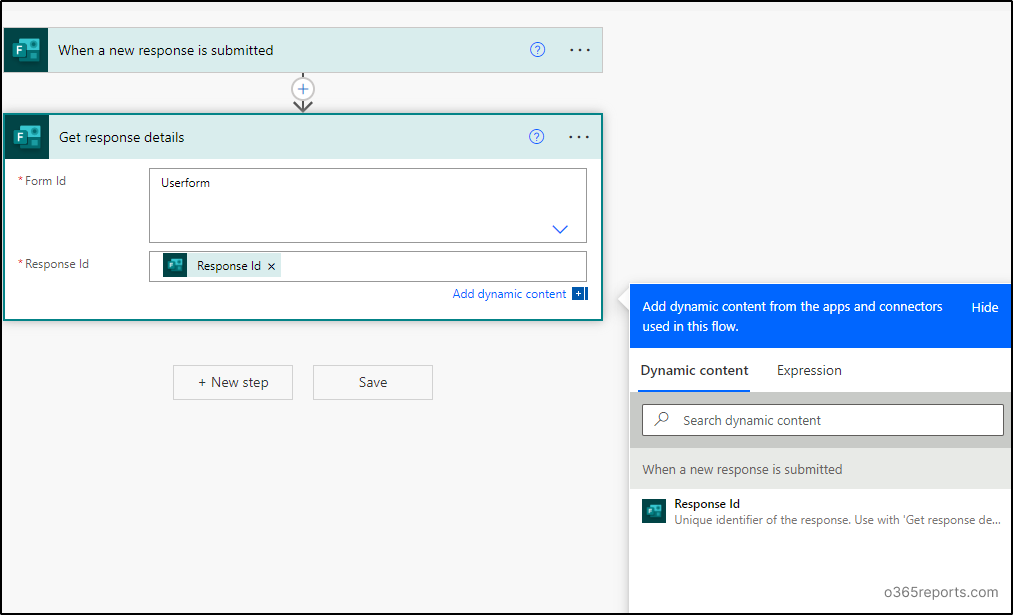
- Give your flow a name and select the action ‘When a new response is submitted’ from the MS Forms connector. This will trigger the flow whenever a new response is submitted.
- Click the dropdown arrow of the ‘Form Id’ field and select the form that you’ve created for this flow. Following that, select ‘New step’.
- Now, select the action Get response details. This will get all the values that one has filled out in the form, by passing the ‘Form Id’ and ‘Response Id’ from the dynamic content.
Note: Dynamic content allows you to dynamically retrieve and use data that we’ve used in previous steps from various connector sources, actions, and triggers.
Step 2: Get Manager’s Profile for User Onboarding Approval
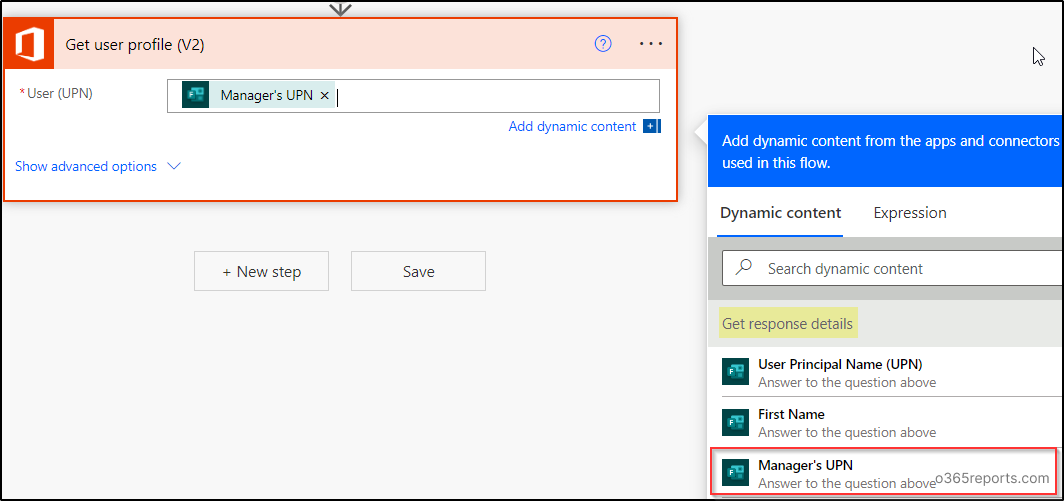
On moving forward, the next connector will be the Get user profile(V2) action from the ‘Office 365 users’ connection. This will fetch the manager’s information on passing their User Principal Name from the dynamic content.
2.1: What Would Happen if the Action ‘Get User Profile’ Fails
What would happen if the value entered for the manager’s UPN in the form is not a valid one? Undoubtedly, our flow will fail without the form responder’s knowledge. Considering that, we will send an email regarding the failure of the flow to the form responder.
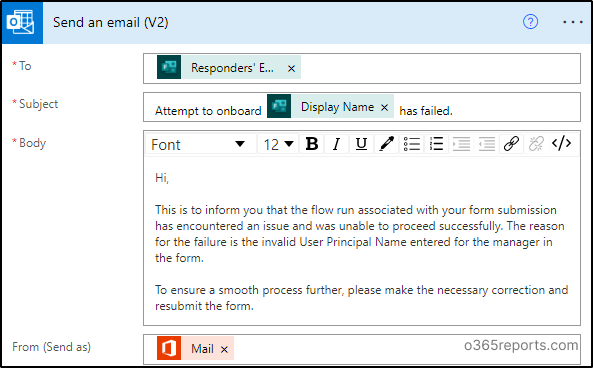
- To send the email notification, we shall add the next step with Send an email(V2) action from the ‘Outlook’ connection. It should run only if the action Get user profile(V2) fails.
- To do that, set the ‘Configure run after’ option of the Send an email(V2)action, as in the following image by clicking on its triple dots.

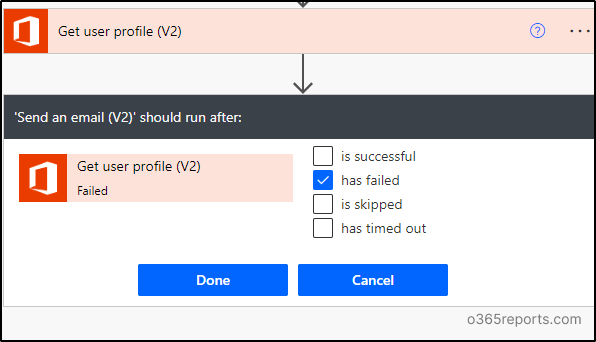
Therefore, an email will be sent only if the action ‘Get user profile’ fails.
Note: The ‘Send an email’ mail action used in our flow would deliver the mails as it is sent from the flow creator. However, if you wish to modify that, you can specify the desired sender mail address in the ‘From (Send as)’ field of ‘Send an email’ action within it’s ‘Show advanced options’.
2.2: If the Connectors Proceeds Well Yet!
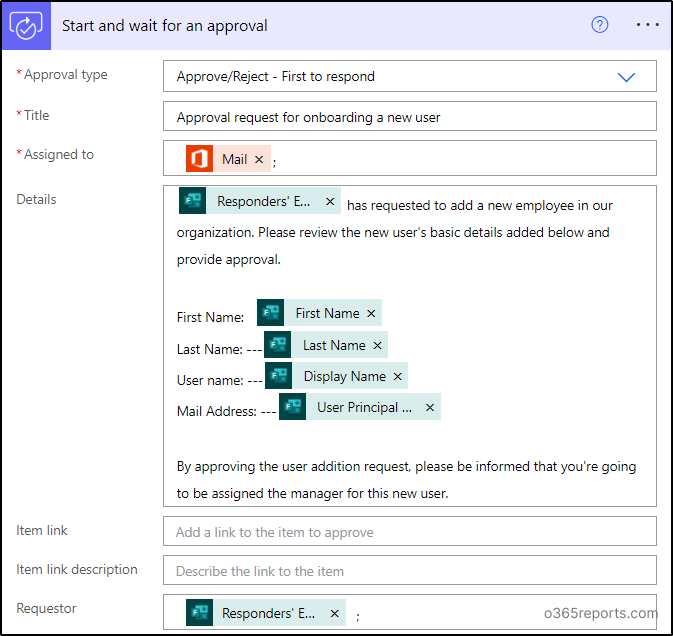
The next action will be Start and wait for an approval, to get approval from the corresponding manager of the user being created. Set it’s ‘Configure run after’ option as ‘is skipped’. In the wake of that, it will only run when its previous action ‘Send an email(V2)’ is skipped.
Step 3: Approval Request in Automated Onboarding Process
Each approval type has different usage in different cases. In our case, it is appealing to go with Approve/Reject-First to respond.
- Once chosen, fill in the ‘Title’ and ‘Assigned to’ (Manager’s Mail) fields.
- You can include any desired values from the dynamic content for the ‘Details’ field, which you want to bring to the manager’s consideration before approval.
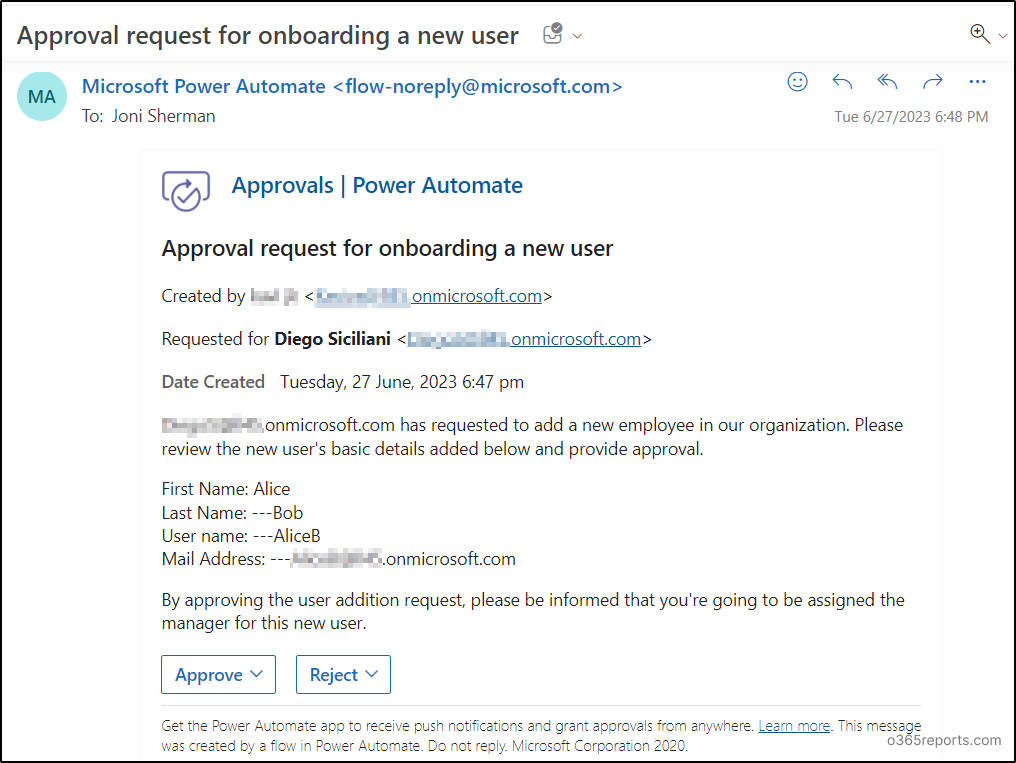
- The manager’s outlook inbox receives the approval request from Power Automate, as shown in the below image. This approval request will be sent, if someone submits a response in the form that we’ve created. This enables them to review the request and can decide either to approve or reject it.
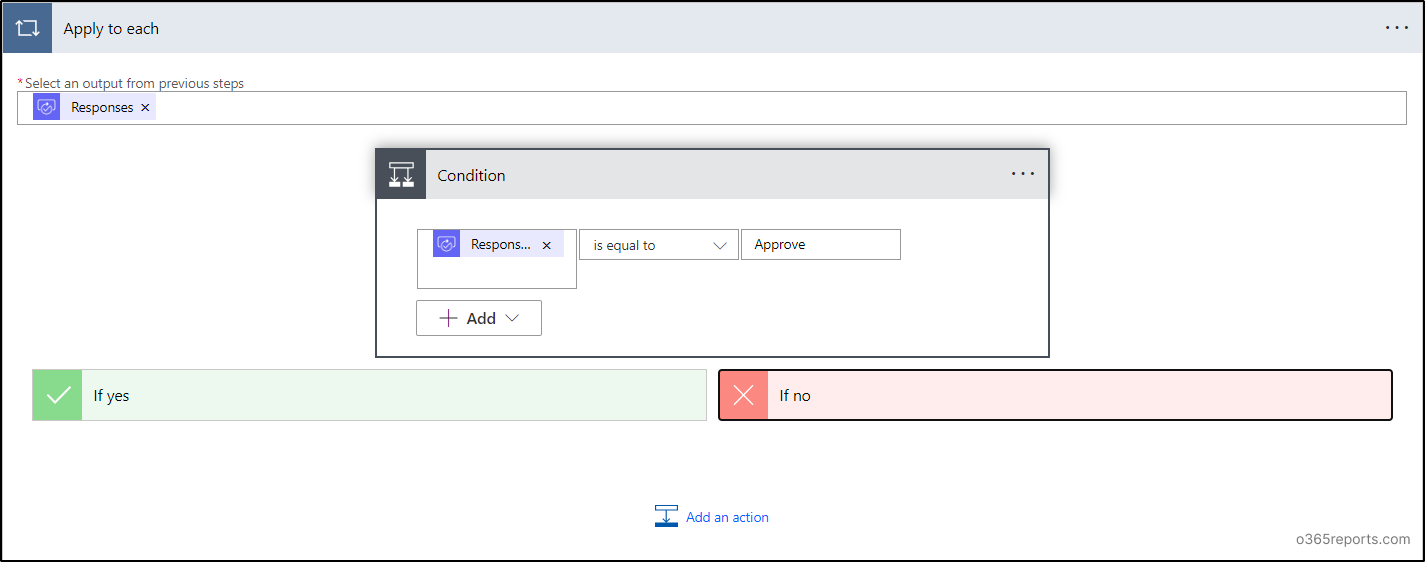
- In the next step, we are going to add the condition having ‘If yes’ and ‘If no’ branches. Set the condition as ‘Responses Approver Response is equal to Approve’.
Hence, if the response is ‘Approve’, the flow will proceed executing the ‘If yes’ branch. Otherwise, the ‘If no’ branch will be executed.
Step 4: Manager-Approved Azure AD Account Creation
The manager’s approval initiates the subsequent actions to automate user onboarding by automated Azure AD account provisioning.
- Search and select Create user action from the Azure AD connector and fill in the details.
- Set the Account Enabled as Yes. On one hand, the values for other fields like display name, User Principal Name could be retrieved from the dynamic content, if your form has fields as in the ‘Create user’ action. On the other hand, you can fill it out manually (less preferable).
- In the next step, use the Assign manager action from the Azure AD connection. Then select User Principal Name (under the ‘Create user’ action) for the User Id. For the manager’s user id, select Id (under the ‘Get user profile’ action) from the dynamic content.
- Now, use the Send an email(V2) action, parallel to the ‘Assign manager’ action. Then select the mail address of the ‘form responder’. Through this they will be notified when a new user is created.
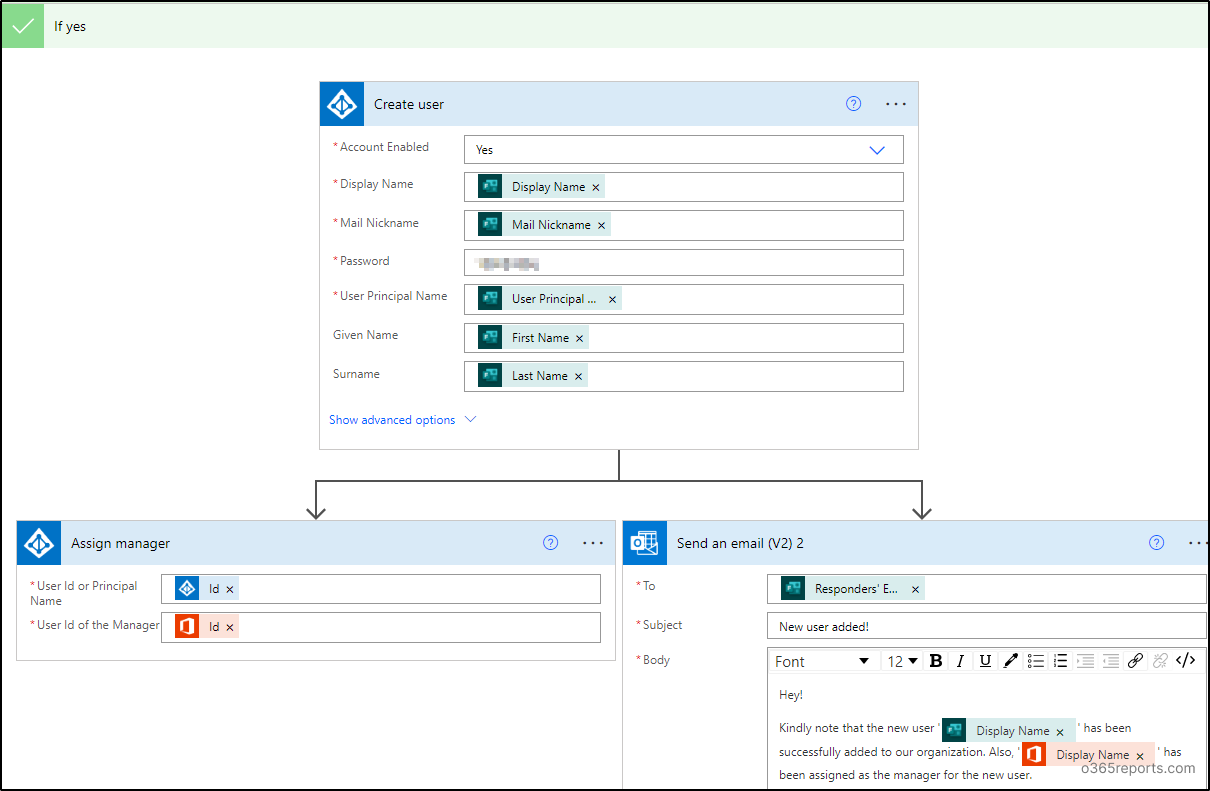
Thus, the approval results in the creation of an Azure AD user account, the assignment of the manager, and sending an email regarding the user creation.
But what if the manager rejects the approval? That is what we should specify in the ‘If no’ part under the Condition control.
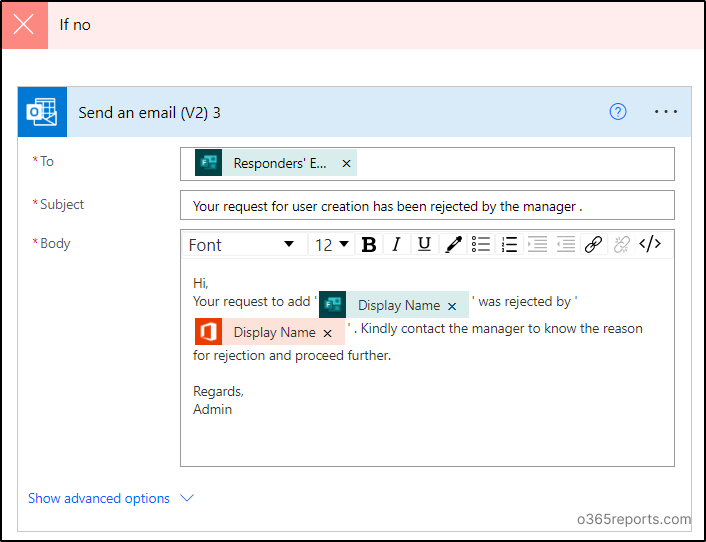
Step 5: On Rejection of User Onboarding Approval
Add Send an email action within If no part and select the Responder’s email
to notify them that the respective manager rejected their request.
Final Visualization of the Automated User Onboarding flow
We’re done and this is the overall outlook of our flow.

Additionally, you can create automated M365 user onboarding using lifecycle workflows, which is also a user-friendly, codeless solution.
Make use of this blog as a kick-start to accomplish your tasks with this fast and secured automation platform. As it has a deeper explanation of how each action works, you can automate user onboarding in your organization, even if you are new to Power Automate. You can also use Power Automate for automating other tasks like sending M365 password expiry notifications.
Level Up Your Microsoft 365 User Onboarding with AdminDroid’s Flow Agents
You’ve seen how Power Automate and Microsoft Forms streamline user onboarding by automating account creation, manager approvals, and notifications. But what if you could complete the entire process in just a few clicks, without the complex setup?
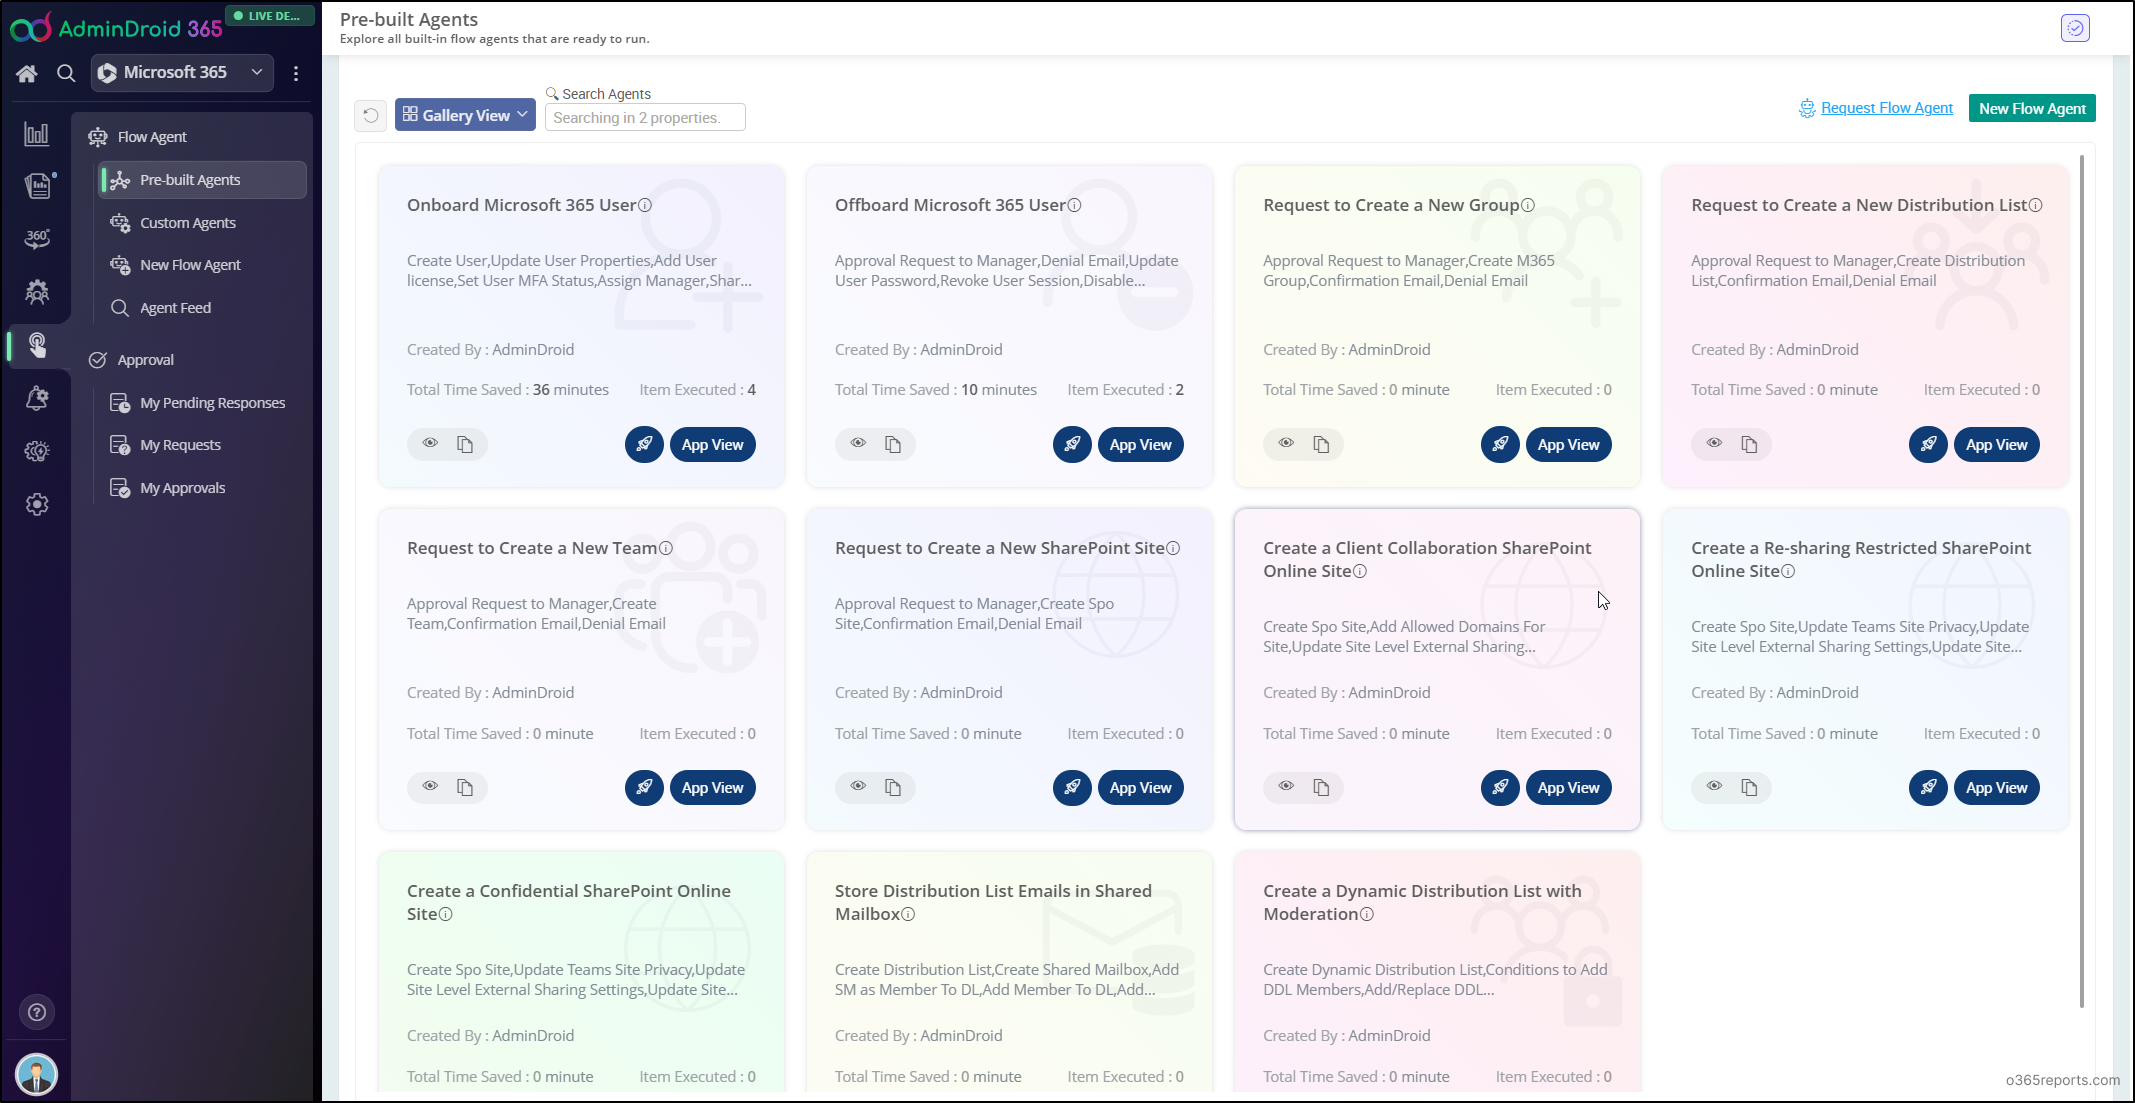
Yes, you read that right. It’s possible! AdminDroid’s Microsoft 365 automation tool offers a flexible user onboarding flow agent, enabling fast and consistent user provisioning in no time. This pre-built onboarding agent automates the entire onboarding process for multiple users at once with actions such as:
- Create new Microsoft 365 users
- Update user properties (department, job title, usage location)
- Assign licenses to the created user
- Add new user as members to groups
- Set MFA status for the user
- Assign managers to user accounts
- Share account password with user’s manager via email

Beyond simplifying onboarding, the automation tool includes 10+ ready-to-use agents for repetitive tasks such as offboarding, creating groups and sites, and more. Every flow agent is equipped with expert-designed actions and automatically generated forms that adjust to your specific needs.
And the best part?
In addition to built-in agents, AdminDroid lets you create custom flow agents that let you automate unique workflows tailored to your specifications with zero code. Using drag-and-drop simplicity, you can combine Microsoft 365 management actions to build custom flows that suit day-to-day needs. These workflows also support advanced features like approvals, pause and resume, revert actions, and more.
AdminDroid 365 goes beyond automation to give you complete control over your Microsoft 365 environment. Some key highlights are:
- 3500+ Extensive Reports: Gain insights across Teams, Exchange Online, SharePoint Online, OneDrive, and more. Explore mailboxes, emails, Teams activities, SPO sites, and user behavior in detail.
- 100+ Smart Dashboards: Get a centralized and comprehensive view of key areas such as users, licenses, security, mailbox storage, activity trends, etc.
- 450+ Management Actions: Easily execute routine tasks such as creating users, assigning managers, managing Teams, updating licenses, and more without switching portals.
- 10+ Reminder Agents: Notify admins or users about password expiry, MFA activations, and all other critical reminders with essential follow-ups.
- 85+ In-built Alert Policy Templates: Get real-time notifications to keep track of all activities happening across your Microsoft 365 tenant. You can also create custom policies as per your needs.
- Advanced Active Directory management: Take full control of your on-premises Active Directory environment with 450+ insightful reports and 70+ management actions.
These are just a glimpse! Download AdminDroid today and experience the 15-day free trial to see how it eases your Microsoft 365 and Active Directory management.
We genuinely value your thoughts and values, so please don’t hesitate to share your approach to automate user onboarding and other M365 tasks in your organization in the comment section below.