Exchange Online provides various reports to help monitor email activities and audit messages for compliance requirements. As an Exchange admin, you may need to track:
- Employees’ emails
- Inbound and outbound mail traffic
- The number of spam and malware detections
- The number of emails sent and received by a specific user
- Emails that matched rules, policies, and more
If you rely on the admin portals to view this information, you may struggle to find the specific section you need. You often have to navigate through multiple portals such as the Microsoft 365 admin center, Exchange admin center, Microsoft Defender portal, and Microsoft Purview portal. Because of this, many admins prefer using PowerShell or a Microsoft 365 reporting tool to track email activities more efficiently.
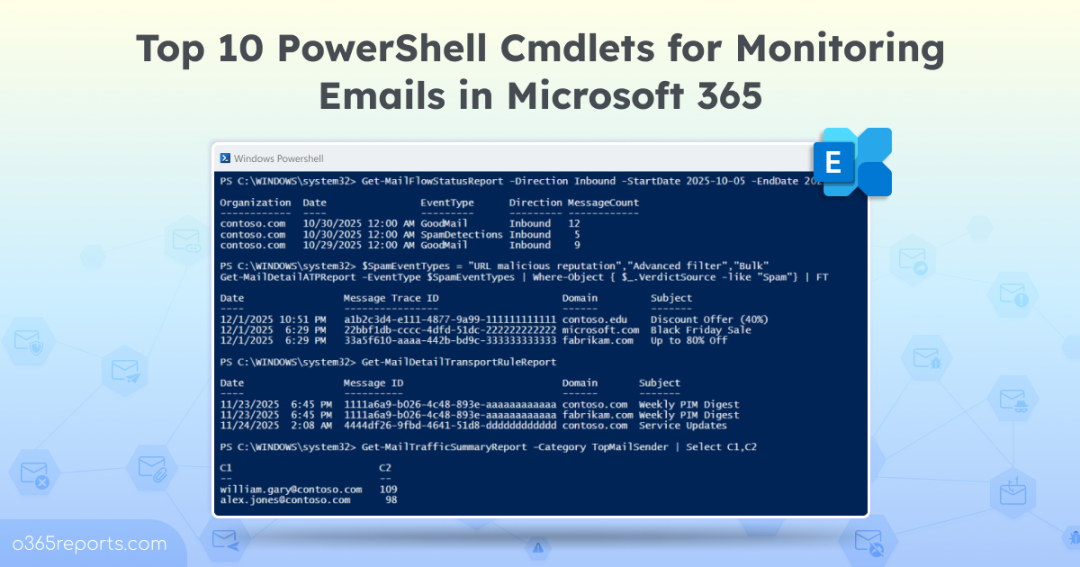
Reporting and Monitoring Emails in Office 365 using PowerShell
This blog lists the top 10 Exchange Online PowerShell cmdlets that help in monitoring and reporting employees’ email activity. With these cmdlets, you can generate the following email reports.
- Overall email traffic report
- Inbound and outbound email traffic report
- Exchange Online spam report
- Phishing detection report
- Malware detection report
- Transport rule audit report
- Redirected emails report
- DLP detection report
- Top senders and recipients report
- Microsoft 365 message trace report
Note: Before running these cmdlets, ensure you have connected to the Exchange Online PowerShell module.
1. Exchange Online Mail Traffic Report
Email traffic reports help you analyze an organization’s email traffic such as the number of emails sent and received, spam volume, malware detections, spoofed messages, etc.
|
1 |
Get-MailFlowStatusReport | Format-Table |
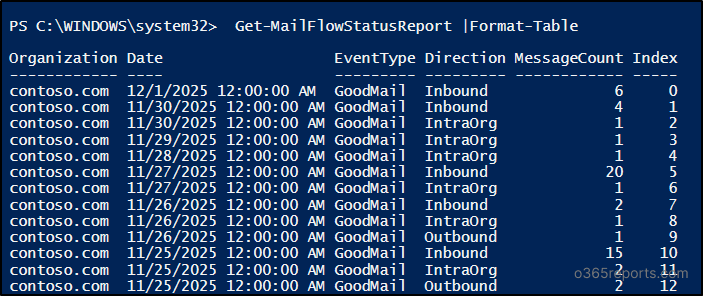
By default, this cmdlet retrieves email traffic statistics for the last 7 days. Using the -StartDate and -EndDate parameters, you can retrieve up to the past 90 days email statistics report.
Refer to the following section for the additional use cases for the ‘Get-MailFlowStatusReport’ cmdlet.
2. Inbound and Outbound Email Traffic Report
To retrieve incoming, outgoing, or internal organizational email traffic separately, use the -Direction parameter in the ‘Get-MailFlowStatusReport’ cmdlet.
|
1 |
Get-MailFlowStatusReport -Direction Inbound -StartDate 2025-10-05 -EndDate 2025-10-30 | FT |

This above cmdlet retrieves inbound email traffic statistics from October 05, 2025, to October 30, 2025.
|
1 |
Get-MailFlowStatusReport -Direction Outbound | FT |
This will retrieve the outbound email traffic statistics data for the past 7 days.
|
1 |
Get-MailFlowStatusReport -Direction IntraOrg | FT |
Execution of the above cmdlet retrieves the internal email traffic statistics of messages sent and received within the organization.
The -EventType param in the ‘Get-MailFlowStatusReport’ cmdlet helps you understand what happened to messages as they passed through filtering and protection layers.
|
1 |
Get-MailFlowStatusReport -Direction Inbound -EventType GoodMail -StartDate (Get-Date).AddDays(-30) -EndDate (Get-Date) |
The above example lists only the good mail received in the last month. You can also use event types such as EdgeBlockSpam, EmailMalware, EmailPhish, SpamDetections, or TransportRules.
3. Exchange Online Spam Reports
Email protection reports help you identify spam and malware detected by Exchange Online Protection (EOP). Here’s how you can use PowerShell to generate a report on emails detected as spam.
The ‘Get-MailDetailSpamReport’ cmdlet shows the details of spam messages sent and received by your organization.
|
1 2 |
$SpamEventTypes = "URL malicious reputation", "Advanced filter", "General filter", "Mixed analysis detection", "Fingerprint matching", "Domain reputation", "Bulk", "IP reputation" Get-MailDetailATPReport -EventType $SpamEventTypes | Where-Object { $_.VerdictSource -like "Spam"} | FT |
The above cmdlet lists spam messages detected in the last 10 days.
Note: Organizations with Defender for Office 365 subscriptions can get up to 30 days of data.

In some situations, emails sent from your organization are rejected or marked as spam by Microsoft 365. To identify those emails, execute the following cmdlet.
|
1 2 |
$SpamEventTypes = "URL malicious reputation", "Advanced filter", "General filter", "Mixed analysis detection", "Fingerprint matching", "Domain reputation", "Bulk", "IP reputation" Get-MailDetailATPReport -EventType $SpamEventTypes -Direction Outbound | Where-Object { $_.VerdictSource -like "Spam"} | FT |
Sometimes, good inbound emails are also determined as spam by anti-spam filters. By checking those emails, you can whitelist a domain or specific email address.
To view inbound spam messages, use the following cmdlet.
|
1 2 |
$SpamEventTypes = "URL malicious reputation", "Advanced filter", "General filter", "Mixed analysis detection", "Fingerprint matching", "Domain reputation", "Bulk", "IP reputation" Get-MailDetailATPReport -EventType $SpamEventTypes -Direction Inbound | Where-Object { $_.VerdictSource -like "Spam"} | FT |
To view spam emails sent by a specific user for a custom period, run the below. Make sure to replace <UserUPN> with the user’s user principal name and <YYYY-MM-DD> with the start and end dates.
|
1 2 |
$SpamEventTypes = "URL malicious reputation", "Advanced filter", "General filter", "Mixed analysis detection", "Fingerprint matching", "Domain reputation", "Bulk", "IP reputation" Get-MailDetailATPReport -EventType $SpamEventTypes –SenderAddress “<UserUPN>” -StartDate “<YYYY-MM-DD>” -EndDate “<YYYY-MM-DD>” | Where-Object { $_.VerdictSource -like "Spam"} | FT |
To view spams received by a user, run the cmdlet with the –RecipientAddress param instead of –SenderAddress.
4. Exchange Online Phishing Reports
Phishing reports help you identify messages classified as phishing by Microsoft Defender for Office 365.
To view all phishing messages detected in your organization for the last 10 days, you can use the following cmdlet.
|
1 2 |
$PhishEventTypes = "URL malicious reputation", "Advanced filter", "General filter", "Spoof intra-org", "Spoof external domain", "Spoof DMARC", "Impersonation brand", "Mixed analysis detection", "File reputation", "Fingerprint matching", "URL detonation reputation", "URL detonation", "Impersonation user", "Impersonation domain", "Mailbox intelligence impersonation", "File detonation", "File detonation reputation", "Campaign" Get-MailDetailATPReport -EventType $PhishEventTypes | Where-Object { $_.VerdictSource -like "Phish"} |

To list all the phishing emails received by your organization in the last 10 days, you can use the demonstration below.
|
1 2 |
$PhishEventTypes = "URL malicious reputation", "Advanced filter", "General filter", "Spoof intra-org", "Spoof external domain", "Spoof DMARC", "Impersonation brand", "Mixed analysis detection", "File reputation", "Fingerprint matching", "URL detonation reputation", "URL detonation", "Impersonation user", "Impersonation domain", "Mailbox intelligence impersonation", "File detonation", "File detonation reputation", "Campaign" Get-MailDetailATPReport -Direction Inbound -EventType $PhishEventTypes | Where-Object { $_.VerdictSource -like "Phish"} |
Use the following cmdlet to get all the phishing emails sent from your organization.
|
1 2 |
$PhishEventTypes = "URL malicious reputation", "Advanced filter", "General filter", "Spoof intra-org", "Spoof external domain", "Spoof DMARC", "Impersonation brand", "Mixed analysis detection", "File reputation", "Fingerprint matching", "URL detonation reputation", "URL detonation", "Impersonation user", "Impersonation domain", "Mailbox intelligence impersonation", "File detonation", "File detonation reputation", "Campaign" Get-MailDetailATPReport -Direction Outbound -EventType $PhishEventTypes | Where-Object { $_.VerdictSource -like "Phish"} |
To find the phishing emails sent by a specific user at a defined period, use the following cmdlet.
|
1 2 |
$PhishEventTypes = "URL malicious reputation", "Advanced filter", "General filter", "Spoof intra-org", "Spoof external domain", "Spoof DMARC", "Impersonation brand", "Mixed analysis detection", "File reputation", "Fingerprint matching", "URL detonation reputation", "URL detonation", "Impersonation user", "Impersonation domain", "Mailbox intelligence impersonation", "File detonation", "File detonation reputation", "Campaign" Get-MailDetailATPReport –SenderAddress “<UserUPN>” -StartDate “<YYYY-MM-DD>” -EndDate “<YYYY-MM-DD>” -EventType $PhishEventTypes | Where-Object { $_.VerdictSource -like "Phish"} |
5. Exchange Online Malware Reports
The ‘Get-MailDetailATPReport’ cmdlet helps to identify emails that contain malware.
To view all the sent and received malwares for past 10 days,
|
1 2 |
$MalwareEventTypes = "File detonation", "File detonation reputation", "File reputation", "Anti-malware engine", "URL malicious reputation", "URL detonation", "URL detonation reputation", "Campaign" Get-MailDetailATPReport -EventType $MalwareEventTypes | Where-Object { $_.VerdictSource -like "Malware"} |
To view malwares sent from your organization,
|
1 2 |
$MalwareEventTypes = "File detonation", "File detonation reputation", "File reputation", "Anti-malware engine", "URL malicious reputation", "URL detonation", "URL detonation reputation", "Campaign" Get-MailDetailATPReport -Direction Inbound -EventType $MalwareEventTypes | Where-Object { $_.VerdictSource -like "Malware"} |
To list detected malware emails received by your organization,
|
1 2 |
$MalwareEventTypes = "File detonation", "File detonation reputation", "File reputation", "Anti-malware engine", "URL malicious reputation", "URL detonation", "URL detonation reputation", "Campaign" Get-MailDetailATPReport -Direction Outbound -EventType $MalwareEventTypes | Where-Object { $_.VerdictSource -like "Malware"} |
To view malwares sent by specific users on a defined period,
|
1 2 |
$MalwareEventTypes = "File detonation", "File detonation reputation", "File reputation", "Anti-malware engine", "URL malicious reputation", "URL detonation", "URL detonation reputation", "Campaign" Get-MailDetailATPReport –SenderAddress “<UserUPN>” -StartDate “<YYYY-MM-DD>” -EndDate “<YYYY-MM-DD>” -EventType $MalwareEventTypes | Where-Object { $_.VerdictSource -like "Malware"} |
6. Identify Which Transport Rule was Applied to an Email
The ‘Get-MailDetailTranportRuleReport’ cmdlet shows details of messages that match the conditions defined by any transport rules.
|
1 |
Get-MailDetailTransportRuleReport | Format-Table Date, Domain, Subject,TransportRule, MessageTraceID, MessageID |

The above PowerShell cmdlet shows the applied transport rule along with the email details for the last 10 days.
To view all the emails processed by specific transport rule,
|
1 |
Get-MailDetailTranportRuleReport -TransportRule "<RuleName>" | Format-Table Date, Domain, Subject,TransportRule, MessageTraceID, MessageID |
The example below retrieves the messages sent by Jones@contono.com that matched the condition defined by the transport rule between November 25, 2025, and November 30, 2025.
|
1 |
Get-MailDetailTransportRuleReport -StartDate 2025-11-25 -EndDate 2025-11-30 -SenderAddress Jones@contoso.com | Format-Table Date, Domain, Subject,TransportRule, MessageTraceID, MessageID |
7. Identify Emails that Redirected to Another Email Address
To identify emails and Exchange transport rules that redirect the message to another email address, run the following cmdlet.
|
1 |
Get-MailDetailTransportRuleReport –Action RedirectMessage | Format-Table Date, Domain, Subject,TransportRule, MessageTraceID, MessageID |

8. Monitor Emails Detected by DLP Policy
Most organizations configure DLP policies to secure their confidential email data. To identify emails that triggered any DLP rules (Data Loss Prevention policies) in the past 7 days, you can run the cmdlet below.
|
1 |
Get-MailDetailDLPPolicyReport |
9. Top Senders and Recipient Report
Top domain mail flow status insights can be obtained using the ‘Get-MailFlowStatusReport’ cmdlet. By supplying ‘Category’ value, you can get top senders and recipients reports.
To get top mail senders report,
|
1 |
Get-MailTrafficSummaryReport –Category TopMailSender | Select C1,C2 |
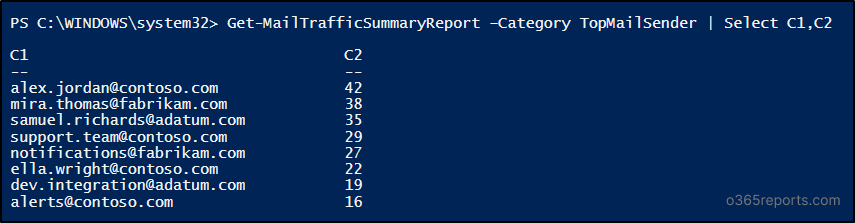
The given example retrieves top mail senders and their mail count for the last 90 days. To view top senders for the custom period, you can use -StartDate and -EndDate params.
To list top mail recipients report,
|
1 |
Get-MailTrafficSummaryReport –Category TopMailRecipient –StartDate 2025-11-15 -EndDate 2025-11-30 | Select C1,C2 |
This example shows the top mail recipient statistics between November 15, 2025, and November 30, 2025.
To view top spam recipients,
|
1 |
Get-MailTrafficSummaryReport –Category TopSpamRecipient | Select C1,C2 |
To display the top malware recipient report,
|
1 |
Get-MailTrafficSummaryReport -Category TopMalwareRecipient | Select C1,C2 |
To get Office 365 top malware report,
|
1 |
Get-MailTrafficSummaryReport –Category TopMalware | Select C1,C2 |
In this report, column C1 is the malware name and column C2 is the number of appearances.
10. Get Microsoft 365 Message Tracing Report
Most admins prefer message tracking to monitor email flow. With message tracing, admins can get complete information of the sent, received, purged, and deleted message. The information includes,
- Sender address
- Recipient address
- Sent/received date
- Email Subject
- Email delivery status
- Email size
- Source IP address (From IP)
- Message trace id, etc.
To get a message tracking report, run the below cmdlet
|
1 |
Get-MessageTraceV2 |

By default, the cmdlet retrieves past 48 hours of data. If you want to retrieve the last 10 days’s data, you can use –StartDate and –EndDate parameters. To search message data for more than 10 days, you can use Start-HistoricalSearch and Get-HistoricalSearch cmdlets.
The below example retrieves message trace information for messages sent by a specific user between the custom period.
|
1 |
Get-MessageTraceV2 –SenderAddress John@contoso.com -StartDate 2025-11-23 -EndDate 2025-11-30 |
To export message trace report as a CSV file,
|
1 |
Get-MessageTraceV2 | Export-CSV <FilePath> -NoTypeInformation |
If you want to filter the message trace details, you can send the output to grid view.
|
1 |
Get-MessageTraceV2 | Out-GridView |
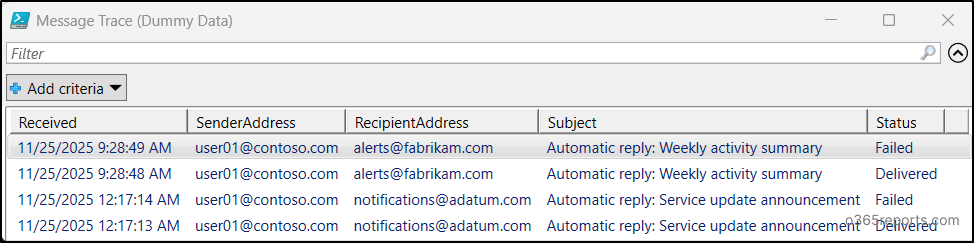
In this way, you can filter or narrow down the message trace details like
- Message trace by subject,
- Message trace by delivery status such as delivered, failed, pending, expanded, quarantined, filtered as spam, and unknown.
To generate more customized message trace report or cmdlet examples for most needed use cases, you can refer to the dedicated blog on message tracing using PowerShell.
Challenges in Generating Email Reports with PowerShell
Monitoring email activity through PowerShell is one of the toughest jobs because
- It requires different cmdlets for each email activity.
- Even after finding the right cmdlet, you need to use multiple filters and parameters to get the desired report.
- If your organization is large, you cannot retrieve all the data due to the PowerShell session expiry.
So, what if there is the easiest way to monitor employee emails?
A tool like AdminDroid will help you track email activities and get an in-depth view of your organization’s mail flow.
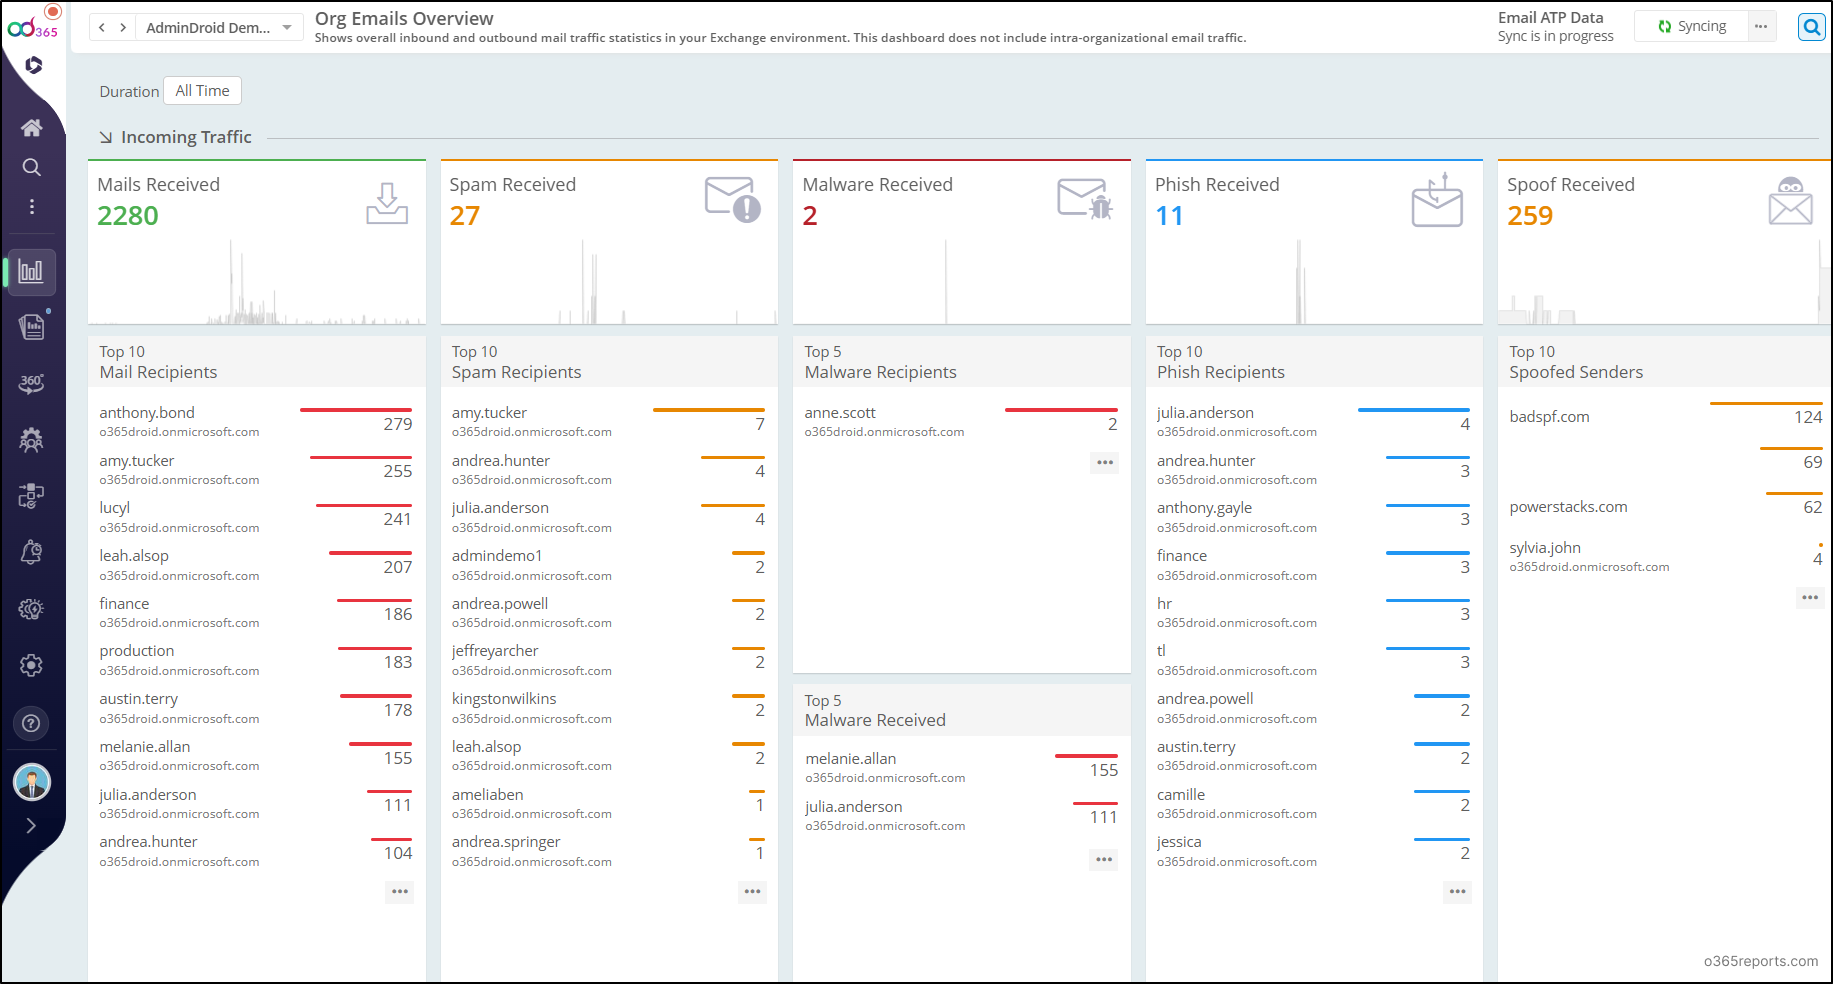
AdminDroid’s Microsoft 365 email monitoring tool provides 400+ pre-built email reports and smart dashboards that give you instant insights into your organization’s email activity. With features like Column Customization, Views, and Advanced Filters, you can create tailored reports in just a few clicks.
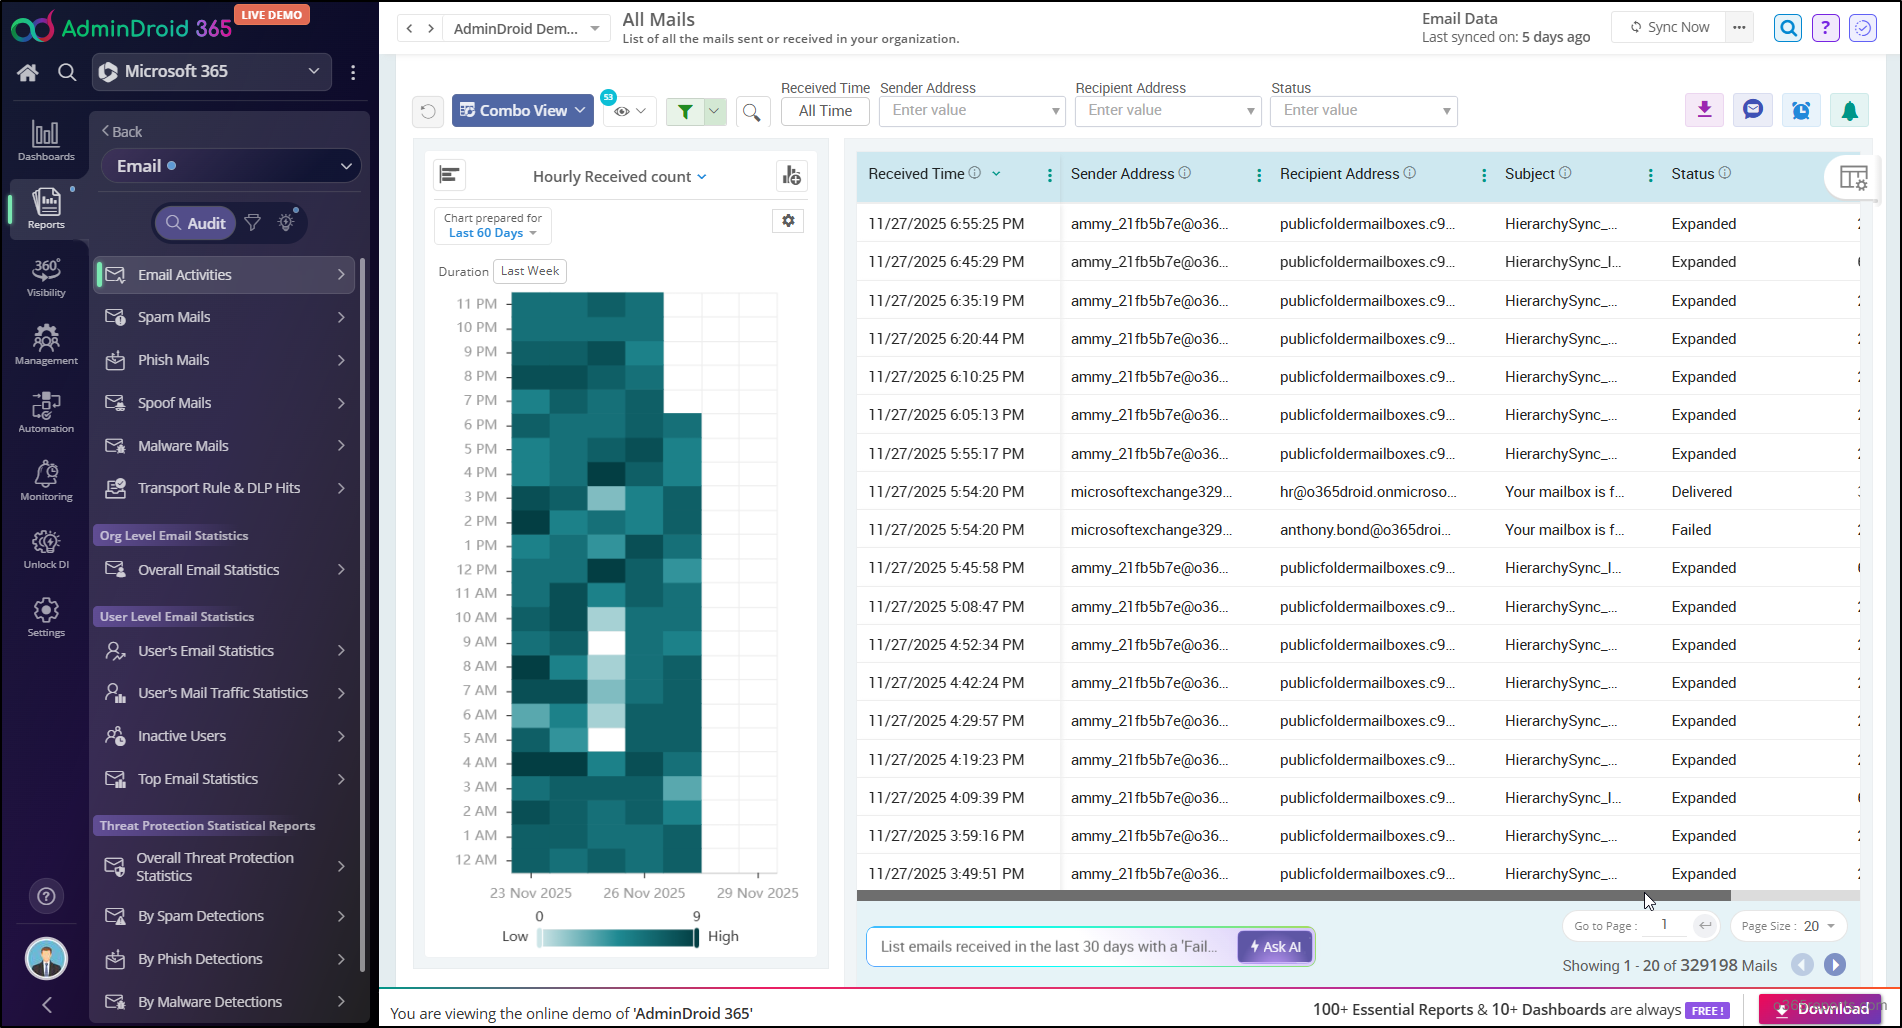
Each report provides AI-powered graphical analysis to gain insights and better understand the data in a visually appealing manner.
AdminDroid 365 goes beyond email reporting and provides complete control across your Microsoft 365 environment. Key capabilities include:
- 3500+ Extensive Reports: Explore detailed insights across Teams, Exchange Online, SharePoint Online, OneDrive, and more. This helps you analyze activities across mailboxes, emails, Teams, SPO sites, and users in detail.
- 100+ Smart Dashboards: Get a unified and comprehensive view of users, licenses, security, mailbox storage, activity trends, and more.
- 450+ Management Actions: Perform routine tasks like creating users, assigning managers, managing Teams, updating licenses, etc., without switching portals.
- 10+ Reminder Agents: Automatically notify admins or users about password expiry, MFA activations, and other critical events.
- 85+ In-built Alert Policy Templates: Receive real-time alerts on key activities across your tenant. You can also create custom policies as per your needs.
- Advanced Active Directory management: Get full control of your on-prem AD with 450+ reports and 70+ admin actions.
These are just a glimpse! Download AdminDroid today and explore the 15-day free trial to see how it simplifies Microsoft 365 and Active Directory management.
I hope this blog will help you monitor emails in the Microsoft 365 environment.