Living in an era where cyberattacks happen every second, admins should configure Microsoft 365 tenants with crucial security settings. But here’s the thing: merely configuring the security settings in Microsoft 365 is not enough; it’s about how you effectively monitor the security configurations.
Mistakes may happen and sometimes users/admins inadvertently make changes to the security settings, which might cause a big loophole in Microsoft 365 security. So, how do you stay on top of these critical security settings?
Fortunately, there are several free Microsoft 365 management tools available. One of them is Maester, an open-source Microsoft security test automation framework. Developed through extensive research, raised to refurnish the way we monitor crucial security settings. Let’s dive into it in detail!
What is Maester?
Maester is an open-source, PowerShell-based security test automation framework that helps organizations validate the security configuration of their Microsoft 365 environment. It evaluates your Microsoft 365 tenant against Microsoft security best practices by running automated security tests and providing detailed validation results.
What does Maester do?
- Validates your Microsoft 365 security posture by running 360+ built-in security tests against your tenant.
- Assesses multiple Microsoft 365 services, including Microsoft Entra ID, Exchange Online, Microsoft Defender for Office 365, Teams, SharePoint Online, Active Directory, and enterprise applications.
- Checks compliance against industry security frameworks such as CISA, CIS, EIDSCA, and ORCA.
- Tests Conditional Access policies using Microsoft Graph What-If simulations to verify policy behavior before deployment.
- Supports Security as Code, allowing you to define, version, and automate security validations using PowerShell and Pester.
- Lets you create custom security tests to validate organization-specific security and compliance requirements.
- Supports multi-tenant assessments, enabling you to validate multiple Microsoft 365 tenants and consolidate the results into a single interactive report.
- Generates interactive reports with detailed pass/fail results, remediation guidance, and supports exporting reports in HTML, CSV, Excel, and more.
- Sends notifications through channels like email and Microsoft Teams, helping administrators stay informed about security test results.
- Integrates with automation platforms such as GitHub Actions, Azure DevOps, and Azure Automation to enable continuous security validation as part of CI/CD workflows.
How to Install the Maester Tool?
The Maester tool depends on Pester and Microsoft Graph PowerShell to work. By running the below cmdlets, both dependencies will automatically get deployed.
|
1 2 3 4 5 |
Install-Module Pester -SkipPublisherCheck -Force -Scope CurrentUser Install-Module Maester -Scope CurrentUser md maester-tests cd maester-tests Install-MaesterTests .\tests |
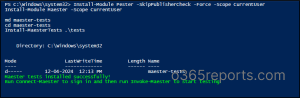
Once done, run the below cmdlet to connect to your Microsoft 365 tenant.
|
1 |
Connect-Maester |
How to Run the Pre-Built Maester Security Tests?
After installation, you can start using the Maester tool to run the tests & monitor your Microsoft 365 tenant’s security configurations.
To run pre-built security tests, execute the cmdlet below.
|
1 |
Invoke-Maester |
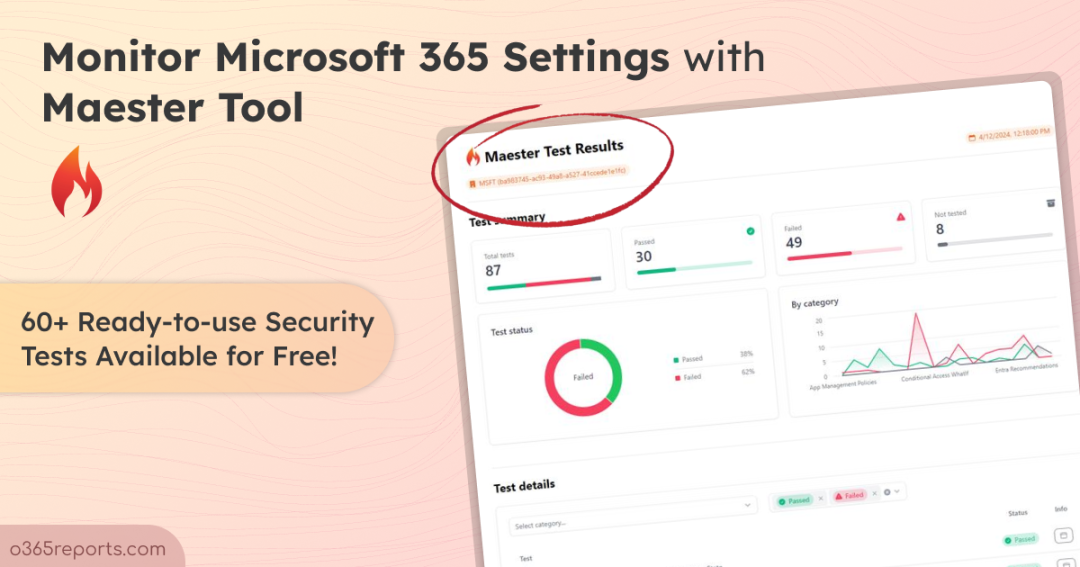
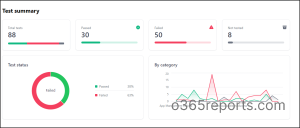
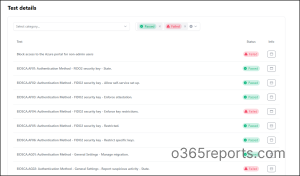
Once the tests have been executed, Maester will generate a comprehensive HTML report, offering detailed insights into each test. The Maester test report comprises two main sections:
Test Summary: This section provides an overview of the test results, including successful, failed, and untested cases. Presented in visually engaging representations, it offers a quick glimpse into the overall test outcome.
Test Details: Here’s where the real value lies. In this section, you’ll find a breakdown of all the tests, along with their status (Pass/Fail). Additionally, each test includes an “Info” column. Clicking on it reveals further details about the test, allowing for deeper analysis and troubleshooting.
You may ask, do we need to execute the above cmdlets every time we want to get the test results? But that’s not needed! Let’s see how!
Automate Microsoft 365 Security Settings Monitoring with Maester
Maester can seamlessly integrate with DevOps services to automate the monitoring of security configurations. By setting up Maester in Azure DevOps pipelines, GitHub, or Azure Automation, you can ensure that tests run automatically at regular intervals. This Maester automation guarantees that your tenant configuration remains compliant with your policies.
You have the flexibility to schedule tests to run daily or monthly and view the comprehensive test results within the respective DevOps service interfaces. Additionally, you can configure Maester to send an email summary at the end of each monitoring cycle using the “Send-MtMail” cmdlet in your GitHub/Azure DevOps daily monitoring workflow.
You might be wondering if the pre-built test cases cover all the scenarios you need. They may not, but don’t worry! With Maester, you can create custom tests tailored to your specific requirements and execute them seamlessly. Let’s dig it!
Create Custom Tests and Run with Maester Tool
Maester is built on top of the Pester module, a PowerShell-based test framework (Security as Code – SaC) used for writing and running tests. Pester employs an English-like, easily understandable format for writing tests.
So, you need to use the Pester code and test it with Maester. To do it, follow the steps below.
- Create a Custom Test File in the Maester Folder.
- Add Security Tests to the File.
- Run the Custom Test Using Maester.
1. Create a Custom Test File in Maester Folder
After installing the Maester module, a folder named “Custom” is automatically created in the same location as the module. This is where you need to create your custom test files. To create a custom test file there, follow the steps below.
- Open Windows PowerShell ISE as you normally would.
- Create an empty file named “<CompanyName>Entra.Test.ps1”.
- Save the file in the “Custom” folder of the Maester module.
Note: Ensure that you use the exact filename format with the “Tests.ps1” suffix so that the file can be automatically discovered and run when you invoke the Maester module.
2. Add Security Tests to the File
Now, you need to add the security tests inside the created file. Here, I have given an example to check whether a specific Conditional Access policy exists in the tenant or not.
|
1 2 3 4 5 6 7 |
Describe "ContosoEntraConfig" -Tag "Entra", "Contoso" { It "Check 'Block Access for External Users' policy" { $PolicyID = "Specify the policyID" $Policy = Get-MgIdentityConditionalAccessPolicy -ConditionalAccessPolicyId $PolicyID $Policy | Should Not BeNullOrEmpty } } |
3. Run the Custom Security Tests with Maester
Once done, you need to run the below cmdlet to execute the custom-created test.
|
1 |
Invoke-Maester .\tests\Custom\ |
Upon successful testing, Maester will provide you with the output of your tests. Furthermore, you can add more test cases or new test files based on your requirements and run with the above cmdlet.
Execute Conditional Access What-If Tests with Maester
Recently, Microsoft introduced the Conditional Access What-If tool to help administrators understand how their Conditional Access policies are enforced without requiring actual user sign-ins.
Typically, after configuring Conditional Access policies with conditions such as locations, device platforms, or user risk, administrators perform manual sign-ins to verify that the expected policies are applied. This process can be time-consuming, especially when testing multiple scenarios.
Maester leverages the Microsoft Entra Conditional Access What-If API to automate this validation. It simulates sign-in scenarios and evaluates which Conditional Access policies would be applied, helping administrators verify policy behavior before making changes or deploying them to production.
For example, the following command simulates a sign-in for a user accessing a cloud application and returns the Conditional Access policies that would be enforced:
|
1 2 3 |
Test-MtConditionalAccessWhatIf ` -UserId "admin@contoso.com" ` -ApplicationId "00000002-0000-0000-c000-000000000000" |
This allows you to verify whether controls such as MFA enforcement, access blocking, or other Conditional Access requirements are applied as expected, all without the user actually signing in.
That’s all! We have covered all the essential functionalities of Maester to monitor Microsoft 365 security settings! Kudos to Merill and his team for giving us the Maester security monitoring tool! By the way, this module is constantly updating with new tests, you can get that using the “Update-MaesterTests”. Also, note that the current version of the module shows some duplications in skipped tests and also tests showing failed even though the exact configurations exist in the tenant. If you have any questions, don’t hesitate to reach out to us in the comment section below. We’re here to help!