Email is a critical part of business communication, but an unfiltered email flow can expose users to risks like spam, phishing, malware, etc. Configuring the mail flow rules to filter spam is a good start. To take it a step further, Microsoft 365 allows you to configure message delivery restrictions. By controlling who can send emails to your organization, you can ensure that only trusted communications reach your inboxes. This guide will walk you through configuring message delivery restrictions in Exchange Online to block unwanted emails and enhance email security in Microsoft 365.
What is Message Delivery Restrictions in Exchange Online?
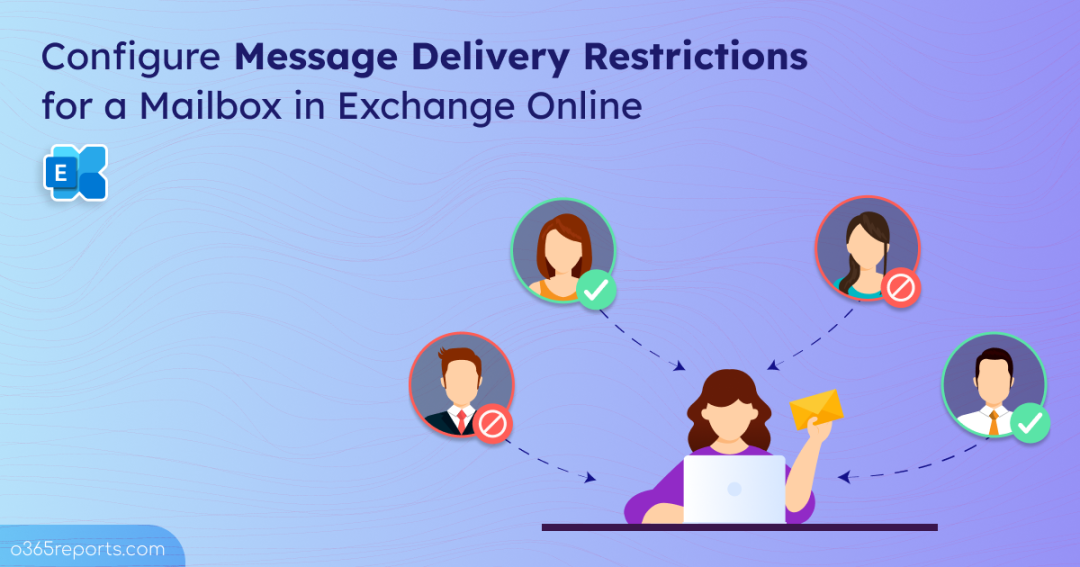
Message delivery restrictions in Exchange Online let you control who can send emails to specific user mailboxes. By default, user mailboxes receive messages from both internal and external users, increasing the risk of email-based cyber threats. Configuring these restrictions allows you to accept or block messages on a desired mailbox from specific users or groups.
Important: Message delivery restrictions allow you to restrict email senders for a mailbox, but they do not affect mailbox permissions. For example, if a user has Full Access to a mailbox, they can still perform actions like moving or copying emails in the mailbox, even if they are restricted from receiving messages. These restrictions only impact incoming email flow, not the user’s ability to interact with or manage the mailbox contents.
How to Configure Message Delivery Restrictions for Exchange Online Mailboxes?
You can configure message delivery restrictions for a mailbox in Exchange Online using the methods below.
- Set up message delivery restrictions in the Exchange admin center
- Restrict message delivery using Exchange Online PowerShell
Configure Message Delivery Restrictions in the EAC
In most Microsoft 365 organizations, high-profile accounts are prime targets for attackers due to their access to sensitive business data. When high-privilege accounts click on emails containing malicious links or attachments, it can lead to data loss. To protect these accounts, it’s essential to control who can send messages to them.
Use the Exchange admin center to configure message delivery restrictions for these high-profile mailboxes as shown below. This helps to block unwanted emails and ensures that only trusted senders can contact these accounts.
- Sign in to the Exchange admin center.
- Navigate to the Recipients >> Mailboxes.
- Select the mailbox that you want to configure message delivery restrictions for. Then, click the Mailbox tab in the user profile.
- Click the Manage message delivery restriction link under Mail flow settings >> Message delivery restriction.
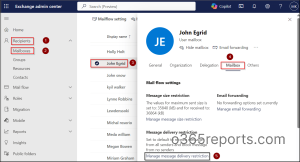
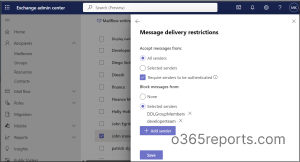
- It will open a new tab called Message delivery restriction with the following options:
Accept messages from: You can use this section to specify who can send messages to a selected user mailbox.
1. All Senders: This is the default option selected for all mailboxes, which means the user mailbox accepts messages from all senders.
2. Selected Senders: You can select this option to allow the user mailbox to receive messages only from specific senders. To add a sender, click the Add sender (+) icon. A list of users in your Exchange Online will appear. Select the desired users, click Confirm, and hit Save.
3. Require senders to be authenticated: This option allows you to reject emails from external senders and ensures that only authenticated internal senders can deliver messages. To block specific internal users, you can use the ‘Block messages from’ section.
Block Messages From: This section prevents specific users or groups from sending messages to the selected mailbox. The following options are available under the Block category:
1. None: This default option indicates that the user’s mailbox will not block or reject messages from any senders within the Microsoft 365 organization.
2. Selected Senders: Use this option to specify a list of senders who should be blocked from sending messages to a user mailbox. To add a sender, click the Add sender (+) icon. Select the desired users from your Exchange Online and click Confirm. Then, hit Save to store your changes.
Points to remember:
- You can also configure message delivery restrictions for shared mailboxes in Exchange Online. Simply select the shared mailbox instead of a user mailbox when applying the method described above.
- Message delivery restrictions are not limited to specific recipient types. You can configure these restrictions for all recipient types, such as room mailboxes, distribution groups, and more, within your organization.
- This message delivery restriction specifically restricts incoming emails and does not apply to restricting emails sent to external addresses in Microsoft 365.
- Finally, please note that configuration changes may take up to five minutes to take effect.
Restrict Message Delivery using Exchange Online PowerShell
PowerShell offers a simple and efficient way to configure message restrictions for a mailbox using straightforward cmdlets. Below are some message delivery restriction configurations in Microsoft 365 that help you to manage Exchange Online mailboxes effectively.
- Set mailbox to accept messages from specific users and groups
- Add a user to the accepted senders list of a mailbox
- Accept messages only from authenticated users
- Set user mailbox to reject messages from specific users and groups
- Add a user to the rejected senders list of a mailbox
Make sure to connect to the Exchange Online PowerShell before executing the following cmdlets.
1. Set Mailbox to Accept Message from Specific Users and Groups
To allow a user mailbox to accept messages only from specific users or groups, you can use the Set-Mailbox cmdlet with the –AcceptMessagesOnlyFrom parameter in Exchange Online PowerShell.
|
1 |
Set-Mailbox -Identity "<MailboxUPN>" -AcceptMessagesOnlyFrom "<SenderUPN>" |
The AcceptMessagesOnlyFrom parameter specifies who is allowed to send messages to the mailbox and rejects messages from all other senders.
If you want a user mailbox to accept messages only from a specific distribution list, you can use the parameter –AcceptMessagesOnlyFromDLMembers.
|
1 |
Set-Mailbox -Identity "<MailboxUPN>" -AcceptMessagesOnlyFromDLMembers "<DLGroupName>" |
2. Add a User to the Accepted Senders List of a Mailbox
Imagine your organization has a shared mailbox restricted to specific senders for a project team. A new team member joins, and you need to permit them to send messages to the mailbox without modifying existing restrictions. In this case, use the cmdlet below to add the new user to the allowed senders list while keeping the current settings intact.
|
1 |
Set-Mailbox -Identity "<MailboxUPN>" -AcceptMessagesOnlyFrom @{add="<SenderUPN>"} |
Replace <MailboxUPN> with the desired user UPN, and <SenderUPN> with the user you wish to allow sending message.
3. Accept Messages Only from Authenticated Users
In sectors like healthcare or finance, restricting emails to internal users helps comply with regulations that require strict control over sensitive data exchanges. To enforce this restriction, use the Set-Mailbox cmdlet with the –RejectMessageFrom parameter to specify senders whose messages should be rejected.
|
1 |
Set-Mailbox -Identity "<MailboxUPN>" -RequireSenderAuthenticationEnabled $true |
Setting this parameter to True ensures that the mailbox accepts emails only from authenticated senders, primarily internal users. It blocks unauthenticated messages from reaching the mailbox to prevent malicious or unauthorized content.
Note: Even if your organization only accepts messages from authenticated senders, it’s still important to track emails received from external domains. This helps you catch any spoofed, misleading, or risky messages that may appear to come from trusted sources.
4. Set User Mailbox to Reject Messages from Specific Users & Groups
If a user’s email account is compromised, it may result in the distribution of malicious links to other members of the organization, potentially leading to security breaches. To mitigate this risk, administrators can configure other users’ mailboxes to reject messages from the compromised user. To do this, use the Set-Mailbox cmdlet with the -RejectMessageFrom parameter to specify senders whose messages should be rejected.
|
1 |
Set-Mailbox -Identity “<MailboxUPN>” -RejectMessagesFrom "<SenderUPN>" |
Replace <MailboxUPN> with the desired user UPN and <SenderUPN> with the sender you want to block from sending messages.
To configure a user mailbox to reject messages exclusively from a specific distribution list, utilize the parameter –RejectMessagesOnlyFromDLMembers. This parameter ensures that messages from members of the specified distribution list are rejected.
|
1 |
Set-Mailbox -Identity “<MailboxUPN>” -RejectMessagesOnlyFromDLMembers "<DLGroupName>" |
5. Add a User to the Rejected Senders List of a Mailbox
By filtering and blocking messages, you can prevent the accumulation of irrelevant emails that consume valuable storage space in user mailboxes. This ensures that only legitimate, important messages are stored, helping to optimize mailbox storage.
To add a user to the existing block list of a specific mailbox, you can use the following cmdlet.
|
1 |
Set-Mailbox -Identity “<MailboxUPN>” -RejectMessagesFrom @{add="<SenderUPN>"} |
To add the members of distribution list to the current block senders list, use the cmdlet below.
|
1 |
Set-Mailbox -Identity “<MailboxUPN>" -RejectMessagesFromDLMembers @{add="<DLGroupName>"} |
How to Verify Mailbox Message Delivery Restrictions?
To check if message delivery restrictions have been successfully applied to a user mailbox, run the following PowerShell cmdlet. This will display all the configured restrictions for the mailbox.
|
1 |
Get-Mailbox -Identity "<MailboxUPN>" | Format-List AcceptMessagesOnlyFrom,AcceptMessagesOnlyFromDLMembers,RejectMessagesFrom,RejectMessagesFromDLMembers,RequireSenderAuthenticationEnabled |

We hope this blog has helped you learn how to set message delivery restrictions in Microsoft 365 using both the EAC and PowerShell. This will help streamline your communication, enhance email security, and manage your Exchange Online mailboxes effectively. Thank you for reading! If you have any questions, feel free to ask in the comments section.
