The Exchange Online quarantine feature acts as a shield to prevent potentially harmful messages from infiltrating users’ inboxes. Once exclusively managed by admins, quarantine policies have evolved to grant users more control. They can request quarantine releases, preview messages, and block senders to strengthen their email security.
With the latest update MC711335, users now not only have the power to block unwanted senders but also approve trusted ones. The standard release of this allow and block list management feature is scheduled to roll out from mid-February 2024 to mid-March 2024. This blog delves into Microsoft’s updated approach, shedding light on how users can seamlessly allow or block emails on the quarantine page. It also covers how admins can manage the quarantine end user allow and block list in Microsoft 365 Defender.
Allow and Block Sender in Microsoft 365 Defender Quarantined Emails
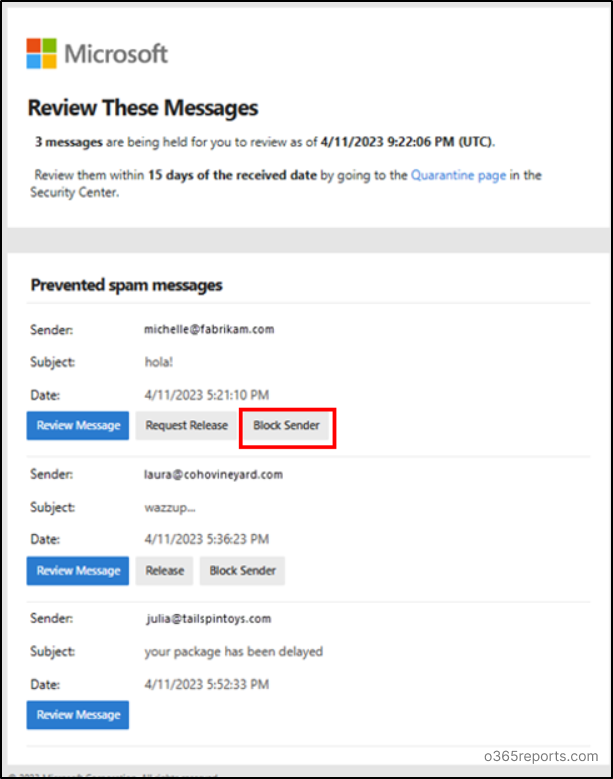
Microsoft end users currently can block emails from unwanted senders, preventing them from appearing in the default quarantine view and quarantine notifications.
With a recent advancement, Microsoft 365 Defender users can now allow emails from trusted senders and prevent them from going to quarantine. However, it’s important to note that allowing email is applicable only in cases where no admin overrides are present.
Additionally, users can independently review the Microsoft 365 admin override reasons leading to the quarantine of emails. This update provides users with increased control in managing their email preferences and interactions.
How End Users Can Allow Sender in Quarantined Email Messages?
Let’s explore how Microsoft users can allow senders of previously blocked quarantine emails by reviewing the admin override reasons in this section.
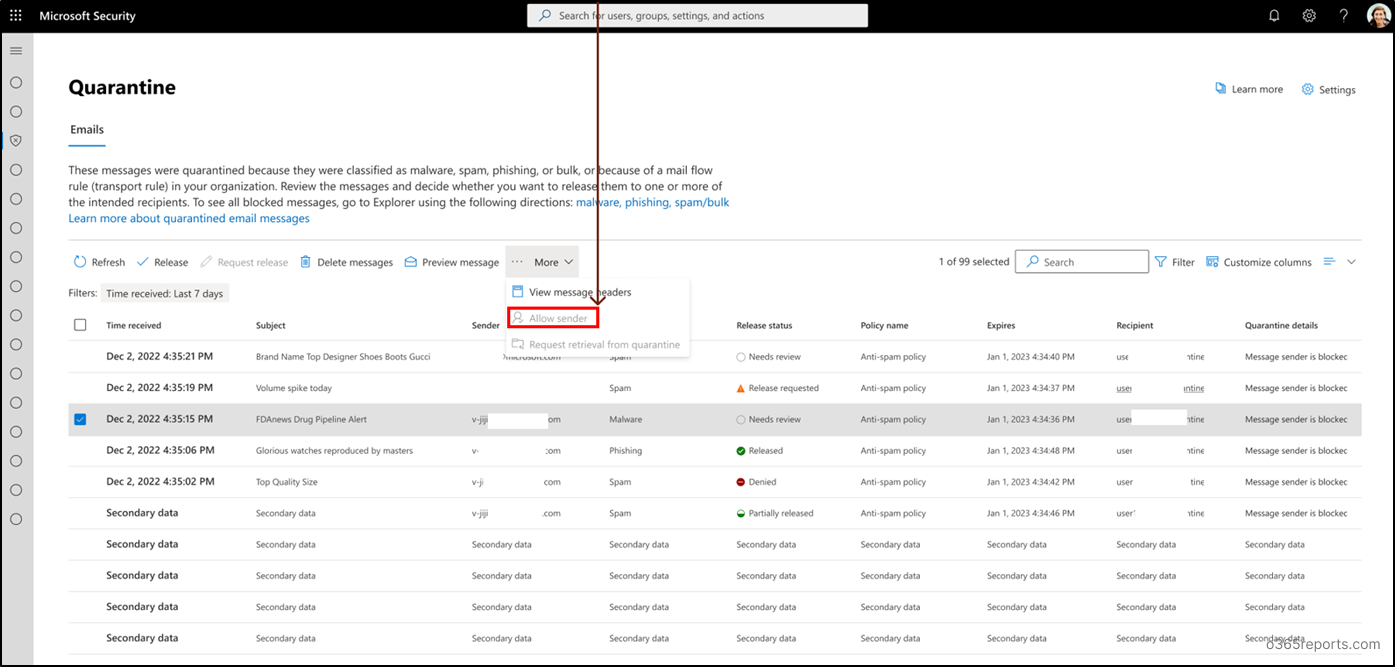
- Use your credentials to log in to Microsoft 365 Defender. Please note that your access to view quarantined messages is subject to the quarantine policy set by Microsoft 365 admins.
- Navigate to the “Email & collaboration” section and click on “Review.”
- Under the “Review” tab, find and click on “Quarantine.”
- Locate the quarantined message in which “Message sender is blocked” under the ‘Email’ tab.
- Select the message and click on “More actions” (represented by three dots).
- Choose the “Allow sender” option.
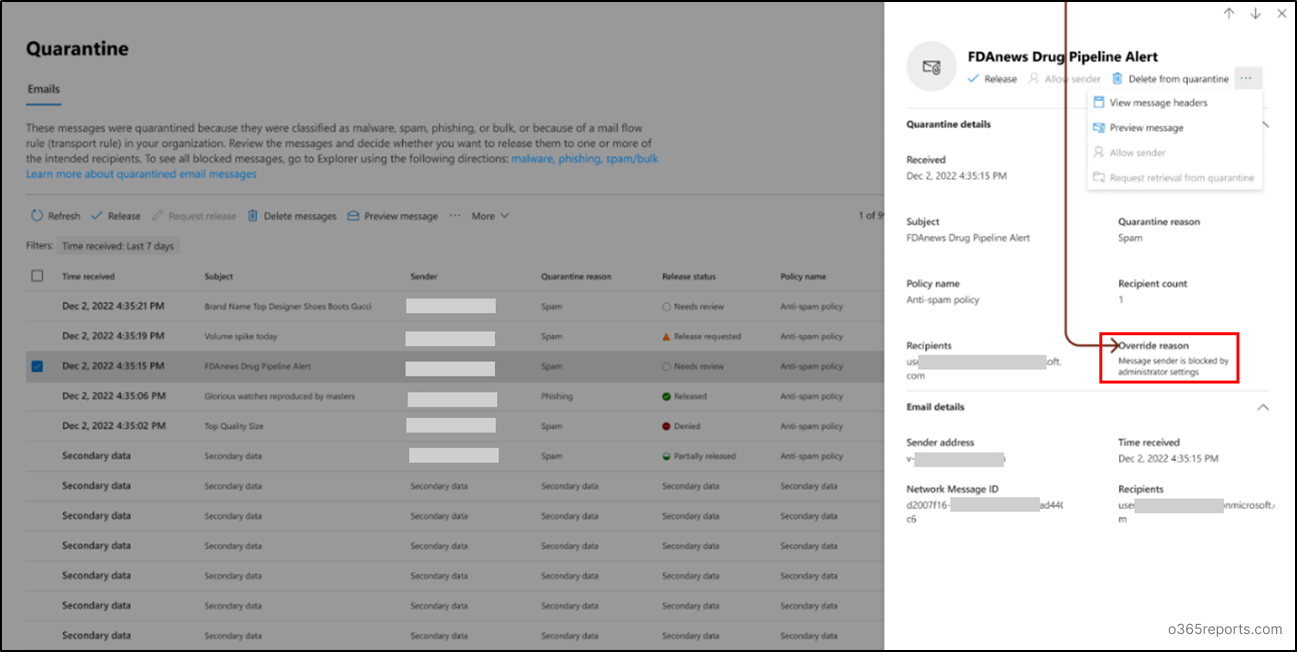
- Users have the option to review the admin “Override reason” under the Quarantine details for that specific message.
- Furthermore, users can undo the “Block sender” action, provided there are no existing admin overrides.

In addition, Microsoft is implementing a new requirement for using the “Block Sender” action in quarantine notifications: sign-in to the security portal. Thus, when users click on the “Block Sender” button in the quarantine notification, they will now be required to sign in to the Microsoft Defender security portal.
This change will begin rolling out in early March 2024 and is expected to be completed worldwide by mid-March 2024.
How to Manage End User Allow and Block List in Quarantine Policy?
Let’s discover how can admins create the quarantine policy for end-user allow and block list management in Microsoft 365 Defender.
1. To establish a quarantine policy and activate the “Allow sender” action, follow these steps:
- Log in to Microsoft 365 Defender with admin permissions.
- In the Email & collaboration section, select “Policies & rules”.
- Navigate to “Threat policies” and choose “Quarantine policies” under “Rules”.
- Click “+Add custom policy”, name the policy, and proceed to the next step.
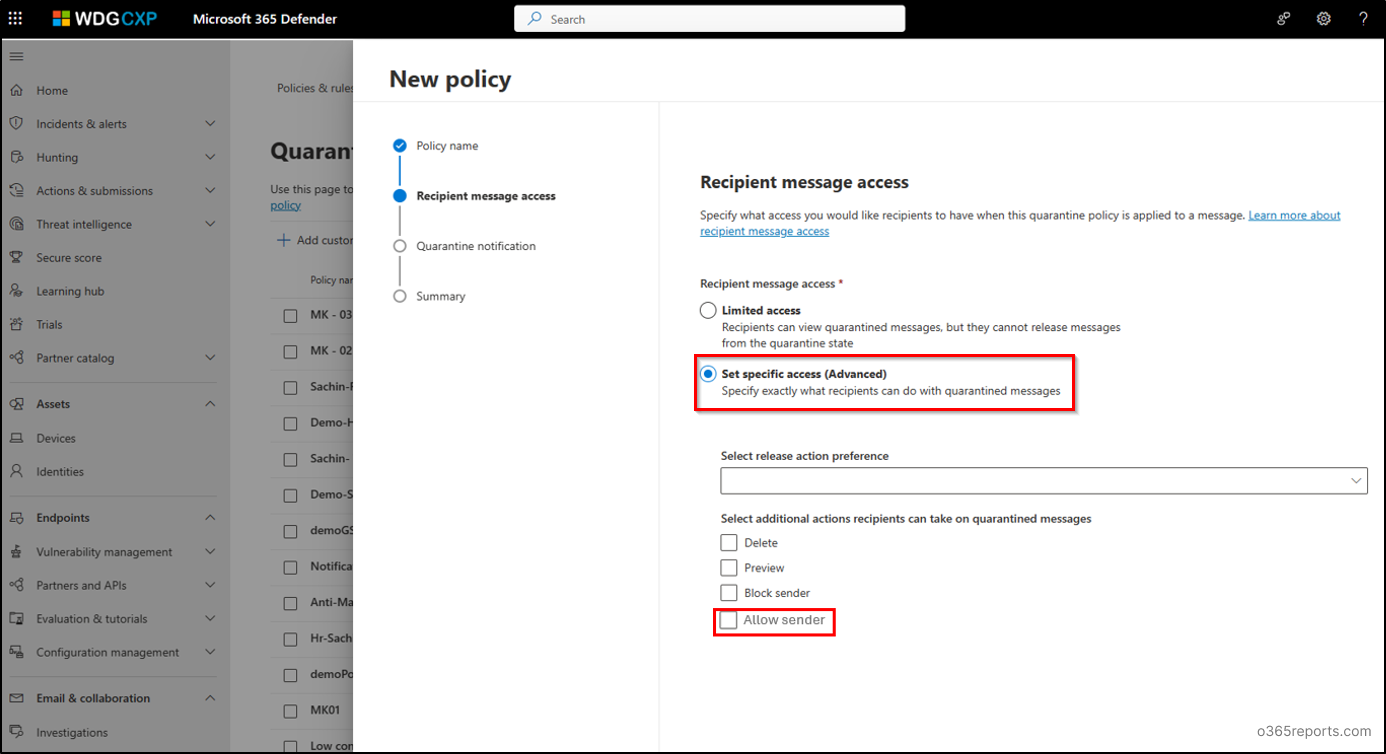
- Under “Recipient message access”, opt for “Set specified access (Advanced)”.
- In the “Select additional actions recipients can take on quarantined messages” category, enable “Allow sender” by checking the corresponding box.
2. As part of an enhancement, the Block Sender Action will be removed from default quarantine policies.
3. In addition to the enable/disable feature, admins can now fine-tune their end user quarantine notification settings. This includes the ability to include or exclude messages from blocked senders in quarantine notifications.
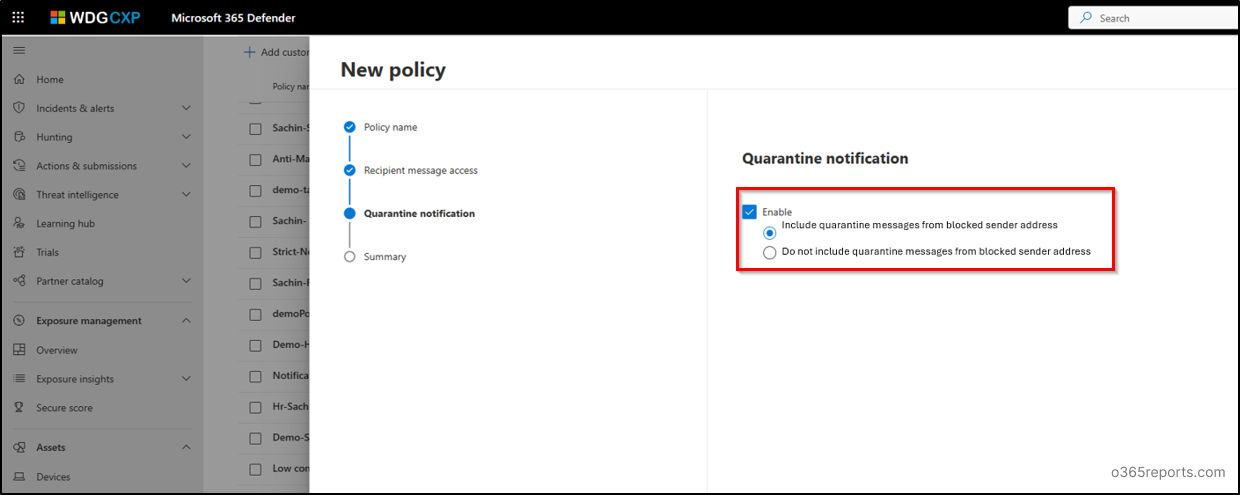
4. By default, quarantined messages from blocked senders are automatically excluded from the Quarantine view. This added flexibility in configuration allows administrators to tailor their quarantine policies according to specific preferences and requirements.
Benefits of Managing Quarantine End User Allow and Block List:
Allowing users to manage quarantine emails in Exchange Online proves helpful for admins in the listed ways below.
- Enabling end users to manage their own blocked senders cuts down the routine email filtering tasks for IT admins, freeing up time for more critical issues.
- While familiar with their legitimate email patterns, end users can swiftly identify false positives.
- End users can also customize email filtering, aligning the system with their unique preferences and needs.
- Exchange Online users can swiftly adapt to email changes and instantly allow or block senders without IT assistance, ensuring real-time responsiveness.
- Microsoft 365 users prevent email blocks and foster efficient information exchange across the organization.
In conclusion, empowering end users to allow and block emails in Exchange Online offers several key benefits. This user-driven strategy proves instrumental in achieving a more efficient Exchange Online allow and block list management, benefiting both administrators and users. Moreover, as admins, it is crucial to equip yourself with quarantine management features in Microsoft Defender to further enhance the overall security posture. Stay tuned for updates on the availability of these settings. Feel free to reach out through the comments section for any queries or assistance.