Email bounces in Microsoft 365 can be frustrating, especially when you’re unsure why a message wasn’t delivered. The bounce message you receive, known as a Non-Delivery Report (NDR), provides a specific error code that helps identify the root cause. This guide will walk you through how to troubleshoot and resolve email bounces efficiently.
Why Do Emails Bounce in Microsoft 365?
At a high level, email bounces in Microsoft 365 occur because the recipient mail system rejects the message. This rejection could be:
- Permanent (Hard bounce): The message will never be delivered (e.g., invalid address).
- Temporary (Soft bounce): The message might be deliverable later (e.g., recipient’s mailbox is full, server temporarily unavailable).
Understanding whether your bounce is temporary or permanent is the first step in resolving it. From there, you can narrow down the cause and apply the correct fix. Now, let’s explore the most common reasons why emails bounce in Microsoft Outlook.
Top 7 Reasons Behind Email Bounces in Microsoft 365
Email bounces can happen for a variety of reasons such as:
- Sender is listed under Restricted Entities in Microsoft Defender
- Invalid or non-existent recipient email address
- Authentication failures due to misconfigured SPF, DKIM, or DMARC
- Recipient’s mailbox reached storage quota
- Misconfigured email forwarding rules
- Message Limits Exceeded
- Content Filtering
Among these, the Restricted Entities list is a common culprit in organizational environments that use Exchange Online or standalone Exchange Online Protection (EOP). Let’s see how to address them in detail.
1. Sender is Listed Under Restricted Entities in Microsoft Defender
Restricted Entities are email addresses, domains, or users that your organization temporarily blocks from sending emails. Essentially, these are sources that the system suspects may send spam, phishing attempts, or other malicious content.
Being on this list doesn’t always mean the sender is malicious, it could be false positive or a temporary restriction. That’s why legitimate users may sometimes experience email bounces. In such case, you receive an error message stating:
“Your message couldn’t be delivered because you weren’t recognized as a valid sender. The most common reason for this is that your email address is suspected of sending spam and it’s no longer allowed to send email. Contact your email admin for assistance. Remote Server returned ‘550 5.1.8 Access denied, bad outbound sender.“
Solution:
Admins can review this list and unblock users if they are mistakenly restricted, restoring normal flow.
- Remove blocked users from restricted entities list in Defender portal
- Remove blocked users from restricted entities using PowerShell
How to Remove Blocked Users from Restricted Entities List
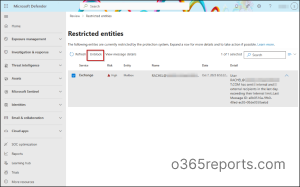
Follow the steps below to unblock a user from the Restricted Entities page in the Microsoft Defender portal.
- Sign in to Microsoft Defender Portal.
- Navigate to Email & Collaboration > Review > Restricted Entities.
- On the Restricted Entities page, find the user you want to unblock. You can either use the search box or sort the columns to locate the user quickly.
- Select the checkbox next to the user’s name and click Unblock.
- In the Unblock User panel, review the account details and follow any security recommendations provided.
- Click Next, then Submit to complete the unblock process.
Note: Restrictions are typically removed within one hour, though in some cases it may take up to 24 hours.
Remove Blocked Users from Restricted Entities Using PowerShell
Before proceeding further, try to connect to Exchange Online PowerShell module.
To view everyone who is currently restricted from sending emails, run the following:
|
1 |
Get-BlockedSenderAddress |
This will show a list of all blocked email addresses in your Microsoft 365 environment.
To remove a user from the restricted list and allow them to send emails again, run:
|
1 |
Remove-BlockedSenderAddress -SenderAddress <emailaddress> |
Replace <emailaddress> with the user’s email. After running this, the user will be removed from the Restricted Entities list in Microsoft 365.
Verify Alert Settings for Restricted Users in MS Defender Portal
If a user is blocked from sending emails in Microsoft 365, admins should get notified right away. To make sure these notifications work correctly, check that the alert policy “User restricted from sending email” is set up properly. Go to Email & Collaboration > Policies & rules > Alert policy, confirm the alert is enabled, verify the recipients, and adjust the daily limit if needed. Verifying the alert will allow admins to fix the issue quickly and prevent email delivery problems.
2. Invalid or Non-Existent Recipient Email Address
This is one of the most common reasons for a hard bounce. If you send an email to an address that doesn’t exist, you’ll often see the error message: “550 5.1.1: User unknown.”
This can happen due to:
- Typos in the email address (e.g., @gamil.com instead of @gmail.com).
- Outdated address saved in Outlook’s auto-complete cache.
- Recipient account deleted, moved, or renamed in Microsoft 365.
Solution:
To resolve this error, follow the below mentioned actions:
- Verify the address manually: Don’t rely on Microsoft Outlook’s cached suggestions. Type the address fresh.
- Check with the recipient: If you’re not sure about the recipient’s address, contact them through another method (like a phone call or chat) to confirm the correct email ID before resending.
- Global Address List (GAL) sync: In organizations, ensure that the GAL is up-to-date. If using hybrid environments, resync Azure AD Connect.
3. Authentication Failures Due to Misconfigured SPF, DKIM, DMARC
Authentication is critical for email deliverability. Microsoft 365 uses SPF, DKIM, and DMARC to prove that your emails are legitimate. If these records are misconfigured or missing, your messages may get rejected or flagged as spoofed with an error: “550 5.7.509 Access denied, sending domain contoso.com does not pass DMARC verification and has a DMARC policy of reject.” Some of the common causes include:
- SPF record missing required Microsoft 365 entries.
- DKIM not enabled for your domains.
Solution:
To resolve this error, ensure your domain’s DNS records are correctly configured.
- SPF: Configure SPF to add the Microsoft 365 entry include:spf.protection.outlook.com in your record.
- DKIM: Enable DKIM for your domain and publish the CNAME records provided in the Microsoft 365 admin center. DKIM helps prevent attackers from altering your email during transit.
- DMARC: Set up DMARC record to tell recipient servers how to handle messages failing SPF/DKIM.
4. Recipient’s Mailbox Reached Storage Quota in Exchange
When a mailbox exceeds its storage quota, new emails bounce with an NDR message like “Mailbox full” with an error code 552 5.7.0. This is often temporary but can persist in cases of unmanaged accounts.
Solution:
In such case, admins can export mailbox quota report retrieve a list of mailboxes that have reached ‘Prohibit Send’ quota and 90% of the warning quota limit. This allows admins to notify users to clean up their mailboxes or take other necessary actions to manage mailbox storage effectively.
5. Misconfigured Email Forwarding Rules in Exchange
Email forwarding is often used by users or admins to automatically redirect incoming messages to another mailbox. However, if these forwarding rules are incorrectly set, they can cause email delivery issues or complete bounces with an error code 550 5.1.10.
Solution:
To resolve this error, admins can check the email forwarding report to find who is auto-forwarding emails to another mailbox and take necessary actions. Admins can also check if the recipient address is active and configured correctly.
6. Message Limits Exceeded in Microsoft Outlook
Microsoft 365 imposes rate limits on outbound email to prevent a compromised account from sending vast amounts of spam. Exceeding these limits can cause emails to be rejected with an error: “550 5.7.233 –Your message can’t be sent because your tenant exceeded its daily limit for sending email to external recipients.”
Solution:
To resolve this issue, admins should review the outbound spam policy in the Microsoft Defender portal (Email & collaboration > Policies & rules > Threat policies > Anti-spam) to manage or override restrictions.
7. Content Filtering in Microsoft Outlook
If flagged, the system may quarantine the message or reject it altogether, often with an error like “550 5.7.1 Message rejected as spam by Content Filtering.”
Solution:
- Admins should begin by checking the quarantine section of the Microsoft Defender portal (Email & collaboration > Review > Quarantine) to confirm whether the message was blocked or simply held for review.
- To validate if content filtering is the cause, admins can configure exceptions for specific sender addresses or domains, ensuring that trusted communications are not interrupted.
I hope this blog helped you understand the top causes of email bounces in Microsoft 365 and how to resolve them. Feel free to reach out through the comments section if you have any queries.