As an admin, you often find yourself managing a plethora of tasks, including user notifications, alerts, and email automation. While Outlook offers a user-friendly interface for sending emails, it will be challenging when it comes to sending emails in bulk. PowerShell can streamline these processes.
With PowerShell, admins can send emails in bulk, schedule reports, or trigger messages based on specific events or conditions. In this blog, we’ll show you how to send an Exchange Online email with the Send-MgUserMail cmdlet in Microsoft Graph PowerShell.
The Old Method: Send-MailMessage
Previously, the Send-MailMessage cmdlet was a popular choice for sending emails using PowerShell. However, it is now considered deprecated and is no longer actively supported in newer versions of PowerShell. While it might still function in some environments, it doesn’t receive updates and lacks many modern features. Additionally, it doesn’t guarantee secure connections to SMTP servers, which can expose your organization to security risks.
Instead of using SMTP directly, which can pose security vulnerabilities, it’s better to use modern APIs like Microsoft Graph. These APIs support OAuth 2.0 for secure authentication and authorization. To send emails and integrate with Microsoft 365 securely, it’s recommended to use the Send-MgUserMail or Send-MgUserMessage cmdlets. Both of these cmdlets are part of the Microsoft Graph PowerShell SDK and are actively maintained, making them a safer and more efficient choice for email management.
Difference Between Send-MgUserMail and Send-MgUserMessage
Here’s a breakdown of their key differences:
|
Send-MgUserMessage |
Send-MgUserMail |
|
|
In short, Send-MgUserMessage is used to send pre-drafted messages, while Send-MgUserMail sends emails immediately based on specified content.
Using the Send-MgUserMail Cmdlet to Send Emails
The ‘Send-MgUserMail’ cmdlet is part of the Microsoft Graph PowerShell SDK, specifically within the Microsoft.Graph.Users.Actions module. This cmdlet enables you to send emails quickly, making it a powerful tool for automating communication tasks in your organization. With ‘Send-MgUserMail’, you can streamline the email-sending process and easily integrate it into your PowerShell scripts.
Prerequisites to Use the ‘Send-MgUserMail’ Cmdlet
For utilizing the ‘Send-MgUserMail’ cmdlet, you need to first connect to the Microsoft Graph PowerShell using the cmdlet below.
|
1 |
Connect-MgGraph -Scopes "Mail.Send" |
Now, let’s look at various scenarios for sending emails from Exchange Online using the ‘Send-MgUserMail’ cmdlet.
- Send a simple message using Send-MgUserMail
- Send an email to multiple recipients using CSV
- Send an email with CC and BCC using PowerShell
- Use Send-MgUserMail to send an email with attachment
- Use Send-MgUserMail to send multiple attachments in an email
- Send an email with custom internet message headers
1. Send a Simple Message Using Send-MgUserMail
Imagine you’re managing a project and need to quickly coordinate a catch-up meeting with your team member. Using Microsoft Graph PowerShell, you can effortlessly send an email to your team member.
To send a simple message using Microsoft Graph PowerShell, run the script below by replacing the <senderEmailAddress>, <recipientEmailAddress>, subject, and content with your specific details:
|
1 2 3 4 5 6 7 8 9 10 11 12 13 14 15 16 17 18 19 |
$userId = "<senderEmailAddress>" $params = @{ message = @{ subject = "Team Catch-up Tomorrow?" body = @{ contentType = "Text" content = "Hi, are you free for a quick team catch-up tomorrow? Let me know your availability." } toRecipients = @( @{ emailAddress = @{ address = "<recipientEmailAddress>" } } ) } saveToSentItems = "true" } Send-MgUserMail -UserId $userId -BodyParameter $params |
This sends a quick email to the specified recipient. If you don’t want to save this message in the ‘Sent Items’ folder, set saveToSentItems to “false“.

Tip: Setting up SPF, DKIM, and DMARC can help protect your email domain from spoofing and improve email delivery to the inbox.
2. Send an Email to Multiple Recipients at Once
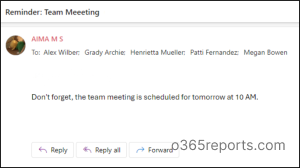
When you need to remind your entire team about an upcoming meeting, you can streamline the process by using PowerShell to send a message to multiple recipients simultaneously.
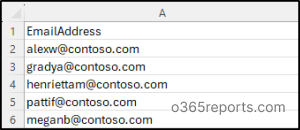
To send an email message to multiple users using PowerShell, first create a CSV file with ‘EmailAddress’ as the header. Failing to use the correct header may result in errors.
Then, run the following script by replacing the <filePath> and <senderEmailAddress> with your specific details:
|
1 2 3 4 5 6 7 8 9 10 11 12 13 14 15 16 17 18 19 20 21 22 |
$userId = "<senderEmailAddress>" $recipients = Import-Csv -Path "<filePath>" $recipientList = @() foreach ($recipient in $recipients) { $recipientList += @{ emailAddress = @{ address = $recipient.EmailAddress } } } $params = @{ message = @{ subject = "Reminder: Team Meeting" body = @{ contentType = "Text" content = "Don't forget, the team meeting is scheduled for tomorrow at 10 AM." } toRecipients = $recipientList } saveToSentItems = "true" } Send-MgUserMail -UserId $userId -BodyParameter $params |
This sends the email to all users in the list simultaneously.
Note: By default, you can send emails to up to 500 recipients at a time. To exceed this limit, you can configure a custom recipient limit for the mailboxes used to send emails.
3. Use Send-MgUserMail to Send an Email with CC and BCC
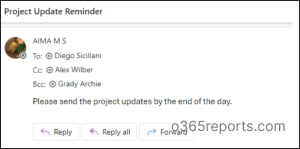
When communicating project updates, you may want to keep certain recipients informed. Using Microsoft Graph PowerShell, you can easily send emails with CC (carbon copy) and BCC (blind carbon copy) recipients.
To send emails with CC and BCC, use the following script, replacing <senderEmailAddress>, <toAddress>, <ccAddress>, and <bccAddress> with your specific details:
|
1 2 3 4 5 6 7 8 9 10 11 12 13 14 15 16 17 18 19 20 21 22 23 24 25 26 27 28 29 30 31 32 33 |
$userId = "<senderEmailAddress>" $params = @{ message = @{ subject = "Project Update Reminder" body = @{ contentType = "Text" content = "Please send the project updates by the end of today." } toRecipients = @( @{ emailAddress = @{ address = "<toAddress>" } } ) ccRecipients = @( @{ emailAddress = @{ address = "<ccAddress>" } } ) bccRecipients = @( @{ emailAddress = @{ address = "<bccAddress>" } } ) } saveToSentItems = "true" } Send-MgUserMail -UserId $userId -BodyParameter $params |
This sends an email to the primary recipient, with CC to one recipient and BCC to another. You can modify the script to send emails to multiple recipients by using a CSV file.
Note: Use CC when you want all recipients to know who else received the email and use BCC when you want to keep other recipients’ addresses hidden.
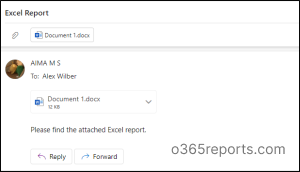
4. Send an Email with an Attachment
When you need to share important documents, such as reports or spreadsheets, you can easily send an email with an attachment using PowerShell. This is particularly useful for providing updates or sharing files with team members.
To send an email with an attachment using ‘Send-MgUserMail’, replace <senderEmailAddress>, <recipientEmailAddress>, and <attachmentFilePath> with your specific details:
|
1 2 3 4 5 6 7 8 9 10 11 12 13 14 15 16 17 18 19 20 21 22 23 24 25 26 27 28 29 30 |
$userId = "<senderEmailAddress>" $filePath = "<attachmentFilePath>" $fileName = [System.IO.Path]::GetFileName($filePath) Add-Type -AssemblyName System.Web $contentType = [System.Web.MimeMapping]::GetMimeMapping($fileName) $params = @{ message = @{ subject = "Excel Report" body = @{ contentType = "Text" content = "Please find the attached Excel report" } toRecipients = @( @{ emailAddress = @{ address = "<recipientEmailAddress>" } } ) attachments = @( @{ "@odata.type" = "#microsoft.graph.fileAttachment" name = $fileName contentType = $contentType contentBytes = [Convert]::ToBase64String([IO.File]::ReadAllBytes($filePath)) } ) } } Send-MgUserMail -UserId $userId -BodyParameter $params |
This sends an email to the specified recipient with the desired attachment.
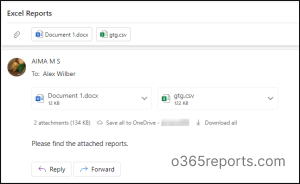
5. Send an Email with Multiple Attachments
In collaborative work environments, it’s common to share multiple files—such as reports, spreadsheets, or presentations—with colleagues. PowerShell makes it easy to send emails with multiple attachments at once. This saves time and ensures everyone gets the necessary documents without having to send several emails.
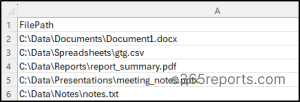
First, create a CSV file with a column header labeled FilePath.
Then, run the following cmdlet by replacing the <senderEmailAddress>, <filePath>, and <recipientEmailAddress> with your specific details:
|
1 2 3 4 5 6 7 8 9 10 11 12 13 14 15 16 17 18 19 20 21 22 23 24 25 26 27 28 29 30 31 32 33 34 35 36 37 38 |
$userId = "<senderEmailAddress>" $csvFilePath = "<filePath>" $filePaths = Import-Csv -Path $csvFilePath | ForEach-Object { $_.FilePath } $attachments = @() foreach ($filePath in $filePaths) { if (Test-Path $filePath) { $fileName = [System.IO.Path]::GetFileName($filePath) Add-Type -AssemblyName System.Web $contentType = [System.Web.MimeMapping]::GetMimeMapping($fileName) $attachment = @{ "@odata.type" = "#microsoft.graph.fileAttachment" name = $fileName contentType = $contentType contentBytes = [Convert]::ToBase64String([IO.File]::ReadAllBytes($filePath)) } $attachments += $attachment } else { Write-Host "File not found: $filePath" } } $params = @{ message = @{ subject = "Excel Reports" body = @{ contentType = "Text" content = "Please find the attached reports." } toRecipients = @( @{ emailAddress = @{ address = "<recipientEmailAddress>" } } ) attachments = $attachments } } Send-MgUserMail -UserId $userId -BodyParameter $params |
This sends an email to the specified recipient with all the desired attachments included.
6. Send an Email with Custom Internet Message Headers
Custom email headers can be crucial for adding metadata or specific instructions to emails, particularly in professional settings. For example, you might want to track email opens, categorize messages, or include additional routing information for your internal systems. Using Microsoft Graph PowerShell, you can easily send emails with custom headers tailored to your organization’s needs.
To send an email with custom headers, run the script below by replacing the <senderEmailAddress>, <recipientEmailAddress>, and the custom header names and values with your specific details:
|
1 2 3 4 5 6 7 8 9 10 11 12 13 14 15 16 17 18 19 20 21 22 23 24 25 26 27 28 29 |
$userId = “<senderEmailAddress>” $params = @{ message = @{ subject = "Project Launch: Important Dates to Remember" body = @{ contentType = "HTML" content = "<p>Hello Everyone,</p><p>We are excited to announce the launch of our new project! Please review the attached timeline and let us know if you have any questions.</p><p>Cheers,<br>The Project Team</p>" } toRecipients = @( @{ emailAddress = @{ address = “<recipientEmailAddress>” } } ) internetMessageHeaders = @( @{ name = "x-custom-header-1" value = "custom value 1" } @{ name = "x-custom-header-2" value = "custom value 2" } ) } } Send-MgUserMail -UserId $userId -BodyParameter $params |
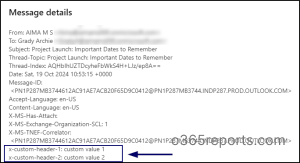
This script sends an email to the specified recipient, including custom internet message headers.
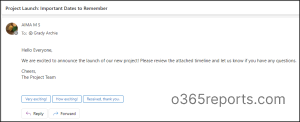
Custom headers are visible in the message details for the recipients as shown below.
You can also run these scripts using certificate-based authentication, which requires no user/admin account credentials for authentication. This method is ideal for running scripts unattended. To use certificates, you must register the app in Microsoft Entra, which allows you to connect to MS Graph using certificate. Depending on your requirements, you can create a self-signed certificate.
This method is scheduler-friendly, enabling you to schedule the script using Task scheduler or Azure Automation.
We hope this blog has helped you with the PowerShell scripts to send emails effortlessly. Thanks for reading! If you have any further queries, feel free to reach us through the comments section.

")
")