
As the volume of threats increases rapidly, staying aligned with the recommended practices is essential to enhance security effectively. As part of this, the multi-tenant PnP Management Shell Entra ID app was deleted on September 9, 2024, to improve application security. This change now requires admins to register their own Entra ID applications for use with PnP PowerShell. In this blog, we’ll explore how this impacts admins and provide detailed steps to adapt to this new requirement.
How Does it Impact Microsoft 365 Users?
This update significantly impacts any code or script that relies on this Entra ID app. For users who utilized this default app, the credentials flow, interactive flow, and device login flow will be impacted. Additionally, users might encounter the following app identifier error.
Message: AADSTS700016: Application with identifier ‘31359c7f-bd7e-475c-86db-fdb8c937548e’ was not found in the directory ‘The [companyname]’.
This can happen if the application has not been installed by the administrator
of the tenant or consented to by any user in the tenant. You may have sent your authentication request to the wrong tenant.
To resolve the above error, you need to register your application in Entra ID to access PnP PowerShell (for both interactive login and for app–only access).
How to Register an Entra ID Application to Use with PnP PowerShell?
Users can register an Entra ID application in two ways, i.e., PowerShell (automated) and Entra Admin Center. Explore the detailed steps below.
- Register an Entra ID application using PnP PowerShell for interactive login
- Register an Entra ID application using PnP PowerShell for app only access
- Register an Entra ID application using Entra admin center
Register an Entra ID Application Using PnP PowerShell
Registering an Entra ID application using PnP PowerShell is an automated and easy method as it bypasses the admin center steps, saving your time.
1. Register an Entra ID Application for Interactive Login
Use the below PnP PowerShell cmdlet to register an application in Entra ID for interactive user logins.
|
1 |
Register-PnPEntraIDApp -ApplicationName "<app name>" -Tenant <tenantname>.onmicrosoft.com -Interactive |
After running the above cmdlet, you will be prompted to authenticate with your credentials. Upon successful authentication, you will again be prompted to grant consent to the app. Once you give the app consent, the new application will be registered in Entra ID.
You can also use the ‘Register-PnPEntraIDAppForInteractiveLogin‘ to register an Entra ID app for interactive login.
The output returns the file path of both the Pfx and Cer file, client Id, base 64 encoded key, and certificate thumb print.
A limited set of permission scopes will be added by default. However, you can specify any of the below permissions to customize your own permission scopes:
- GraphApplicationPermissions
- GraphDelegatePermissions
- SharePointApplicationPermissions
- SharePointDelegatePermissions
Connect to PnP PowerShell for Interactive Login
Use the below cmdlet to connect to PnP PowerShell for interactive login.
|
1 |
Connect-PnPOnline contoso.sharepoint.com -Interactive –ClientId “2811bo8d-e2e7-4735-8d81-566baca6e5f" |
Replace your tenant name and respective client id in the above cmdlet.
2. Register an Entra ID Application for App Only Access
If you wish to use an application in a script that does not require user interaction, you can register the application with App Only access. Use the following PnP cmdlet to register an app in Entra ID and, optionally, generate the certificates for app login (optional).
|
1 |
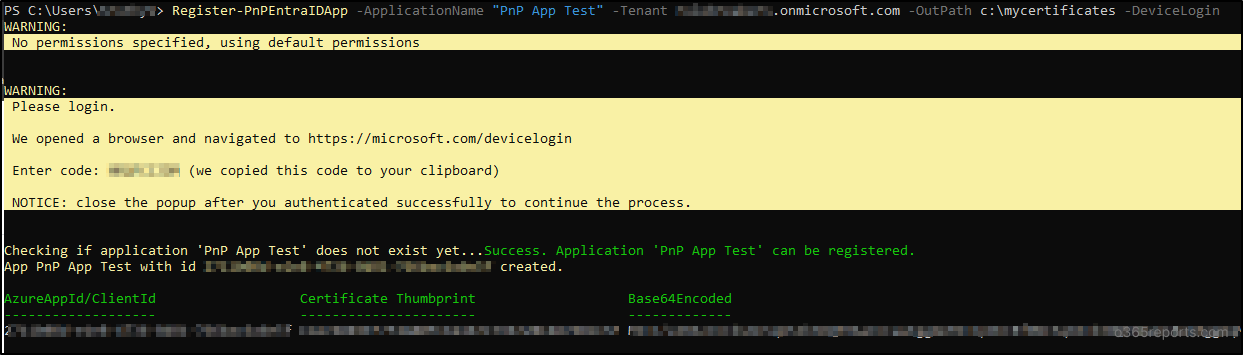
Register-PnPEntraIDApp -ApplicationName "<app name>" -Tenant <tenant name>.onmicrosoft.com -OutPath c:\mycertificates -DeviceLogin |
After running the above cmdlet, you will be redirected to the ‘https://microsoft.com/devicelogin’ URL, where you will be prompted to enter the code displayed in the output.
Once you enter the code, you will need to authorize access by login with your credentials and a certificate will be generated and uploaded to the app. By default, only a limited set of permission scopes are added. However, you can specify your own permission scopes by including the permissions listed for interactive login.
Additionally, the cmdlet will return the client id which can be used to connect to PnP PowerShell. You will need to authenticate again using your credentials to grant consent to the registered application. The output will also include the base64encoded private key certificate, which can be used when connecting to PnP PowerShell.
Sample Output:
Connect to PnP PowerShell for App Only Access
You can connect to PnP PowerShell for app–only access using the below cmdlet. Run the below cmdlet to connect to PnP PowerShell by including the base 64 encoded value without accessing the physical file.
|
1 |
Connect-PnPOnline contoso.sharepoint.com -ClientId “2811bo8d-e2e7-4735-8d81-566baca6e5f" -Tenant contoso.onmicrosoft.com -CertificateBase64Encoded <Pfx base64 encoded> |
Enter the base 64 encoded private key in the –CertificateBase64Encoded parameter.
Both the CER and PFX files with the base 64 encoded key will be saved in the location specified in the –Outpath Parameter (specified when registering the application).
You can also use the below cmdlet to connect to PnP PowerShell by passing the certificate path.
|
1 |
Connect-PnPOnline contoso.sharepoint.com -ClientId <client id> -Tenant contoso.onmicrosoft.com -CertificatePath <enter your path> |
Enter your certificate path appropriately before running the cmdlets.
Register an Entra ID Application Using Entra Admin Center
Follow the below detailed steps to register your own application in Entra ID using Entra admin center to use with PnP PowerShell.
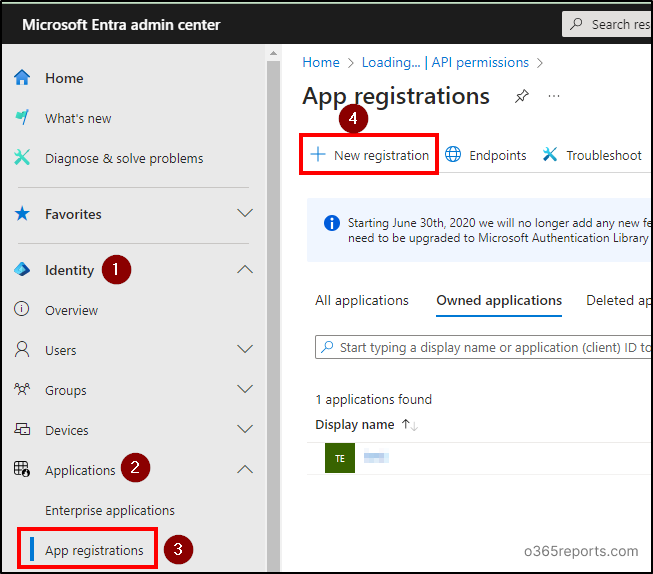
- Sign in to the Entra admin center as at least a Cloud Application Administrator.
- Navigate to Identity –> Applications –> App registrations on the left menu and click on ‘New registration’ at the top.
- In the ‘Name’ field, enter the name for the application as you wish, then click Register.
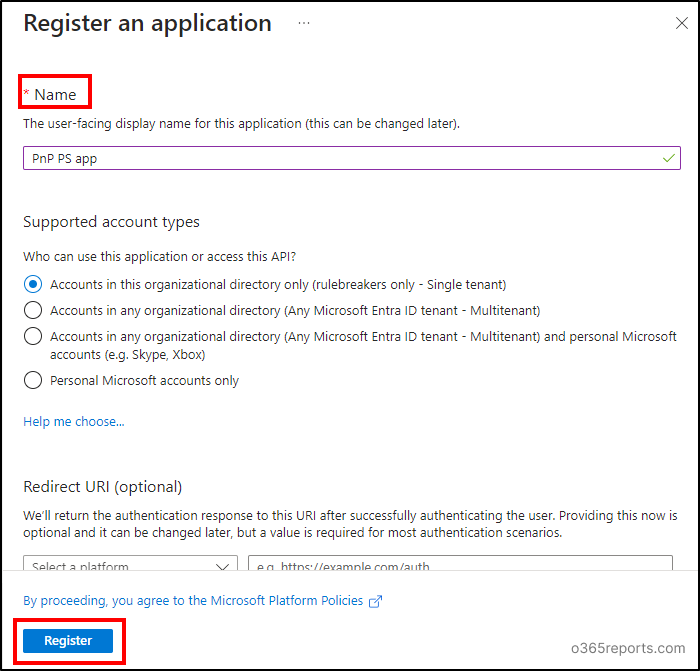
- Note down the Application (client) ID used to connect to PnP PowerShell using the application registration.
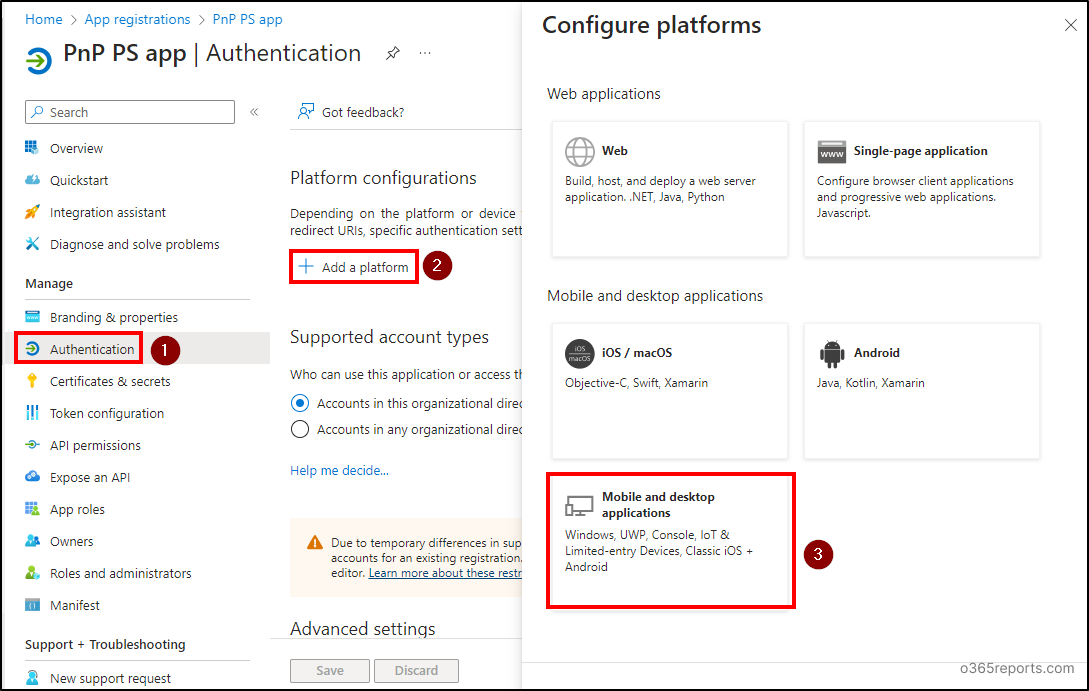
- Go to ‘Authentication’ under the Manage section on the left.
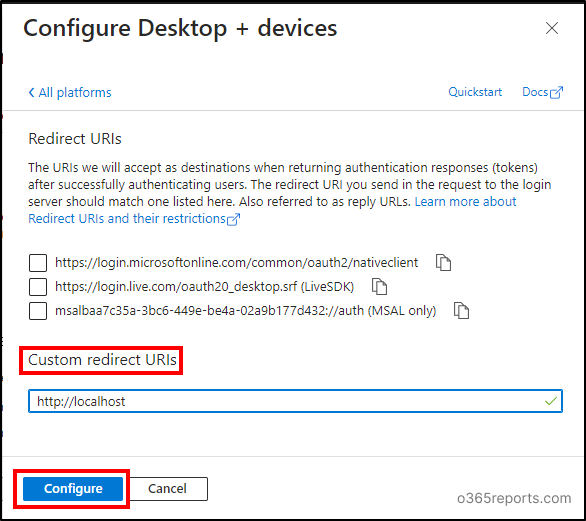
- Under Platform configurations, click on ‘Add a platform’ and choose Mobile and desktop applications.
- Leave the checkboxes unchecked and enter ‘http://localhost’ in the Custom redirect URIs field. Then, select ‘Configure’.
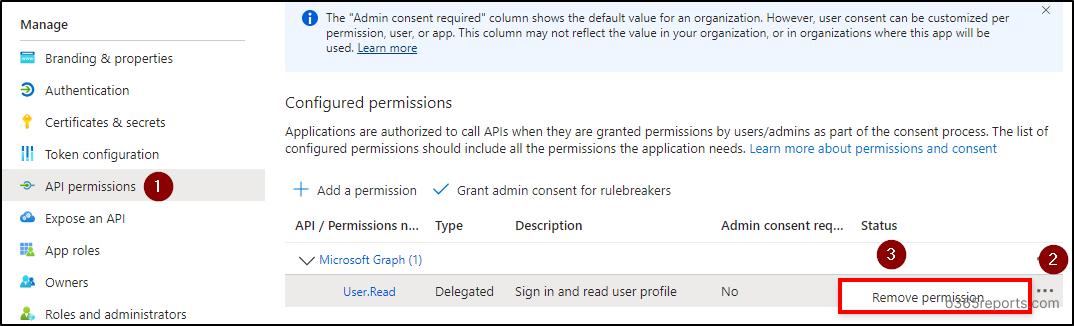
- Go to ‘API permissions’ under the Manage section to assing API permissions to the Entra ID application.
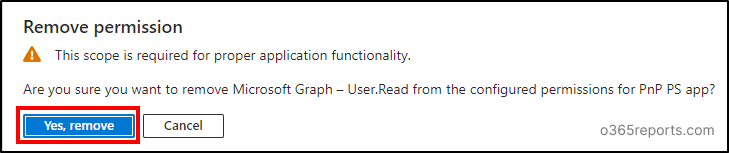
- Click on the three dots (context menu) in the User.Read permission and select ‘Remove permission’. Confirm your removal by selecting ‘Yes, remove’ option in the popup.
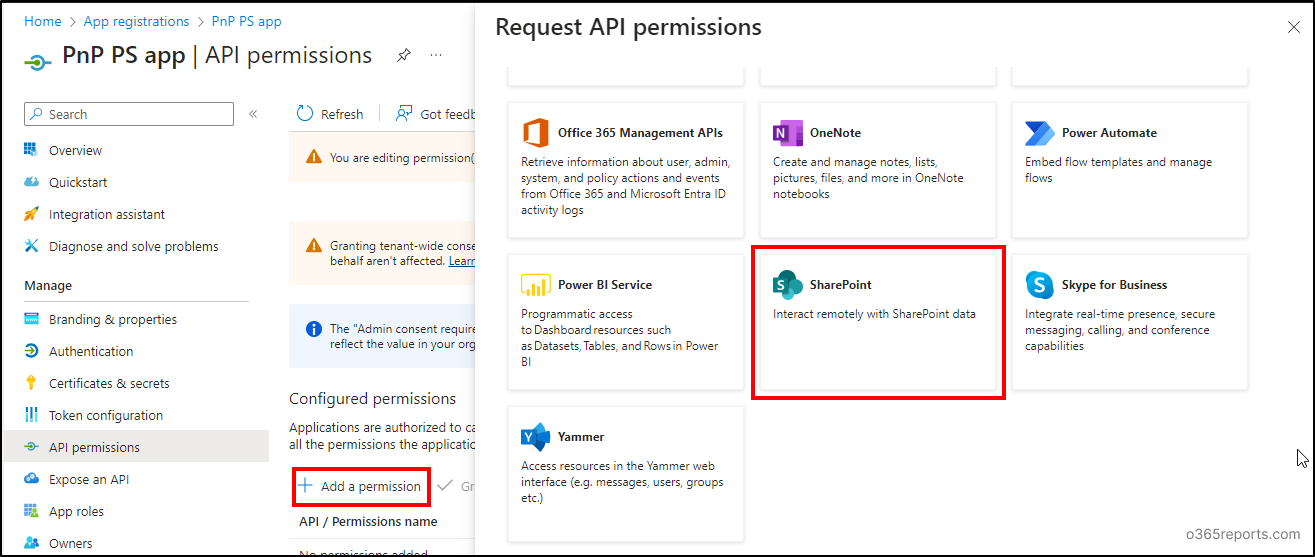
- Then, click on ‘Add permissions’. Scroll down and click on ‘SharePoint’ to assign permission scopes for the Entra ID app.
- Select the ‘Delegated permissions’ option and expand the ‘AllSites’ option. Choose the ‘AllSites.Read’ permission and add other permissions as required. Click on ‘Add permissions’.

- Then, choose ‘Grant admin consent for <tenant name>’ option and confirm by selecting ‘Yes’.The ‘Grant admin consent’ option will be greyed out if you are not a Global administrator.

Tip: After Entra ID app registration, you can assign owners to enterprise applications to manage configurations such as single sign-on, provisioning, user assignments, etc.
You can now use your registered application to connect to PnP PowerShell or add additional permissions to this application as needed.
Also, make sure to audit operations performed on this Entra application to track changes and prevent unauthorized modifications.
I hope this blog provides the detailed steps to register an application in Entra ID to use with PnP PowerShell effectively. Start registering today and enhance your Microsoft 365 security posture.


