If you want to connect Exchange Online PowerShell using MFA, you need to use a special PowerShell tool offered by Microsoft “Exchange Online PowerShell Module” (EXO).
Feb 2023 Update: Remote PowerShell (RPS) retirement in Exchange Online PowerShell
Due to RPS retirement, you can’t use EXO V1 and V2 modules to connect Exchange Online PowerShell. So admins must install/update to EXO V3 module to perform Exchange management tasks.
You can install Exchange Online PowerShell Module (EXO V1) manually or you can use dedicated script that install the module and connects Exchange Online PowerShell using MFA. Let’s check both methods in detail.
- Automated Method:
- PowerShell script to connect Exchange Online PowerShell with MFA
- Manual Method:
- Step1: Install Exchange Online PowerShell Module for MFA(One time process)
- Step2: Connect Exchange Online PowerShell using MFA enabled Account
To ease your work, we have documented common troubleshooting tips at the bottom.
Automated Method: PowerShell Script to Connect Exchange Online PowerShell with MFA
Unfortunately, connecting Exchange Online PowerShell using MFA is somewhat tricky, so newbies can get lost quickly. No worries! We are here to help admins. We have written a user-friendly PowerShell script to connect Exchange Online PowerShell with MFA which does following things.
- Downloads Exchange Online Remote PowerShell Module
- Installs Exchange Online PowerShell Module
- Connects Exchange Online PowerShell using MFA
Download Script: ConnectExchangeOnlinePowerShell.ps1
Manual Method: Setup Everything by Yourself
Step1: Install Exchange Online PowerShell Module for MFA
The first thing you need to do is download the Exchange Online Remote PowerShell module.To download Exchange Online PowerShell Module directly, you can use this quick link: https://cmdletpswmodule.blob.core.windows.net/exopsmodule/Microsoft.Online.CSE.PSModule.Client.application
Alternatively, to download the Exchange Online MFA module through Microsoft, follow the below steps.
1.Login to Exchange Admin Center using Internet Explorer or Edge.
2.In the EAC, go to Hybrid and click the Configure button (as mentioned in below image) to download the Exchange Online PowerShell Module for MFA.
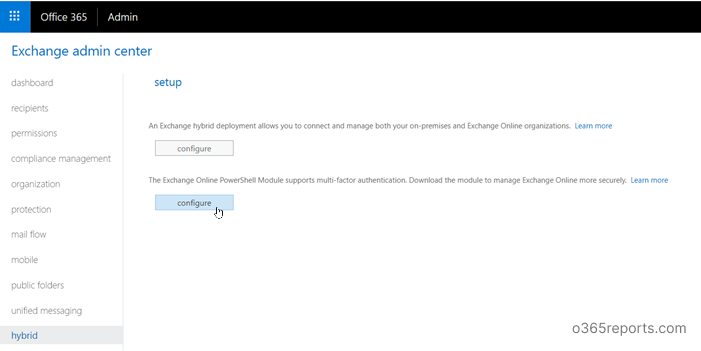
Note: A browser that uses ClickOnce to download (like IE or Edge) is needed to download otherwise you will get an error during installation. Click Connect-ExoPSSession troubleshooting tips for more troubleshooting tips.
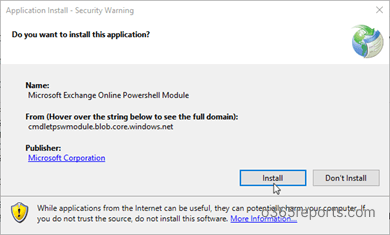
3.Click Install.
Step2: Connect Exchange Online PowerShell Using MFA
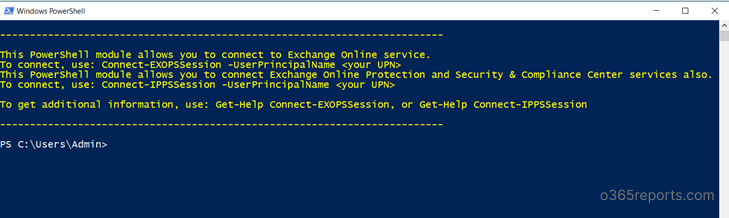
1.Connect-EXOPSSession used to connect to Exchange Online with MFA. You can’t use Connect-EXOPSSession in standard Windows PowerShell. You need to launch Exchange Online Remote PowerShell module. When you launch the Exchange Online Remote PowerShell module, a tip about the usage is shown.
2.Connect-EXOPSSession has a parameter UserPrincipalName. You can use Connect-EXOPSSession, with or without UserPrincipalName. For eg,
|
1 |
Connect-EXOPSSession -UserPrincipalName Admin@Contoso.com |
3.Enter the password in the sign-in window and then click Sign in.

4. A verification code generated and delivered based on MFA configured for your account. Enter the verification code in the verification window and then click Sign in.
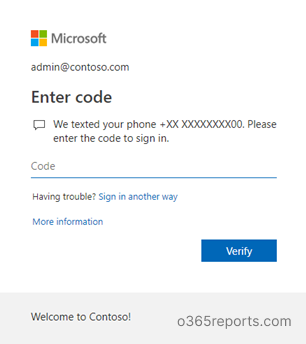
5. After step 4, the Exchange online cmdlets are imported into Exchange Online remote PowerShell Module session. If you don’t receive any errors, you connected successfully as shown in the below figure.

If you want to connect all Office 365 Services PowerShell with a single cmdlet, please refer: Connect to all Office 365 Services using PowerShell (Supports MFA too)
Connect-EXOPSSession – Trouble Shooting Tips:
Most people encounters numerous challenges when they try to use Connect-EXOPSSession cmdlet. To ensure hassle-free installation and execution, we have documented the common errors and their troubleshooting tips in this blog. If you want to get a list of MFA enabled users in your tenant, you can refer Export Office 365 users’ MFA status report.
1.You can’t use Standard Windows PowerShell to Connect Exchange Online With MFA:
If you use standard Windows PowerShell to connect Exchange Online using MFA enabled account, you will get the following error.
New-PSSession : outlook.office365. com Connecting to remote server outlook.office365. com failed with the following error message : Access is denied. For more information, see the about_Remote_Troubleshooting Help topic.+ $Session = New-PSSession -ConfigurationName Microsoft.Exchange -Conne ...

+ FullyQualifiedErrorId : AccessDenied,PSSessionOpenFailed
Import-PSSession : Cannot validate argument on parameter 'Session'. The argument is null. Provide a valid value for the argument, and then try running the command again. + Import-PSSession $Session -CommandName Get-Mailbox,Get-MailboxPermi ...

+ FullyQualifiedErrorId : ParameterArgumentValidationError,Microsoft.PowerShell.Commands. ImportPSSessionCommand

If you want to connect Exchange Online PowerShell with MFA, you need to install “Exchange Online PowerShell Module” (EXO).
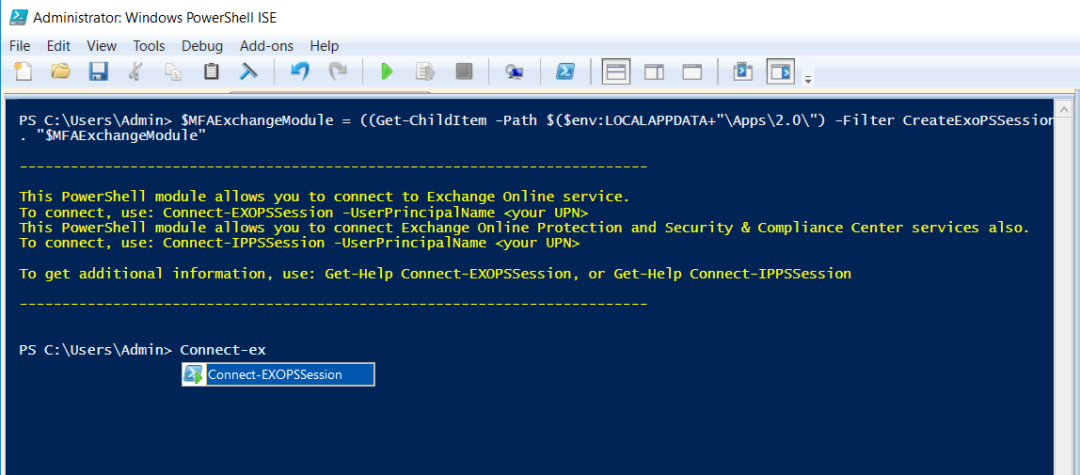
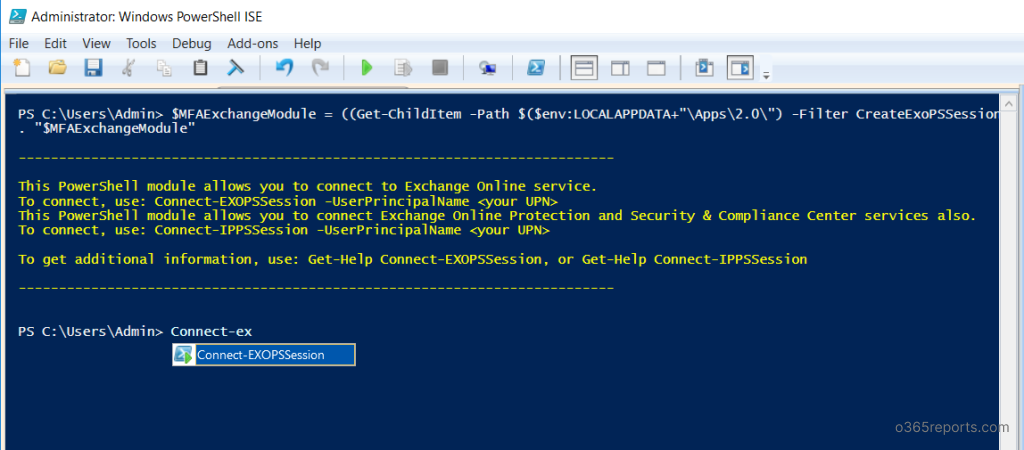
2.How to Import MFA Enabled Exchange Online Powershell Module in ISE?
Instead of using Exchange Online PowerShell console, you can import Exchange Online PowerShell module in Windows PowerShell ISE. To successfully use the Connect-EXOPPSSession cmdlet in the ISE, you need to run the below code in ISE.
|
1 2 |
$MFAExchangeModule = ((Get-ChildItem -Path $($env:LOCALAPPDATA+"\Apps\2.0\") -Filter CreateExoPSSession.ps1 -Recurse ).FullName | Select-Object -Last 1) . "$MFAExchangeModule" |
Now, you can use PowerShell ISE to Connect Exchange Online with MFA.
Note: Before using these code, you should install Exchange Remote Online PowerShell module.
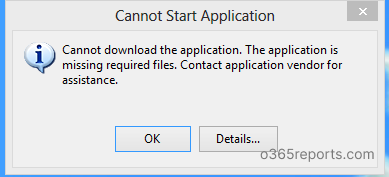
3.Unable to Install Exchange Online PowerShell Module- Cannot start application:
If you didn’t use IE or Edge to download Exchange Online PowerShell Module, you will face error during installation.
4.Enable basic authentication on the WinRM Service:
Windows Remote Management
(WinRM) needs to allow basic authentication (It is enabled by default) to create ExoPSSession. If basic authentication is disabled, you’ll get below error when you try to connect:

Note: The Basic authentication header is required to transport the session’s OAuth token, since the client-side WinRM implementation has no support for OAuth.
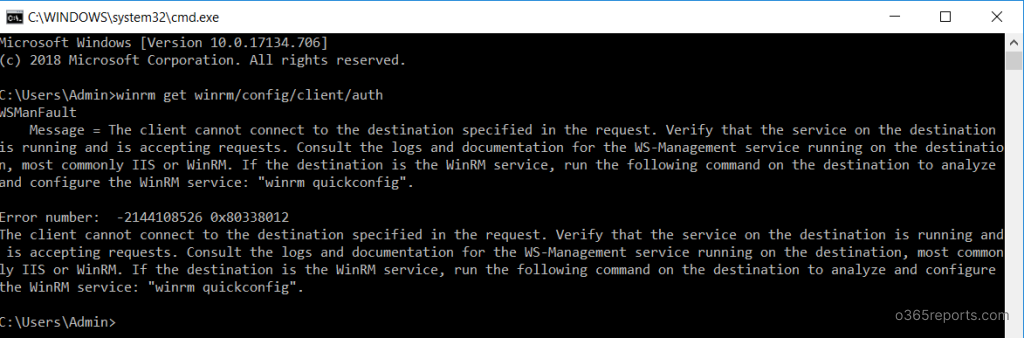
To check whether the basic authentication is enabled, run below command in command prompt.
|
1 |
winrm get winrm/config/client/auth |
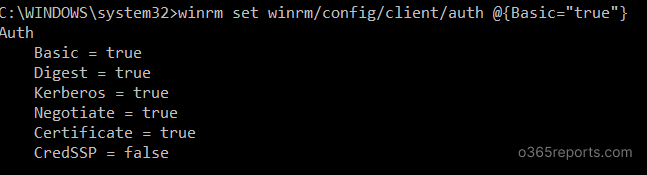
If Basic= true not set, you need to run below command to enable basic authentication.
|
1 |
winrm set winrm/config/client/auth @{Basic="true"} |
After executing above command, the output looks similar to below screenshot.
Note: You can also use EXO V2 module to connect Exchange Online PowerShell with modern auth. Even though the EXO V2 module uses modern auth, it still needs WinRM basic auth to transport modern auth tokens. To improve the security, Microsoft recently introduced EXO V2 Preview module 2.0.6. It allows admin to use EXO V2 module without WinRM basic authentication.
5.Start WinRM service:
In order to enable basic authentication in WinRM, WinRM service must be in running state. Otherwise, you will get following error: The client cannot connect to the destination specified in the request. Verify that the service on the destination is running and is accepting requests. Consult the logs and documentation for the WS-Management service running on the destination, most commonly IIS or WinRM.
To start WinRM service, launch command prompt as administrator and run following command
|
1 |
Winrm quickconfig |
When the cmd prompt displays Make these changes [y/n]?, type y.
If configuration is successful, WinRM service started output will be displayed.
6.Where do I find the Exchange Online Remote PowerShell Module?
You won’t be able to find the Exchange Online Remote PowerShell module, using the Get-Module cmdlet. When you install ClickOnce application, it will be installed in the below directory.
%UserProfile%\AppData\Local\Apps\2.0
You can use the desktop shortcut, to launch the Exchange Online Remote PowerShell module.
7.Disconnect the remote PowerShell session:
Make sure to disconnect the remote PowerShell session when you’re finished. Else you ended up using all remote PowerShell sessions available to you and you will get the following error.
New-ExoPSSession : Processing data from remote server outlook.office365. com failed with the following error message: [AuthZRequestId=068a9813-8420-43f0-9f20-692228962287] [FailureCategory=AuthZ-AuthorizationException] Fail to create a runspace because you have exceeded the maximum number of connections allowed: 10
To disconnect all PowerShell session in the current window, you can use below command.
|
1 |
Get-PSSession | Remove-PSSession |
Connect to Exchange Online PowerShell without Basic Authentication:
All we know that Microsoft is going to deprecate Basic Authentication in Exchange Online in Oct 2022. So, how will you connect to Exchange Online PowerShell without basic authentication?
You can install the new ExchangeOnlineManagement module. I have written a dedicated blog on how to install and use ExchangeOnlineManagement to connect to Exchange Online PowerShell with Modern Authentication. You can refer to the blog for more details.
Automate Exchange Online PowerShell Login with MFA – Unattended Script:
With the introduction of security defaults and MFA enforcement, most scripts are broken in scheduled tasks or automation. As a workaround, most admins used conditional access to exclude MFA for the service accounts. It makes the organization less secure. To fix this problem, Microsoft introduced a new Public preview of the EXO V2 module (Version 2.0.3 or later) to connect Exchange Online with an unattended script.
Challenges in Generating Reports using PowerShell:
Most admins use Exchange Online PowerShell for generating Exchange online reports and auditing Office 365 environment. But I have seen a lot of challenges when using PowerShell. for example,
- If you do not retrieve the audit data properly, it will end up with data loss which spoils the purpose.
- If you are a newbie, you might lose in search of finding the right cmdlet.
- PowerShell requires a lot of effort to generate the needed reports, which is time-consuming.
- Automating report generation is difficult when you are using MFA.
If you are searching for alternative ways to generate Exchange reports like
- Mailbox information reports
- Inactive mailbox reports based on last logon time, last activity time, last mail read, last mail sent time
- Mailbox usage reports
- Mailbox permission reports
- Mailbox forwarding reports
- Mailbox settings reports
- Mailbox on-hold reports
- Email activity reports
- Spam and malware reports
- Email traffic and statistics reports
- Mailbox auditing reports
- Non-owner mailbox access reports
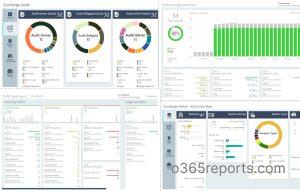
You can take a look at AdminDroid Exchange Online reporting and auditing tool. This tool offers 170+ Exchange Online statistics and auditing reports along with visually appealing dashboards.
Additionally, AdminDroid offers 1500+ pre-built reports on various Office 365 services like Azure AD, Exchange Online, SharePoint Online, Microsoft Teams, OneDrive for Business, Skype for Business, Yammer, General Office 365 reports, and security reports.
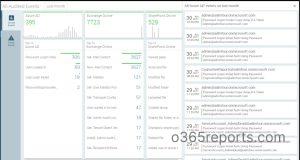
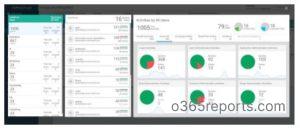

Besides, AdminDroid provides over 100+ reports and a handful of dashboards completely for free. It includes reports on Users, Licenses, Groups, Group Members, Devices, Login Activities, Password Changes, License Changes, and more. The free edition doesn’t have any restrictions in reporting functionalities such as customization, scheduling, and exporting. For your Azure AD reporting and auditing needs, you can download Free Office 365 reporting tool by AdminDroid and see how it helps for you.
I hope that the post above was helpful! Do you have any different approach to use MFA in scripts? Share with other Admins and us in the comments.
")


